

Outdoor Projects ›
Bedrooms ›
Kitchen ›
Living Room ›
Browse by Room
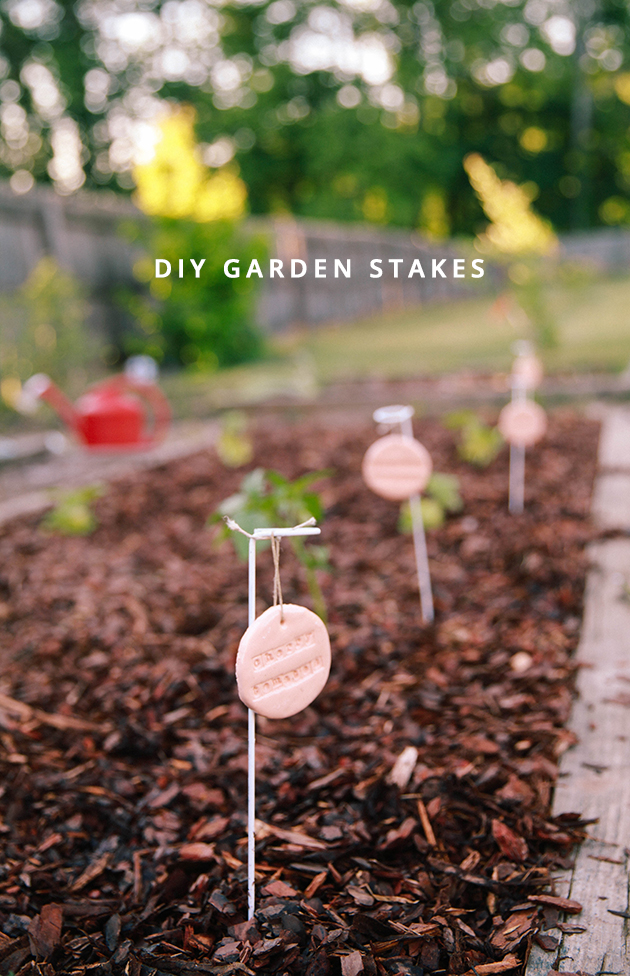
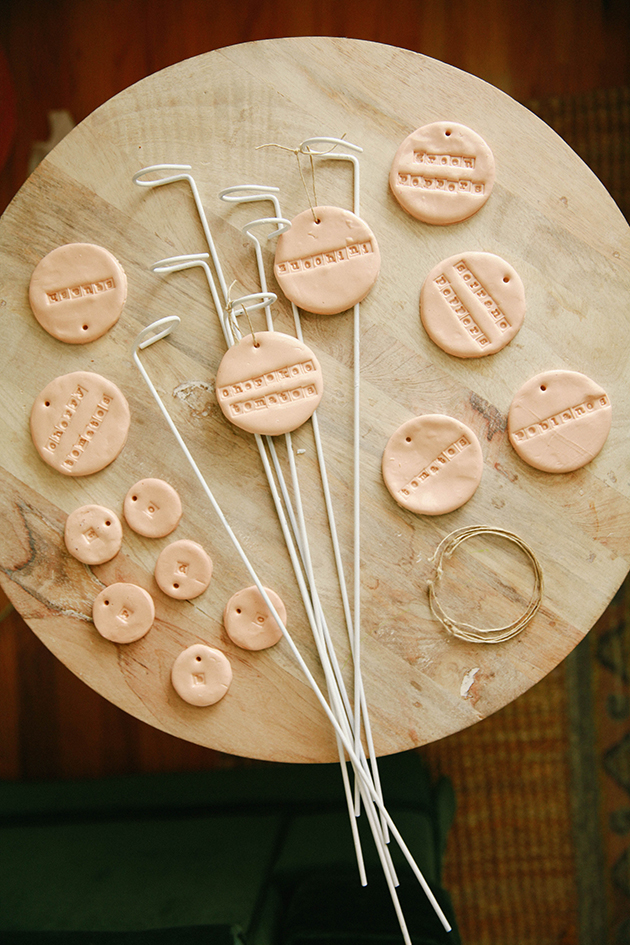
Since we bought our first home last year, Gabe (the green thumb in this relationship) almost immediately put shovel to clay dirt and planted all kinds of fruit trees. This year, we took advantage of the old garden beds that came with the house and planted even more vegetables and fruits to give our kids […]
Garden update + DIY Garden Stakes
Current Projects ›
Other Updates ›
DIY Ideas ›
Renovation Updates
About Us
Shop
Design Guides
Family
Home diys
Renovations
Latest Projects ›
Popular Projects ›
How-tos ›
Home DIYs

Garden update + DIY Garden Stakes
About Us
Shop
Design Guides
Family
Home diys
Renovations
Outdoor Projects ›
Bedrooms ›
Kitchen ›
Living Room ›
Browse by Room

Garden update + DIY Garden Stakes

Organizational ideas ›
Activities & games ›
Family favorites ›
Family Updates ›
Family Resources


Garden update + DIY Garden Stakes
Garden update + DIY Garden Stakes
About Us
Shop
Design Guides
Family
Home diys
Renovations
Snacks & Desserts ›
Family Dinners ›
Hearty Lunches ›
Breakfast & Brunch ›
Recipes

LAtest guides ›
moodboards ›
resources ›
Design Resources
All Design topics ›

Garden update + DIY Garden Stakes
Garden update + DIY Garden Stakes
About Us
Shop
Design Guides
Family
Home diys
Renovations

Our Home Shop ›
favorite Buys ›
Gift Guides ›
Shop with IHOD
Trending Now ›


Garden update + DIY Garden Stakes
Garden update + DIY Garden Stakes
About Us
Shop
Design Guides
Family
Home diys
Renovations


These are so adorable! If my Dad ever has a garden (it’s his life goal to), I’ll definitely make these as a celebration to for him!
Charmaine Ng | Architecture & Lifestyle Blog
http://charmainenyw.com
What a fun DIY! We’re actually starting our first family garden this year – berries, tomatoes, peppers, cucumbers, and beans. Wish us luck – I usually kill every plant i go near. haha
THESE ARE SO AWESOME! Such an amazing idea! We’re currently starting a little herb garden, so this is perfect!
These are so cute! We’re excited to overhaul our backyard this summer and one of the things I absolutely want is some garden space for herbs, berries, and veggies! Will have to make some of these along with the garden!
John Stokes
says:Thanks for your illustration of diy garden products update. My wife makes baskets and uses metal circle bases using custom cut metal circle on https://metalscut4u.com/custom-cut-circle. Now I would like to know how to make a groove on the circle. This would be in a shape of a cross to place glued vertical boards. These boards are dividers within the weaved basket.