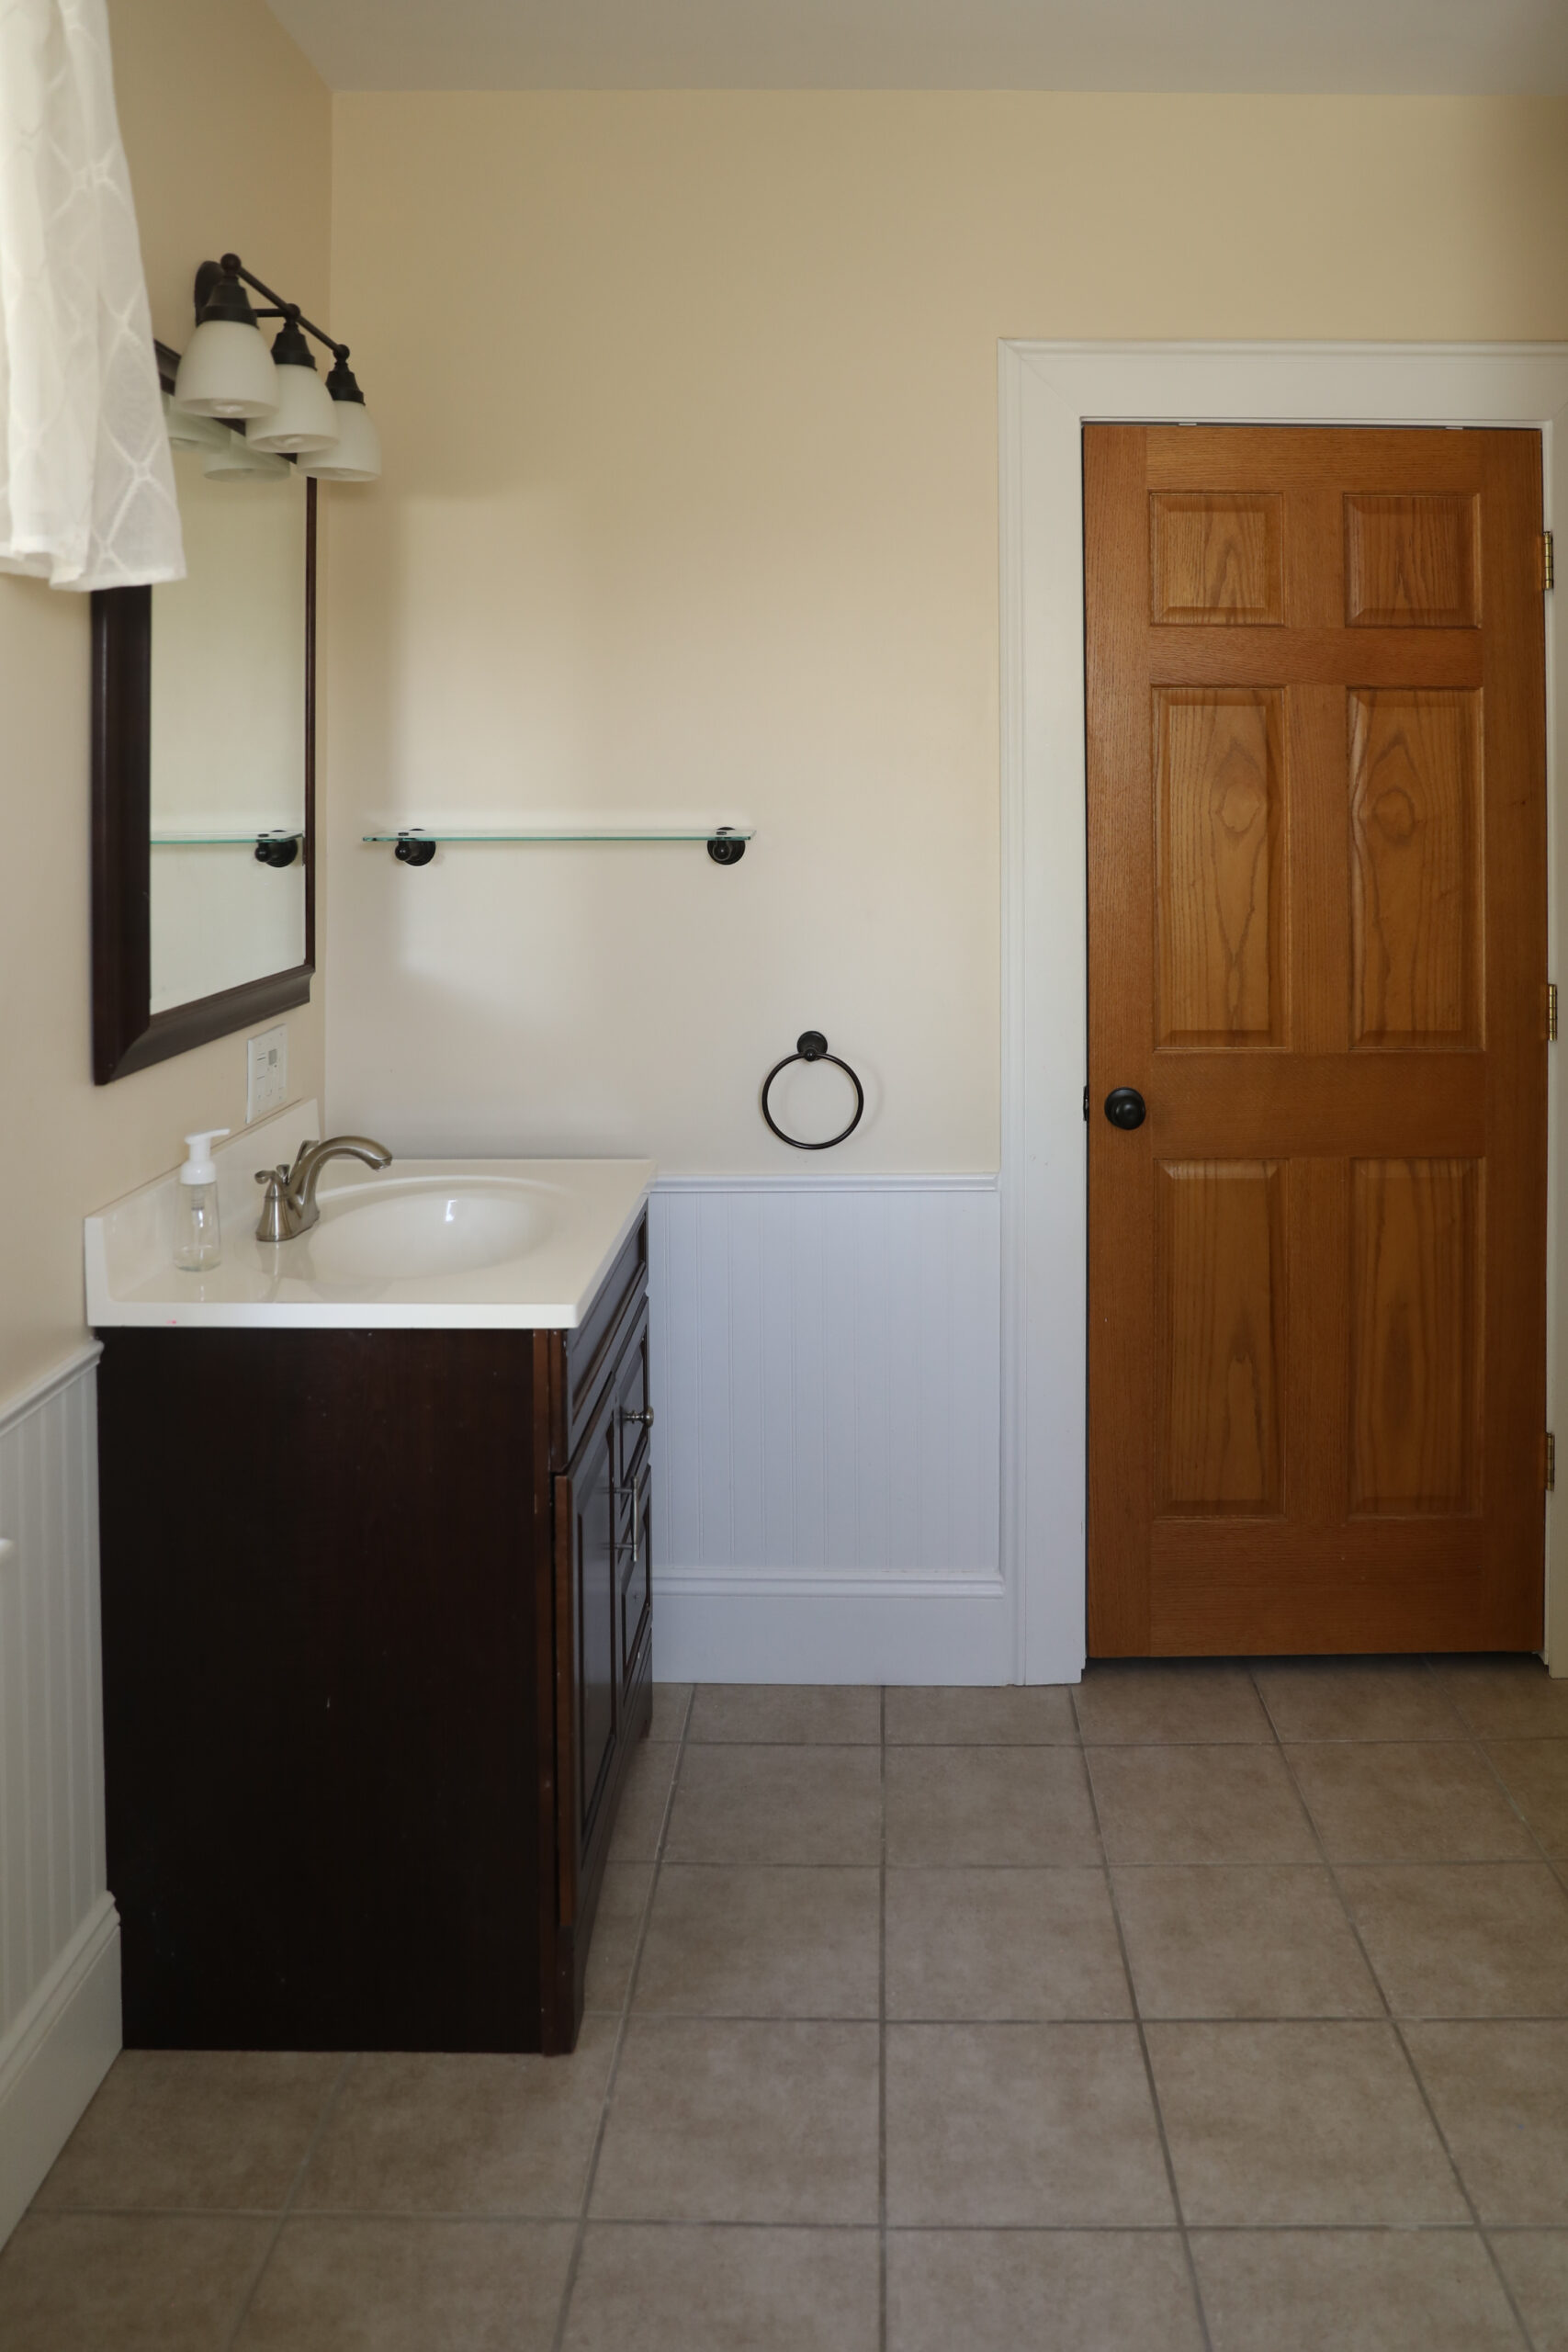
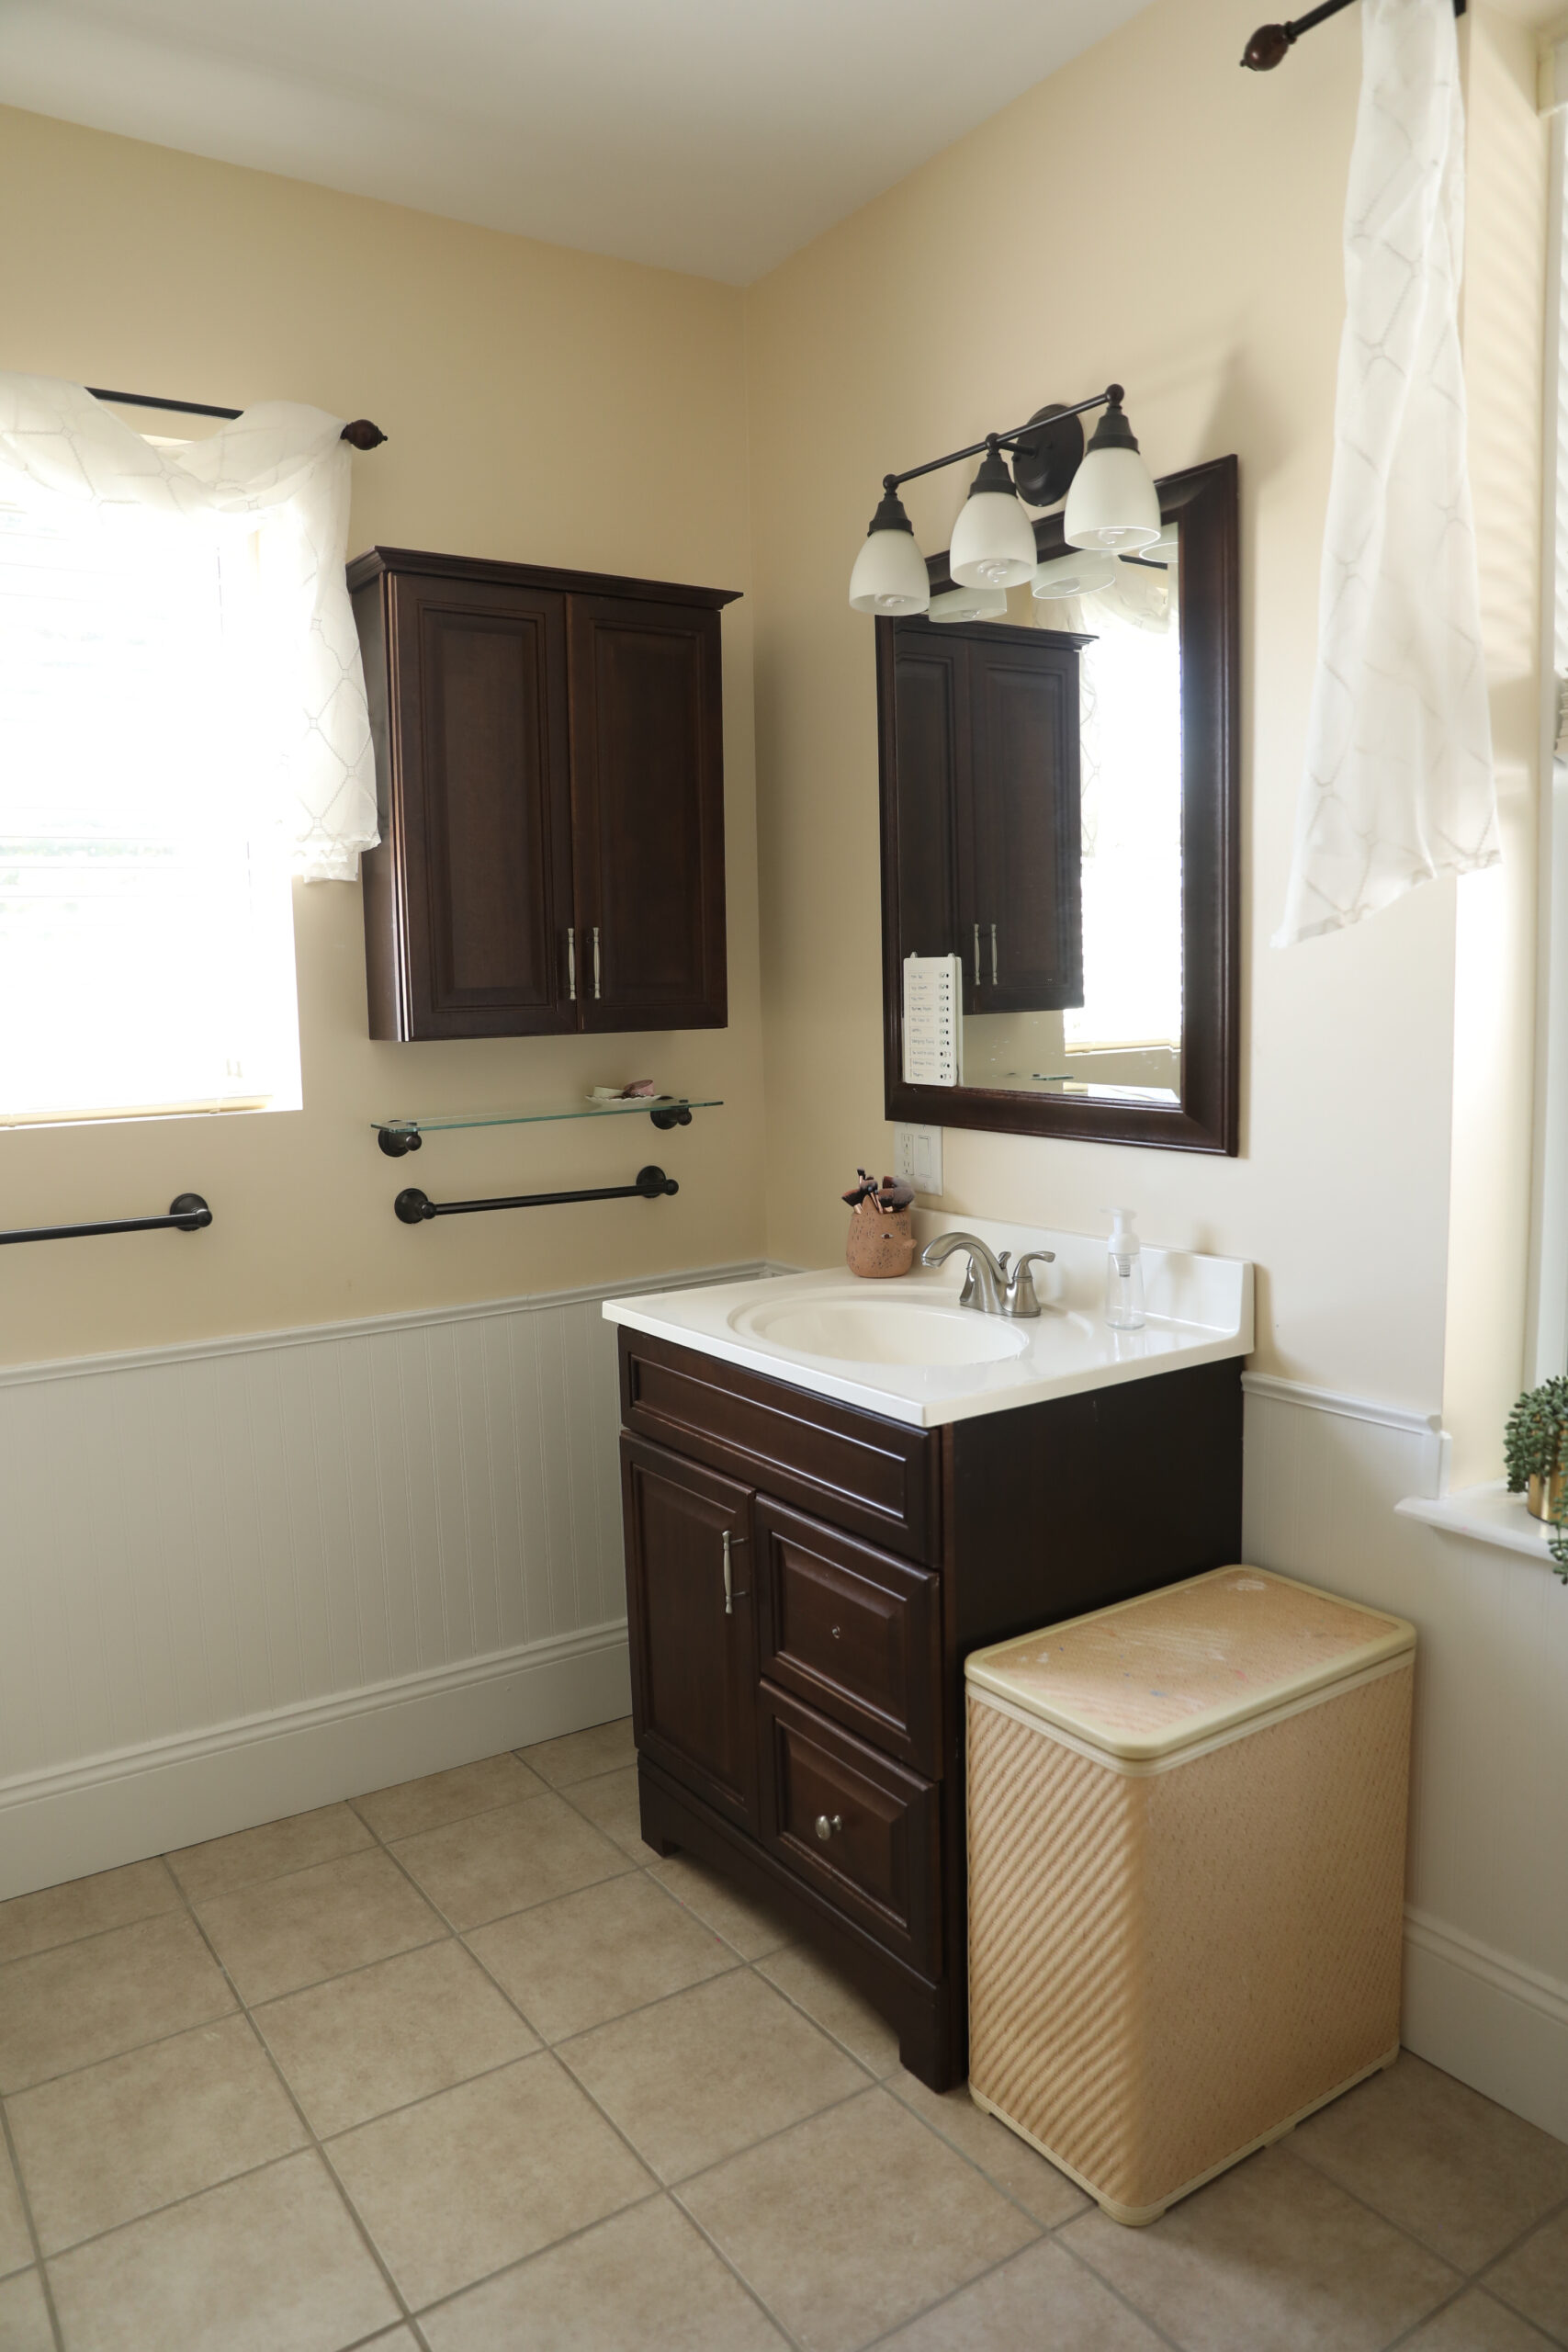
Right before the whirlwind of the holidays we did a bathroom makeover for our girls! I have been dying to try peel and stick tile, and this was the best place to do so. Down the road we will probably install new vanities and tile, but for now this was a good challenge for working with the existing space.
We had the opportunity to partner with Bath Fitter to swap and update the shower system and hardware which snowballed into a full bathroom makeover of course;) This was the moodboard I started with to help select tile and finishes.
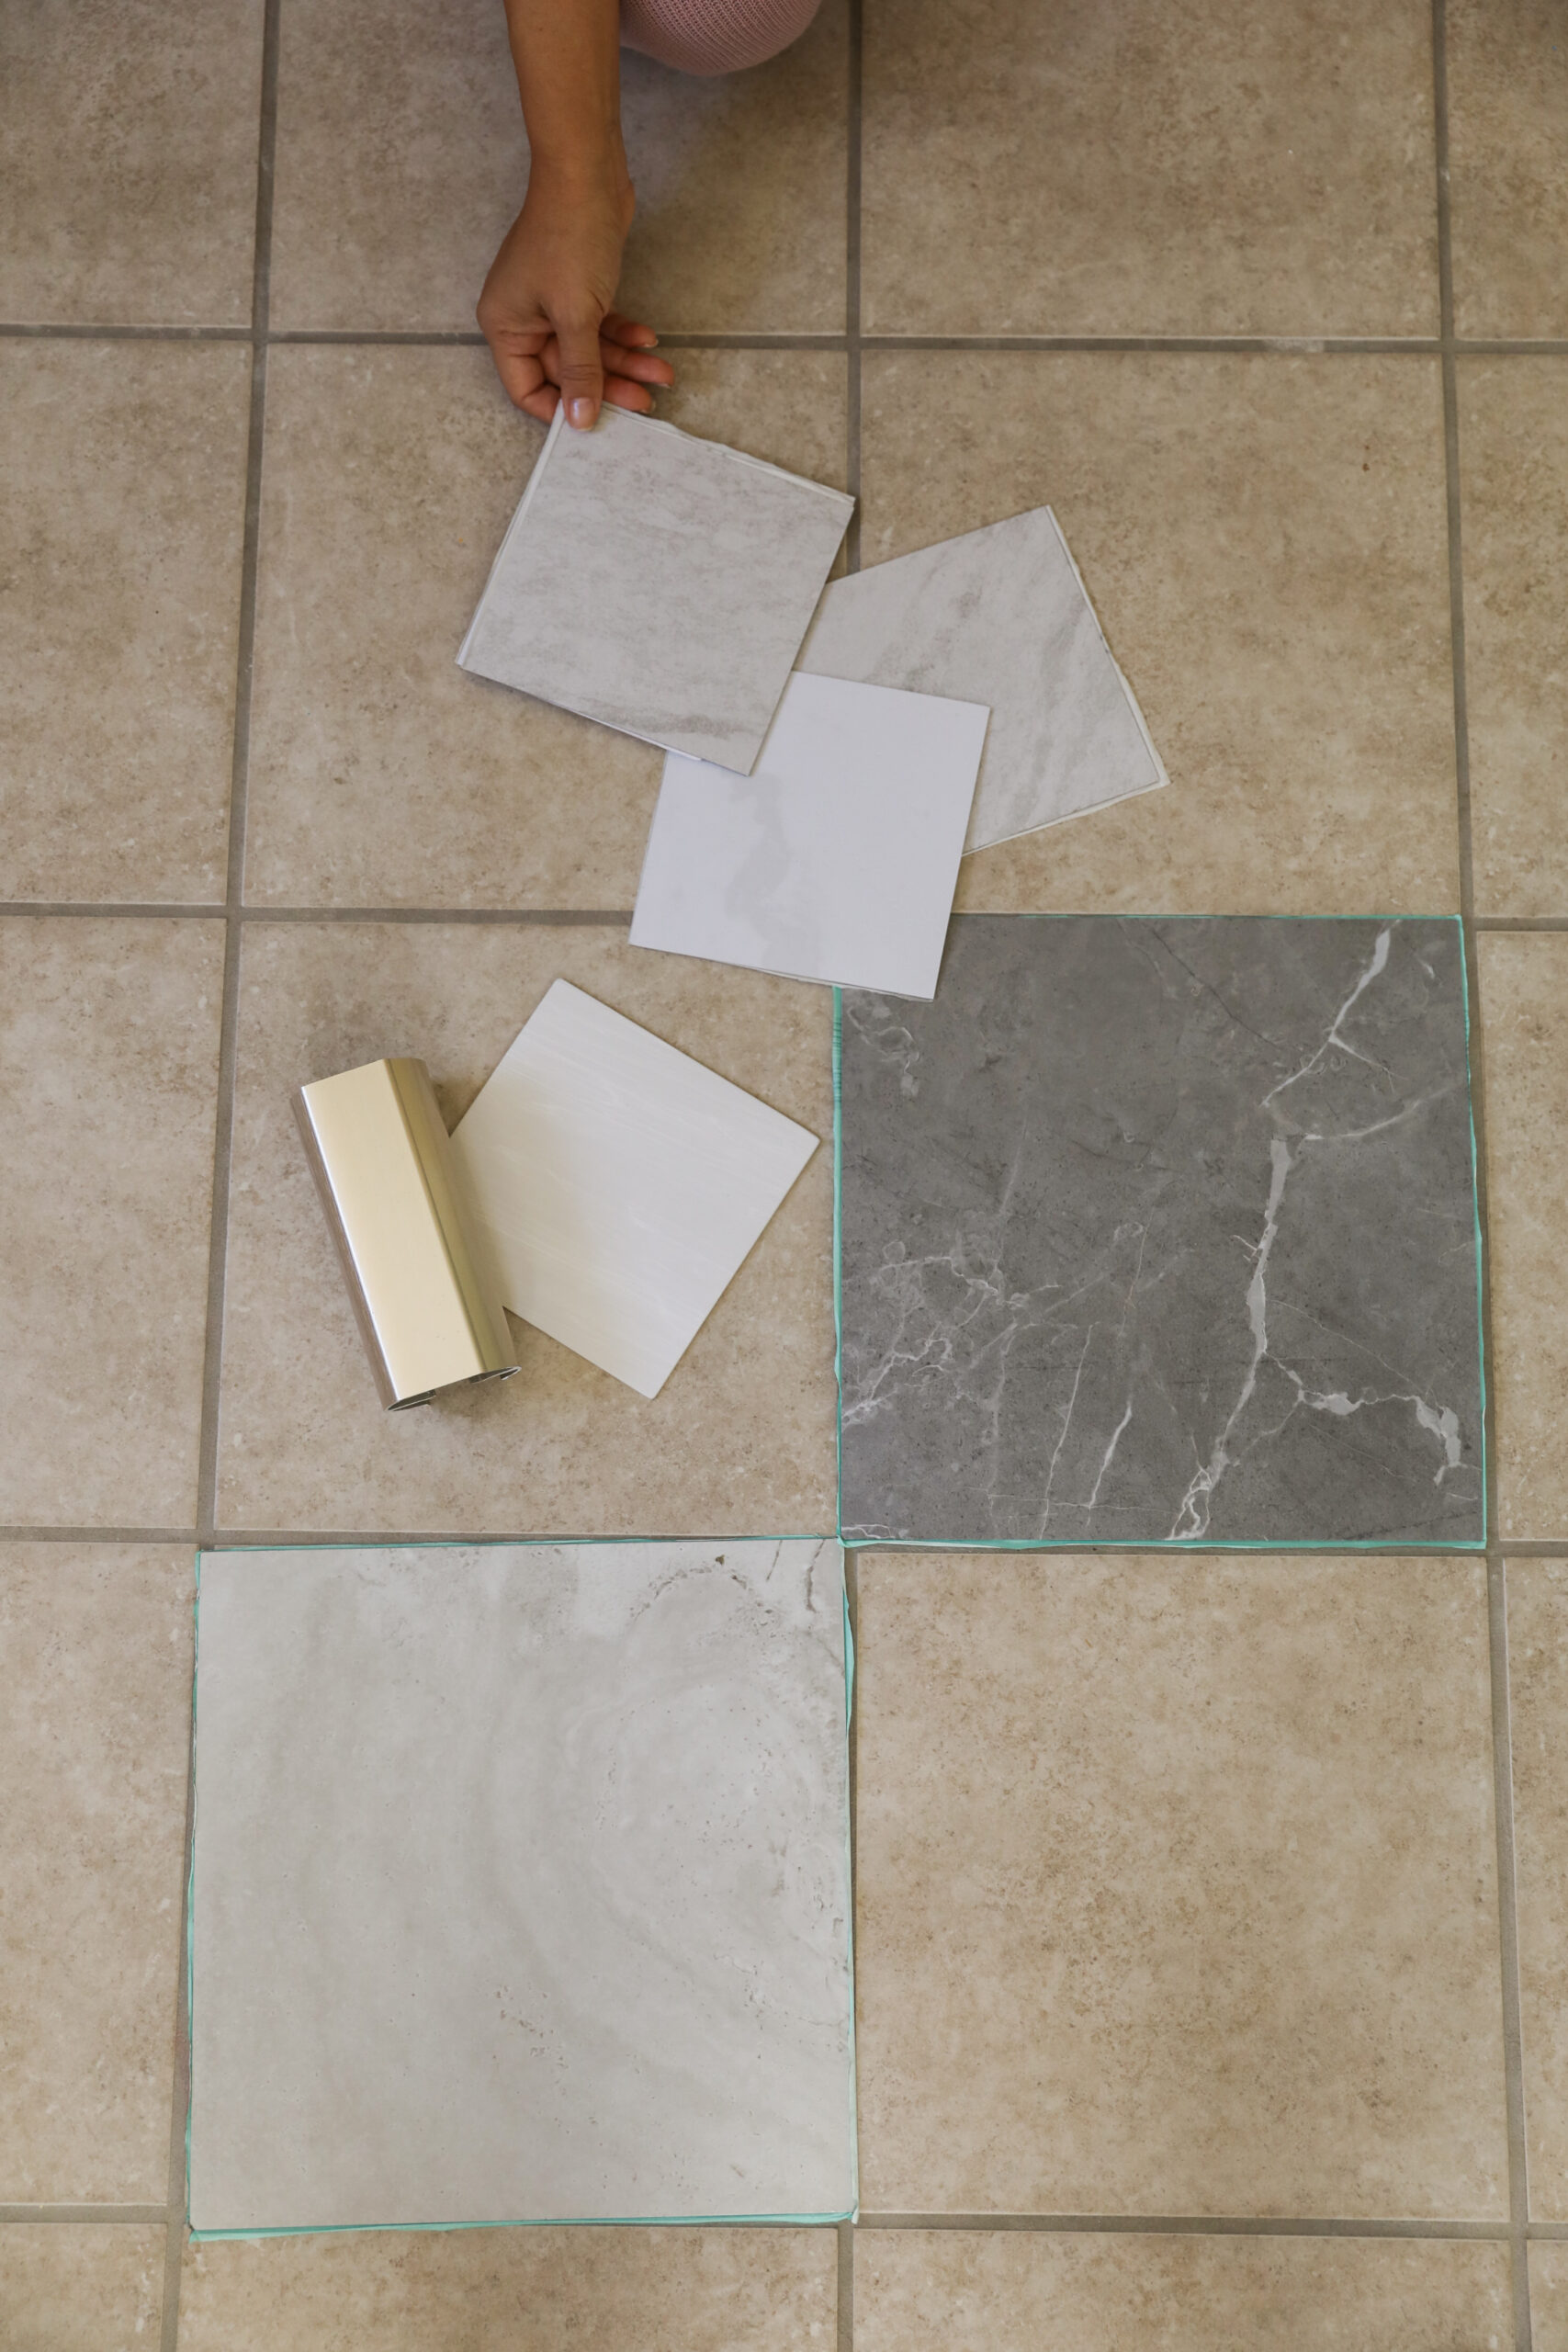
For the peel and stick tile I first ordered several samples to get an in person look at the quality and colors. I wasn’t too impressed with the quality on some of them, and others the white was too stark white with no coating to protect from wear. We ended up going to Lowe’s and finding this Alpine Stone and Gray Marble peel and stick tileversion that looked way more realistic and was super affordable at $1.25 a square.
DIY Peel and Stick Tile 1) Give your floor a good wash before installing. 2) The first row is the most important – we used a laser level to make sure we had our plumb line before installing the first row of tiles. I wanted to do a diamond pattern so we applied them in the opposite direction of the grout lines underneath. 3) Use an exacto knife + a straight edge when you need to make cuts along the walls or edges of a tub or shower. Score the front and the back for a clean break off. 4) To know where to make your cuts for the tile along the edges of your walls you will just need to do a little measuring! Measure the distance between the tile edge and the wall and mark with a pencil. Use your straight edge to draw a line where you need to make your cut. 5) Peel the backing off the tile, butt up against the tile next to it as tightly as possible and press down. 6) Use a press roller to make sure the peel and stick tile adheres nice and tight! 7) Make sure the edges of each tile are applied nice and tightly together since you don’t need any grout in between. This will prevent any water from seep ing into the cracks. We used a yardstick and level as we went to make sure things were staying straight.
This wasn’t a long term solution for the flooring, but we have been so impressed with how it looks and feels. The tiles are waterproof and should last a long time. The only downside is that you can feel some of the unevenness of the tiles underneath when walking on the floor since they are thinner tiles.
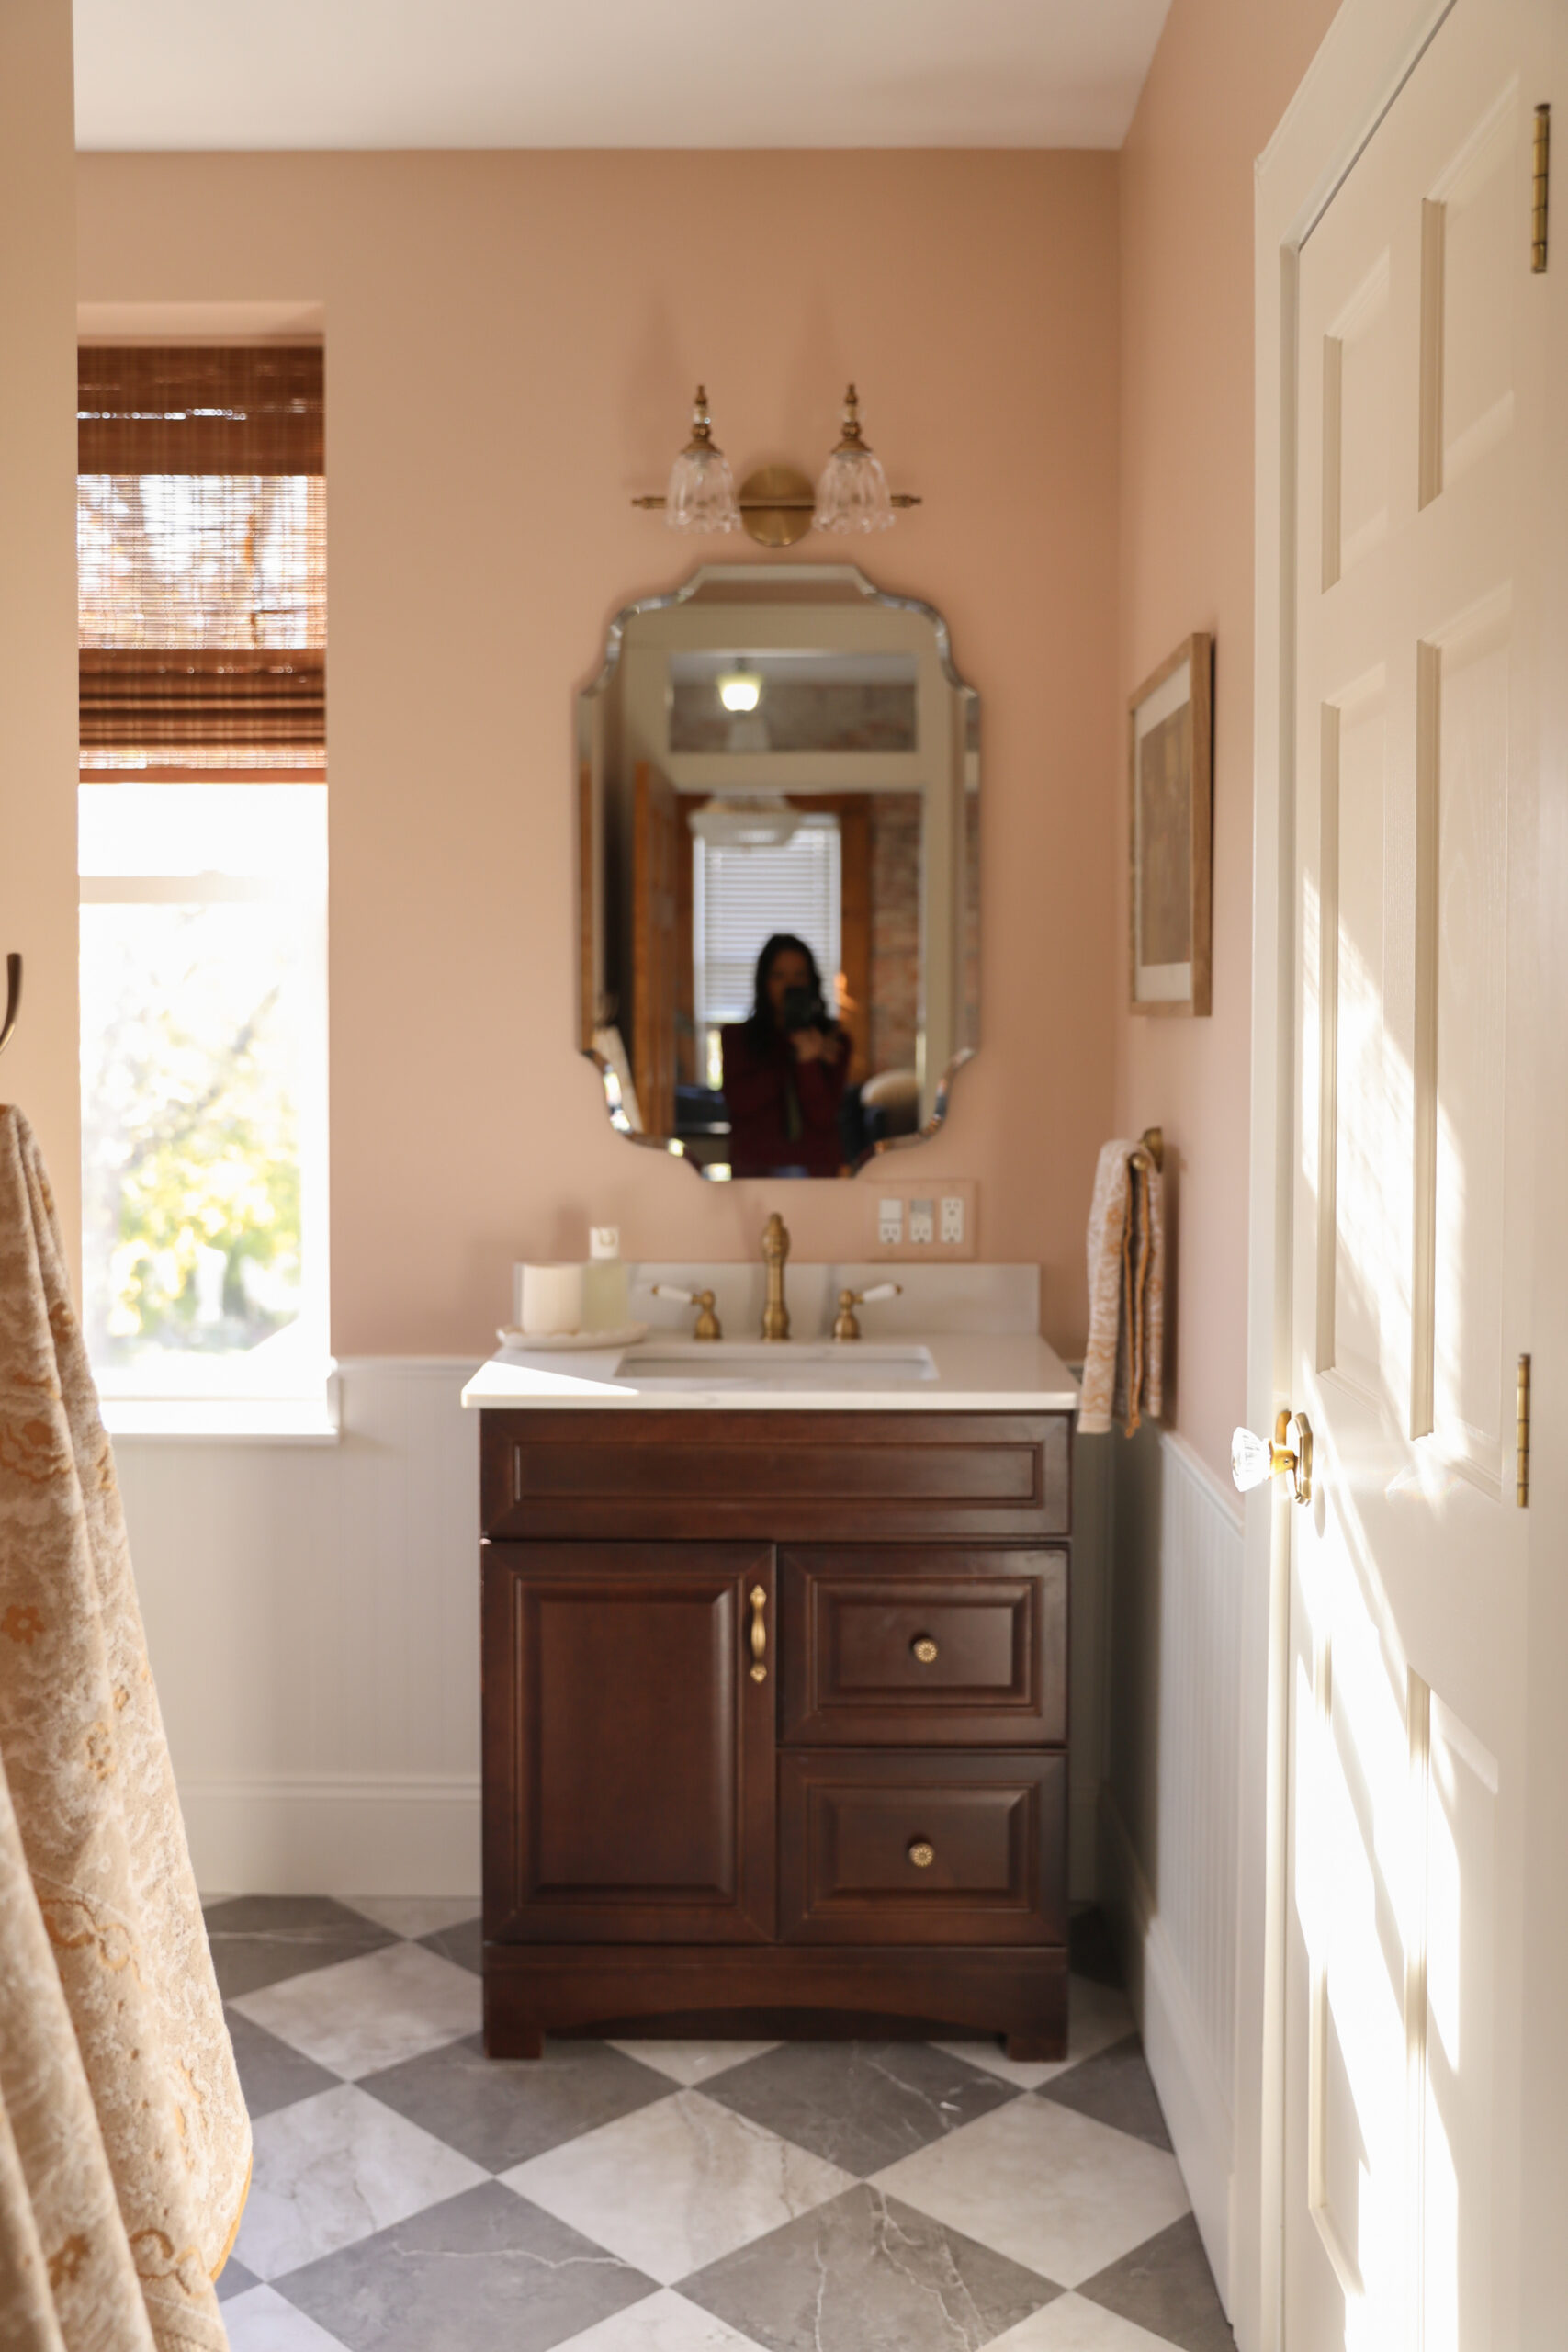
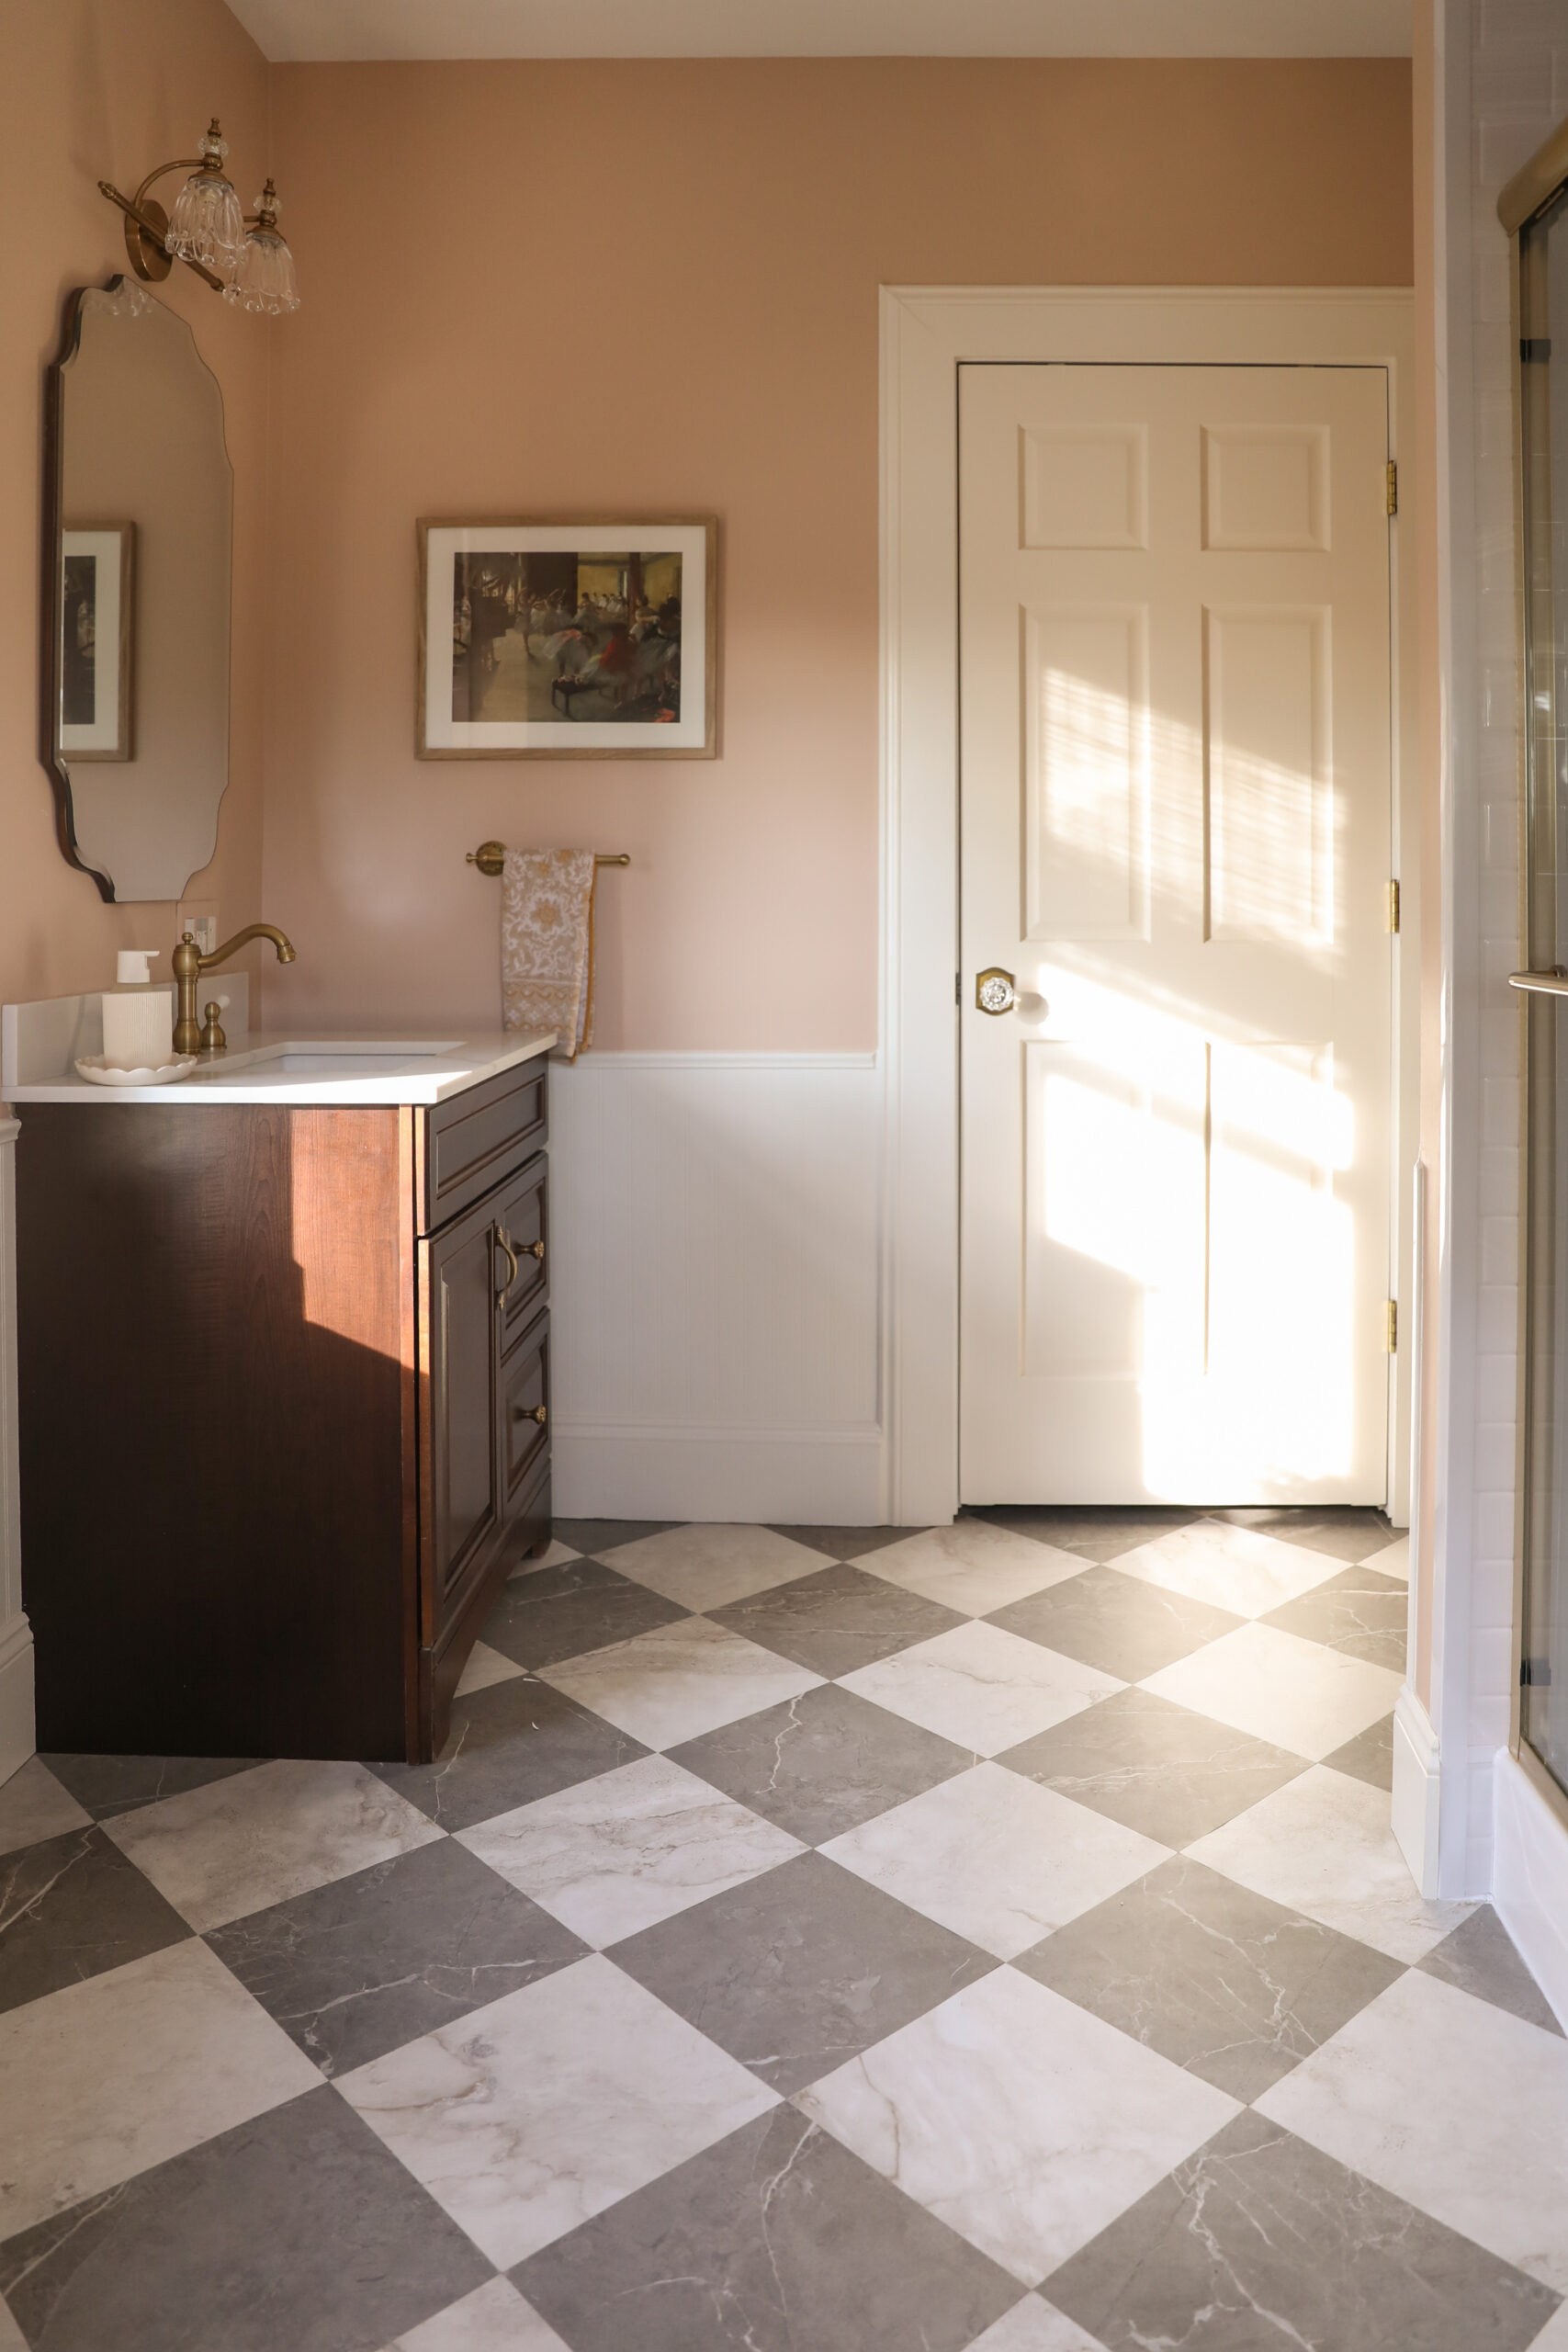
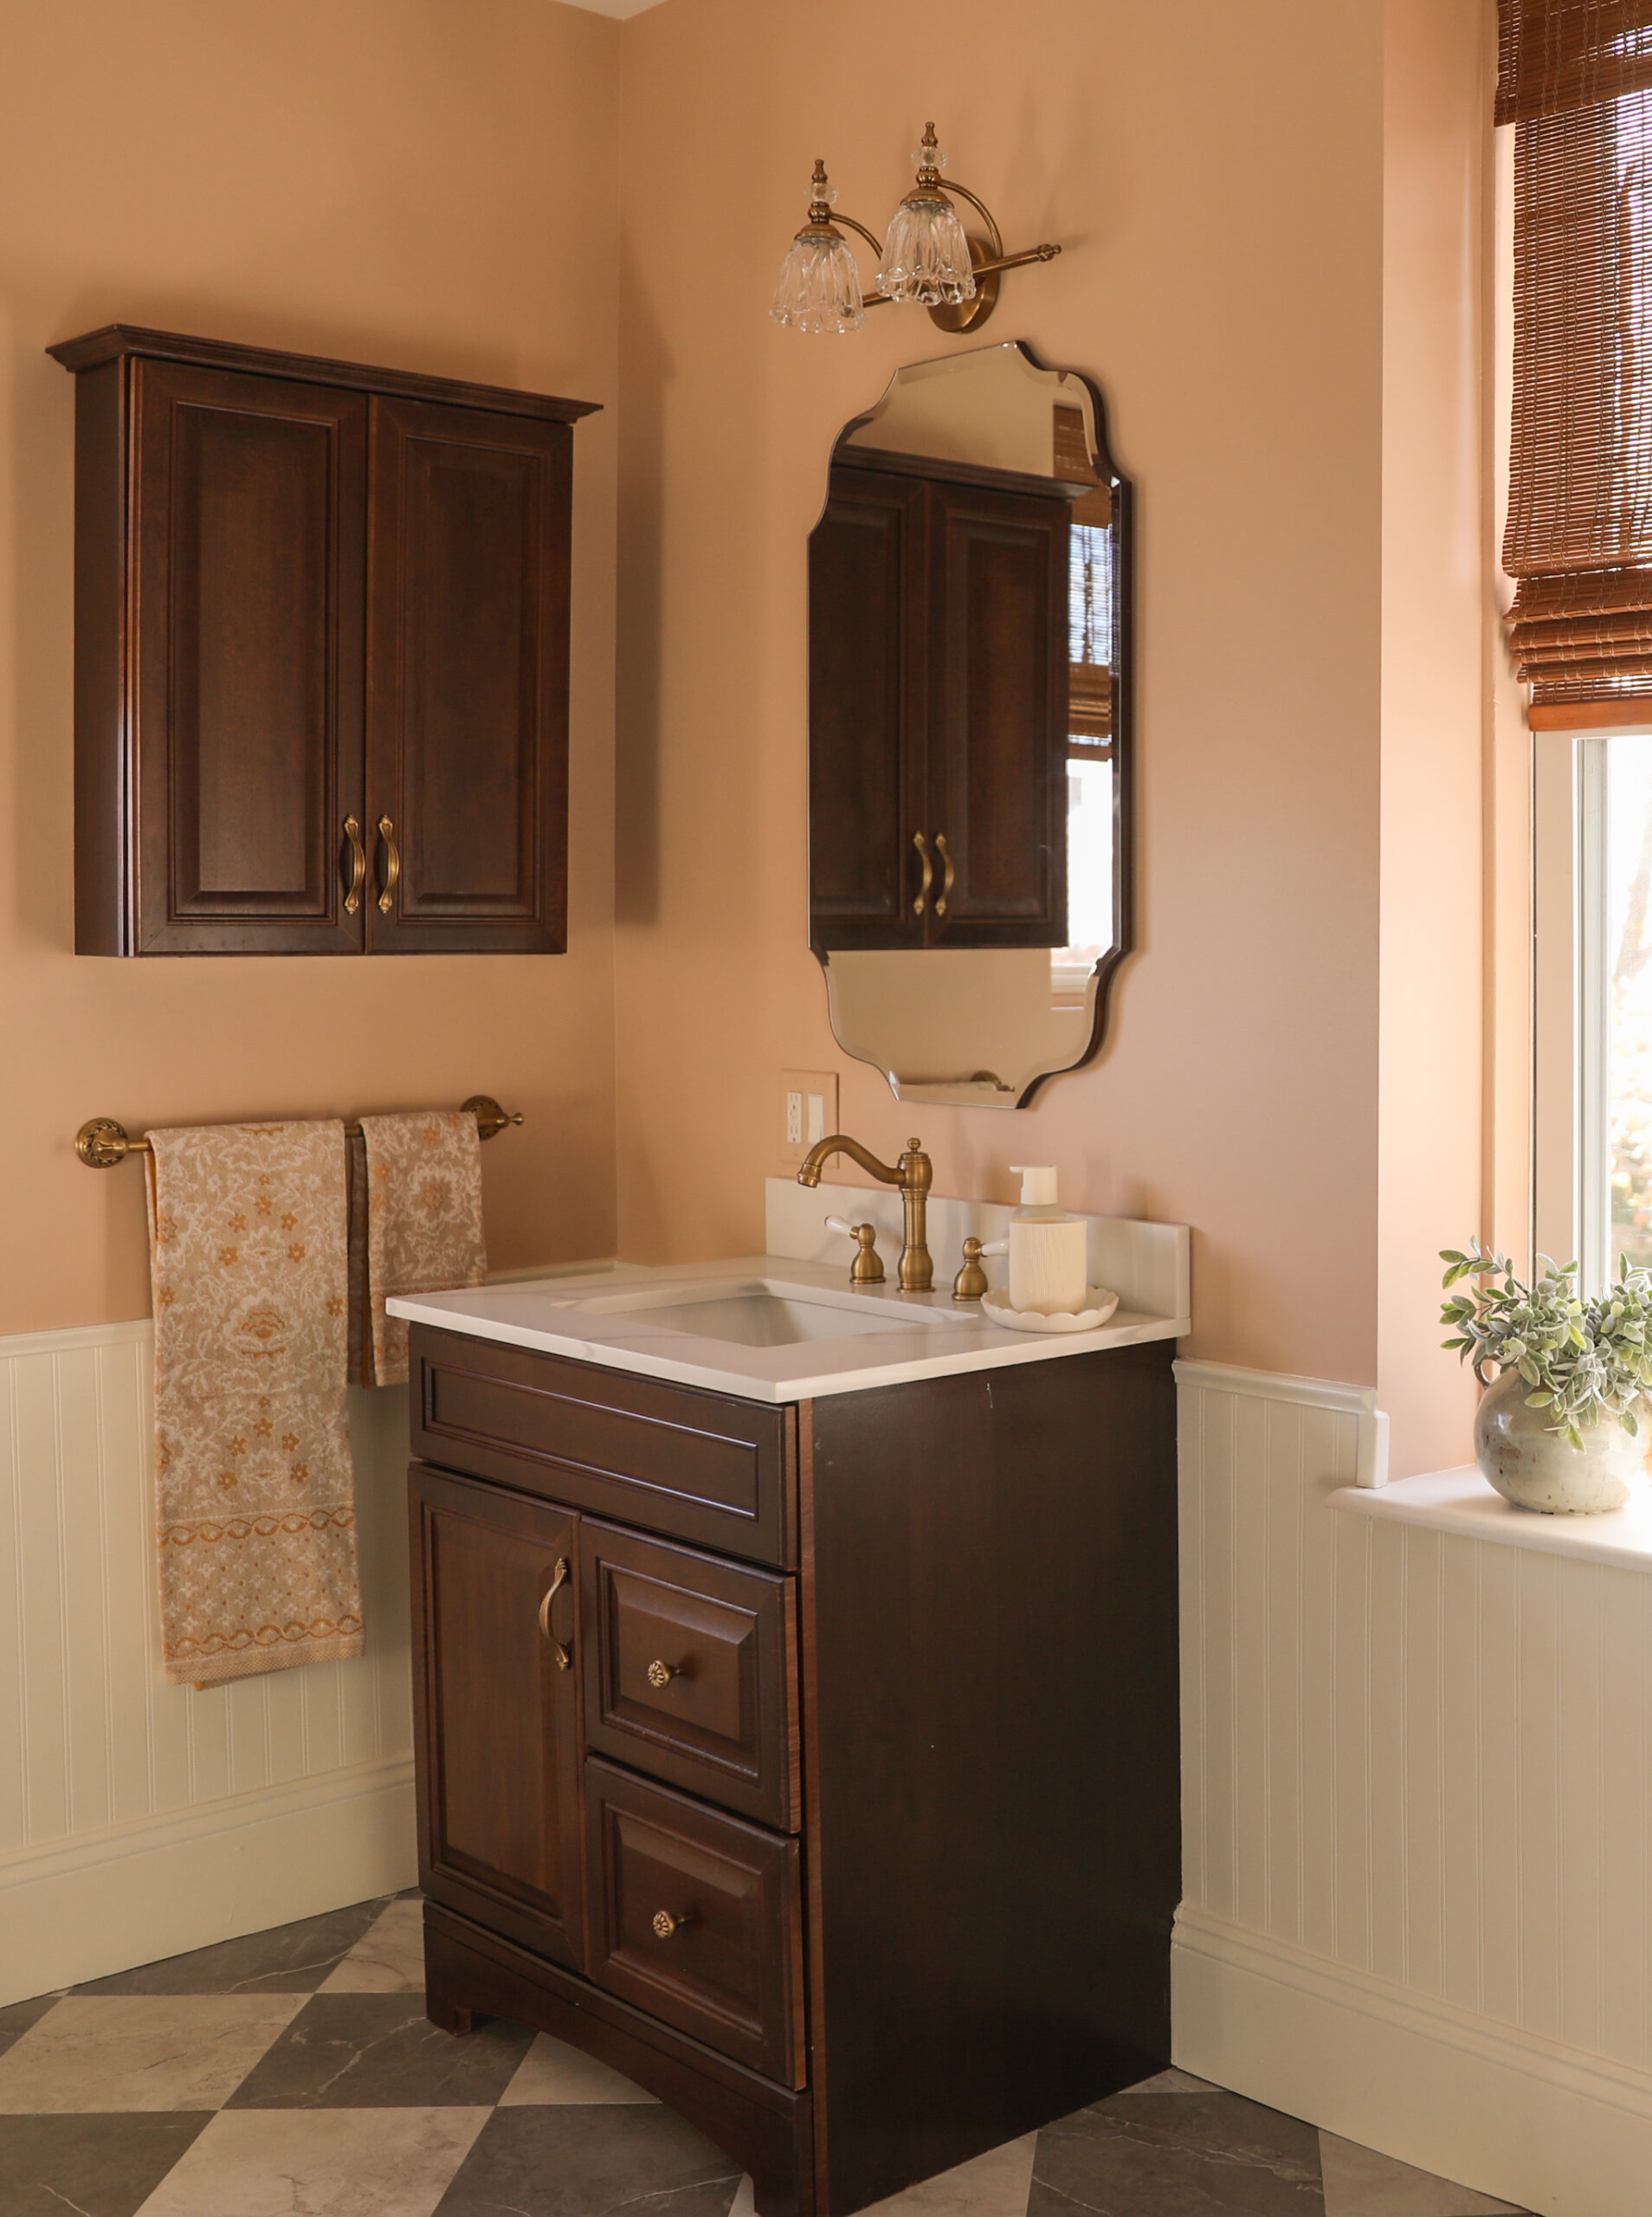
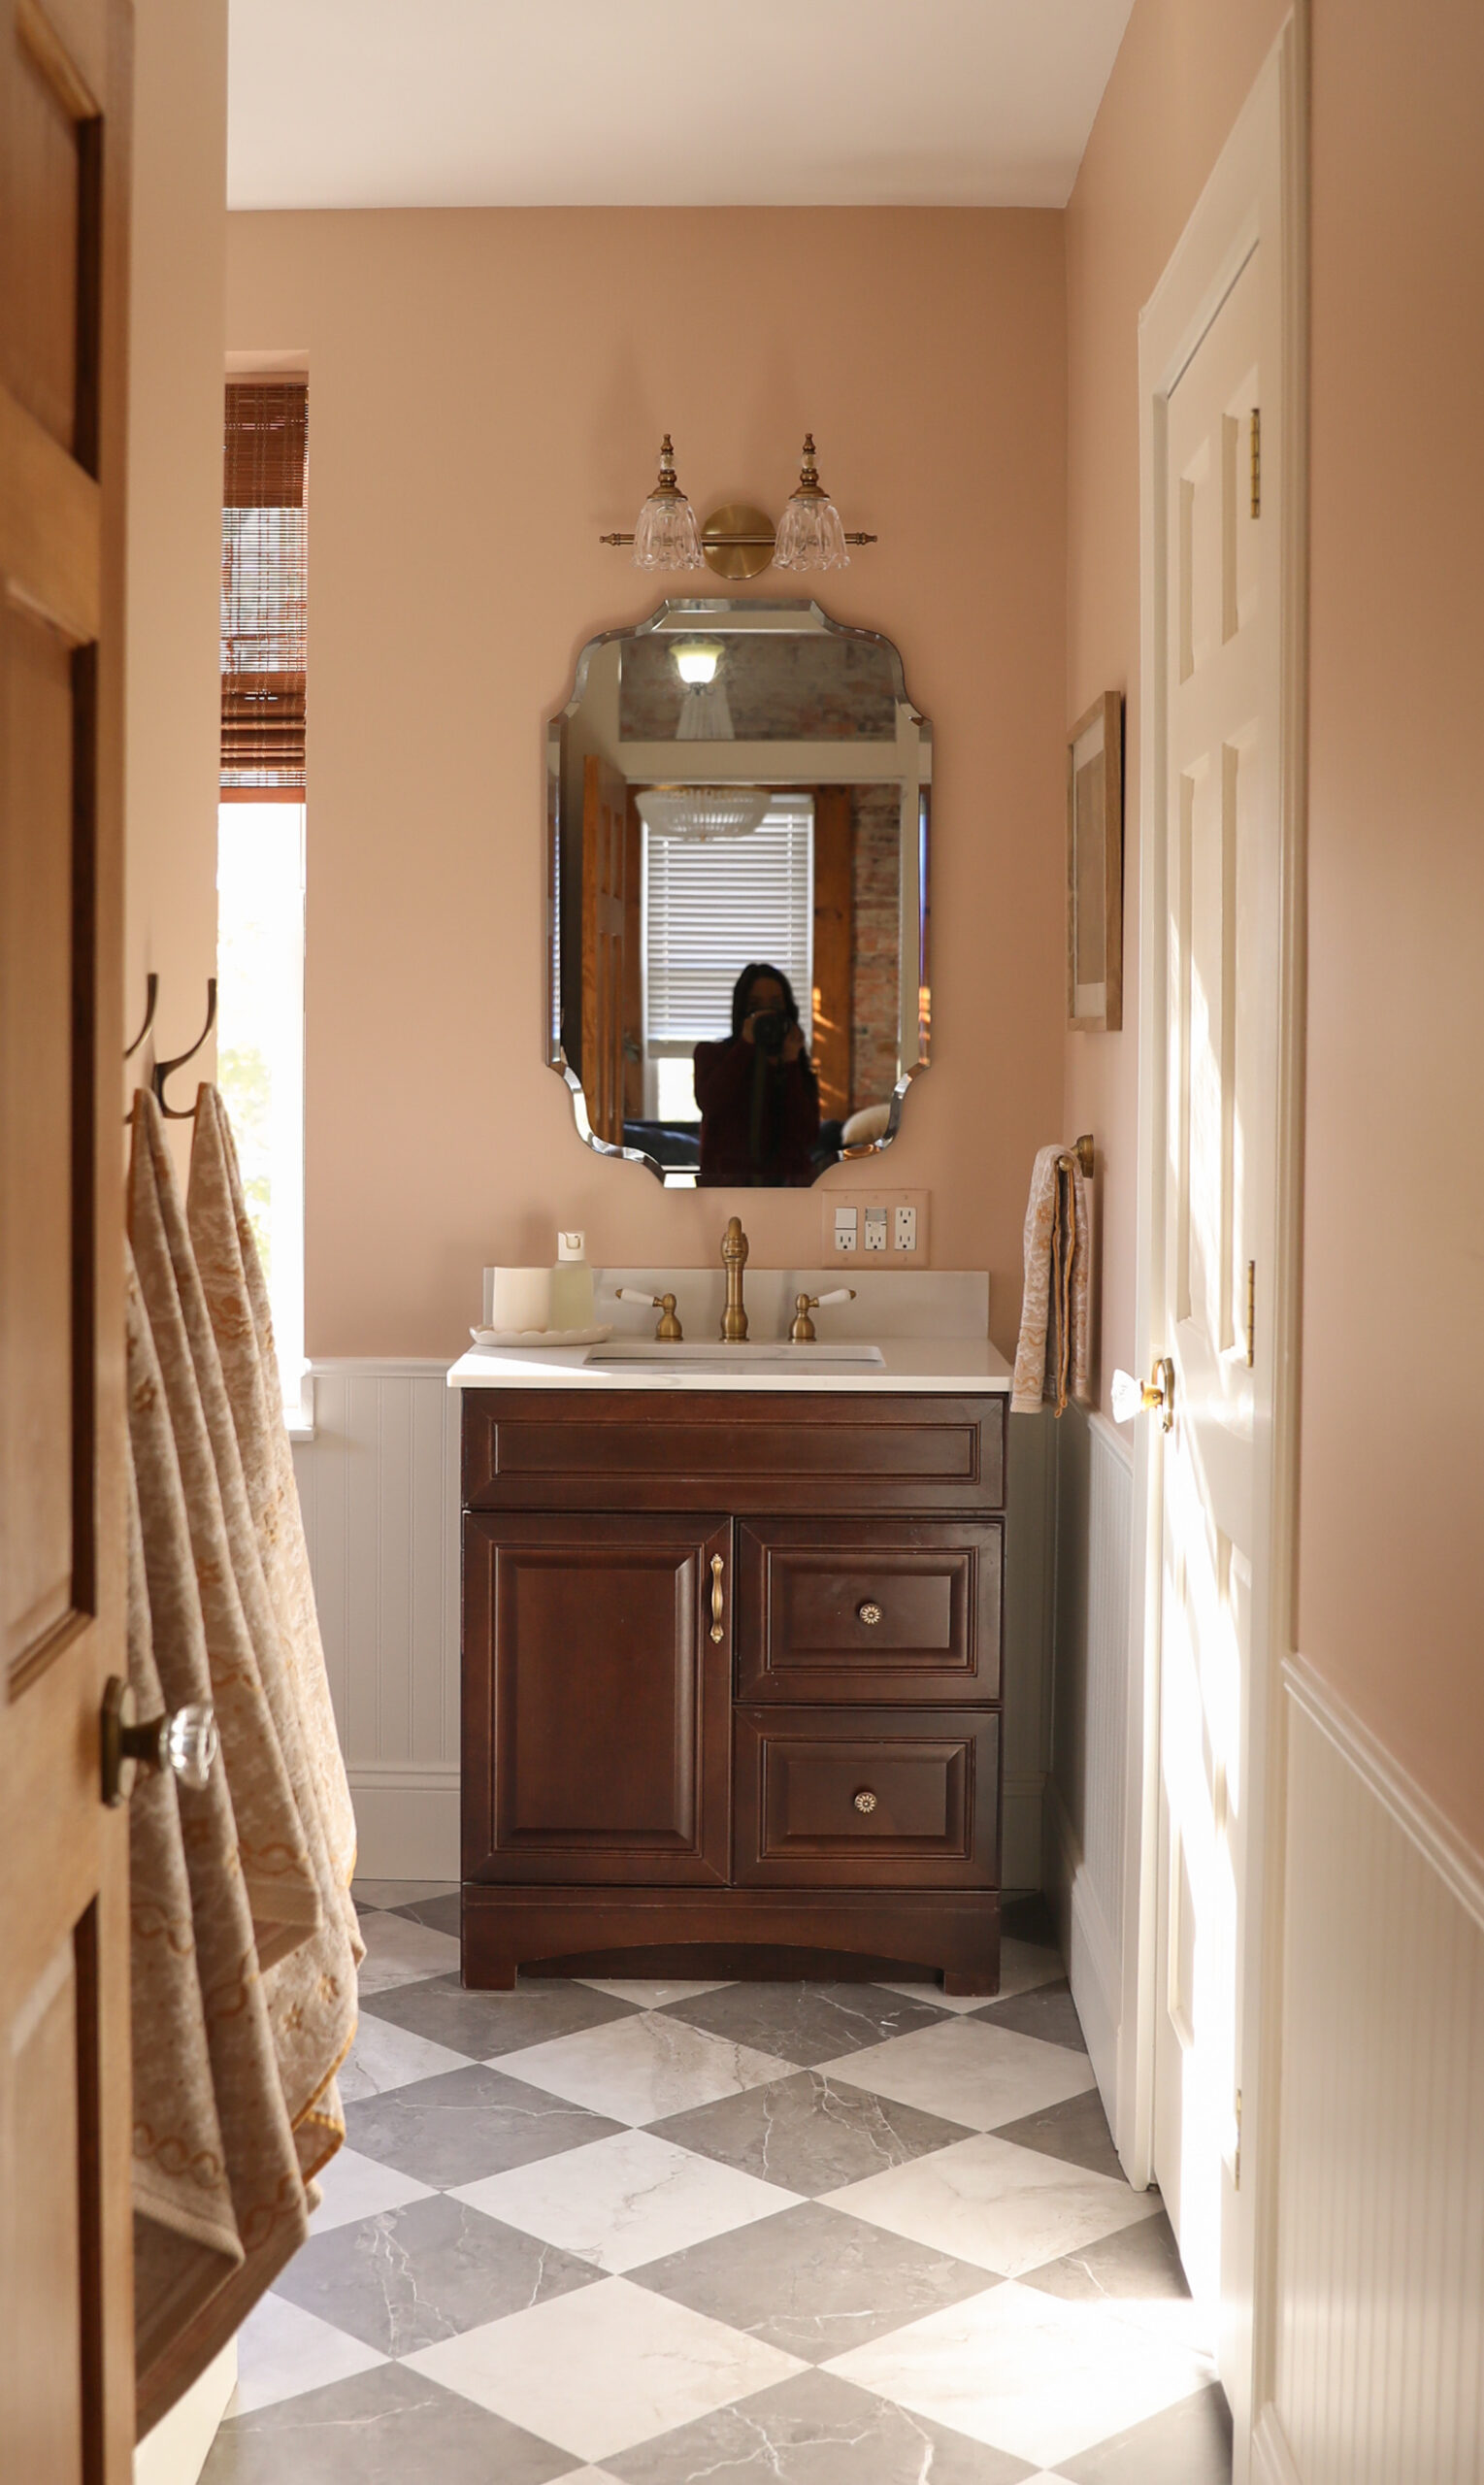
My girls voted for a pink bathroom, and after testing a few samples I really loved Setting Plaster by Farrow and Ball. It wasn’t an overwhelming shade of pink, but more of a warm neutral pink tone. I have their paint deck so I like to use those for reference before ordering samples. Farrow & Ball is on the pricey side of paint, but I always fall for their perfect colors that are almost impossible to color match here in the states due to their color formulation process. I am always willing to pay a little more to nail the color!
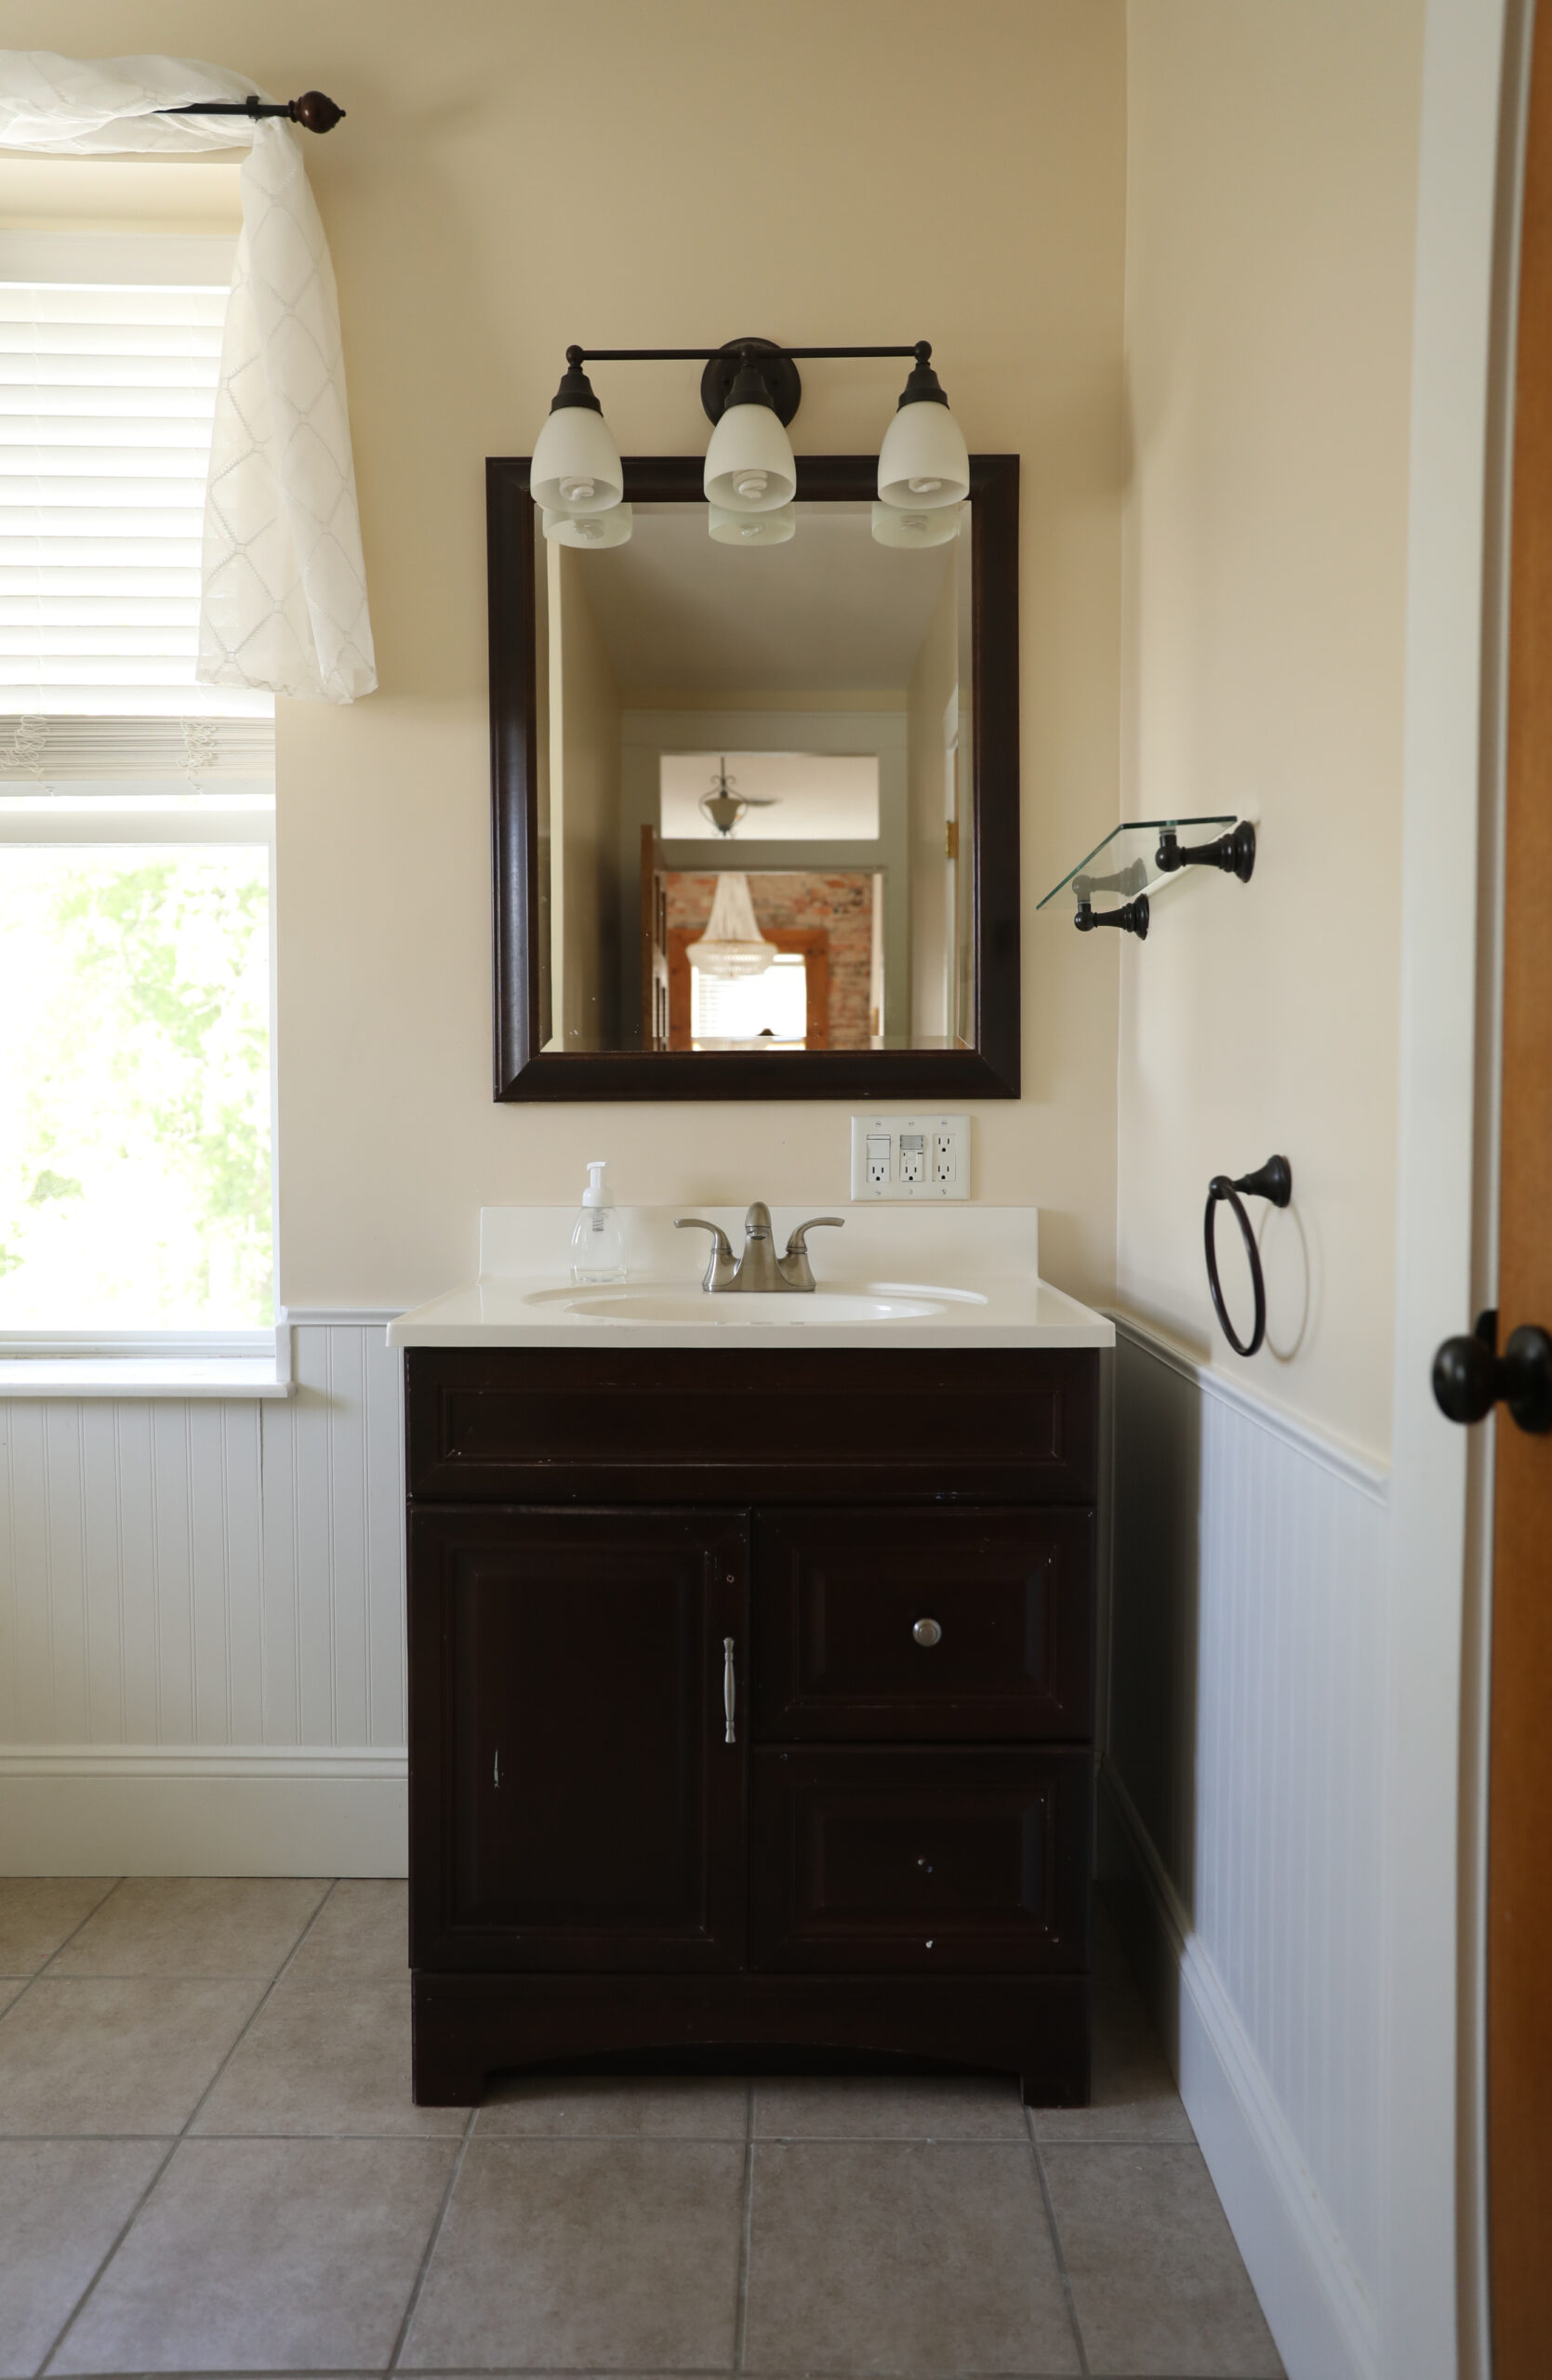
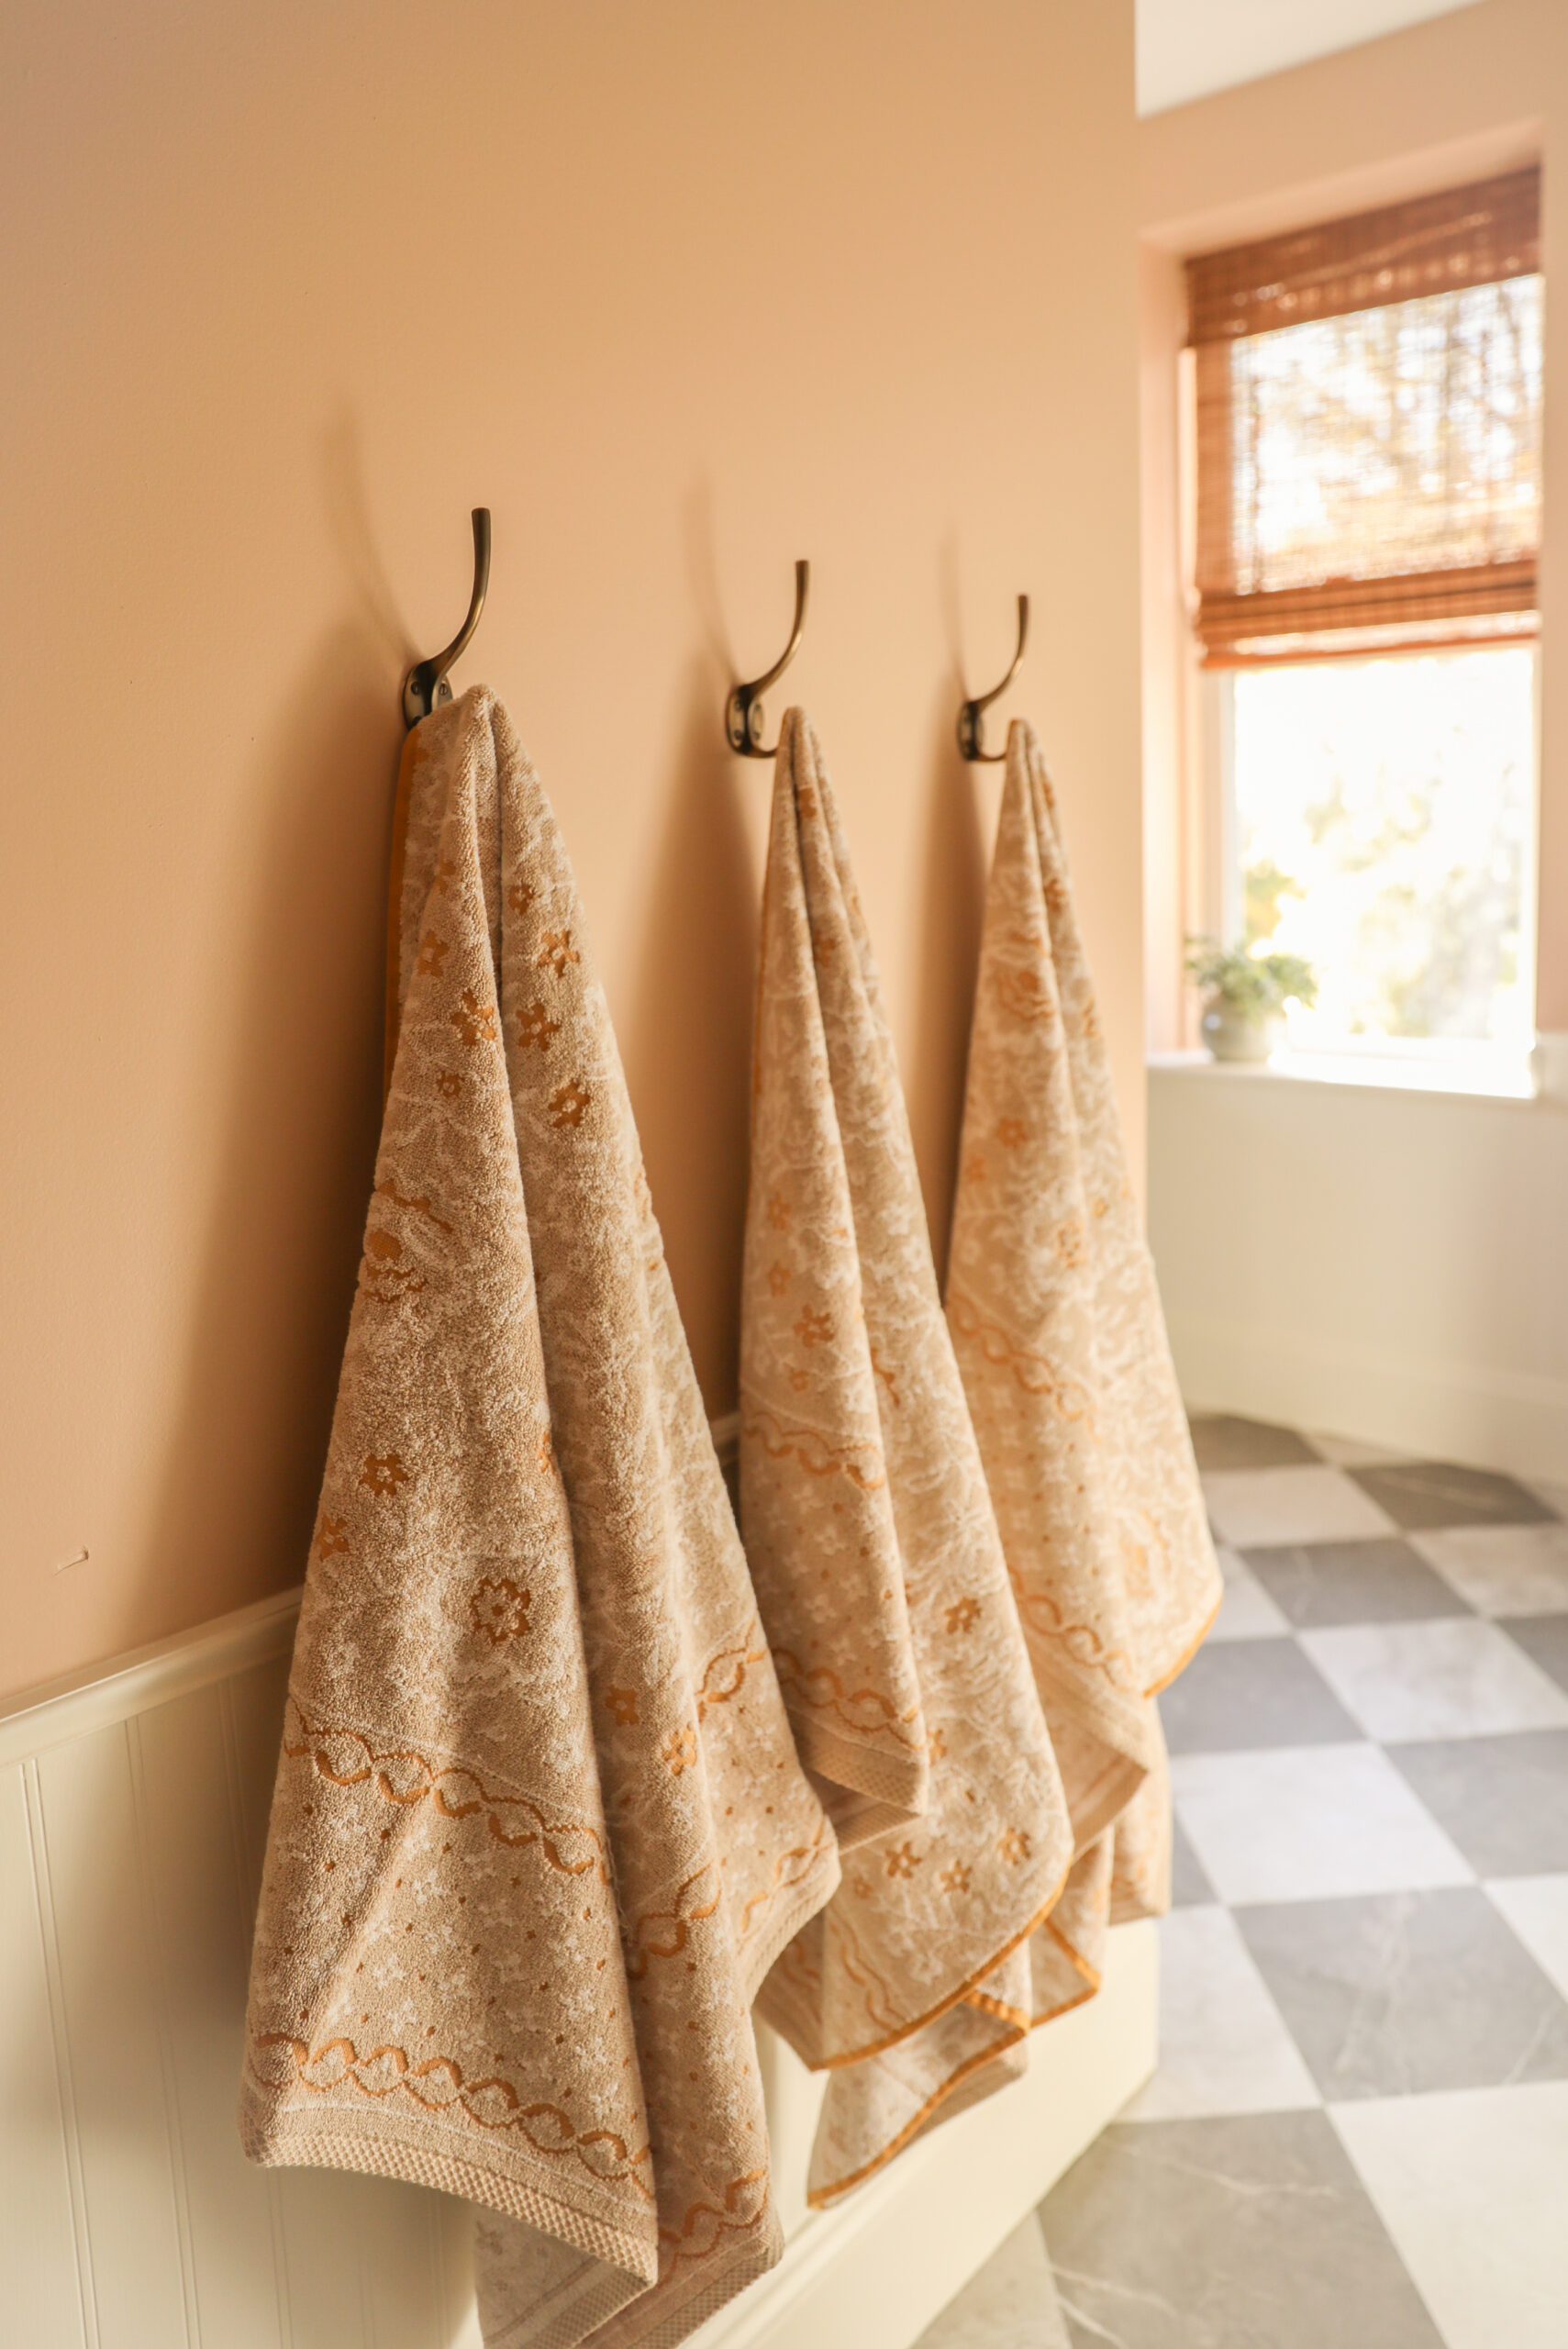
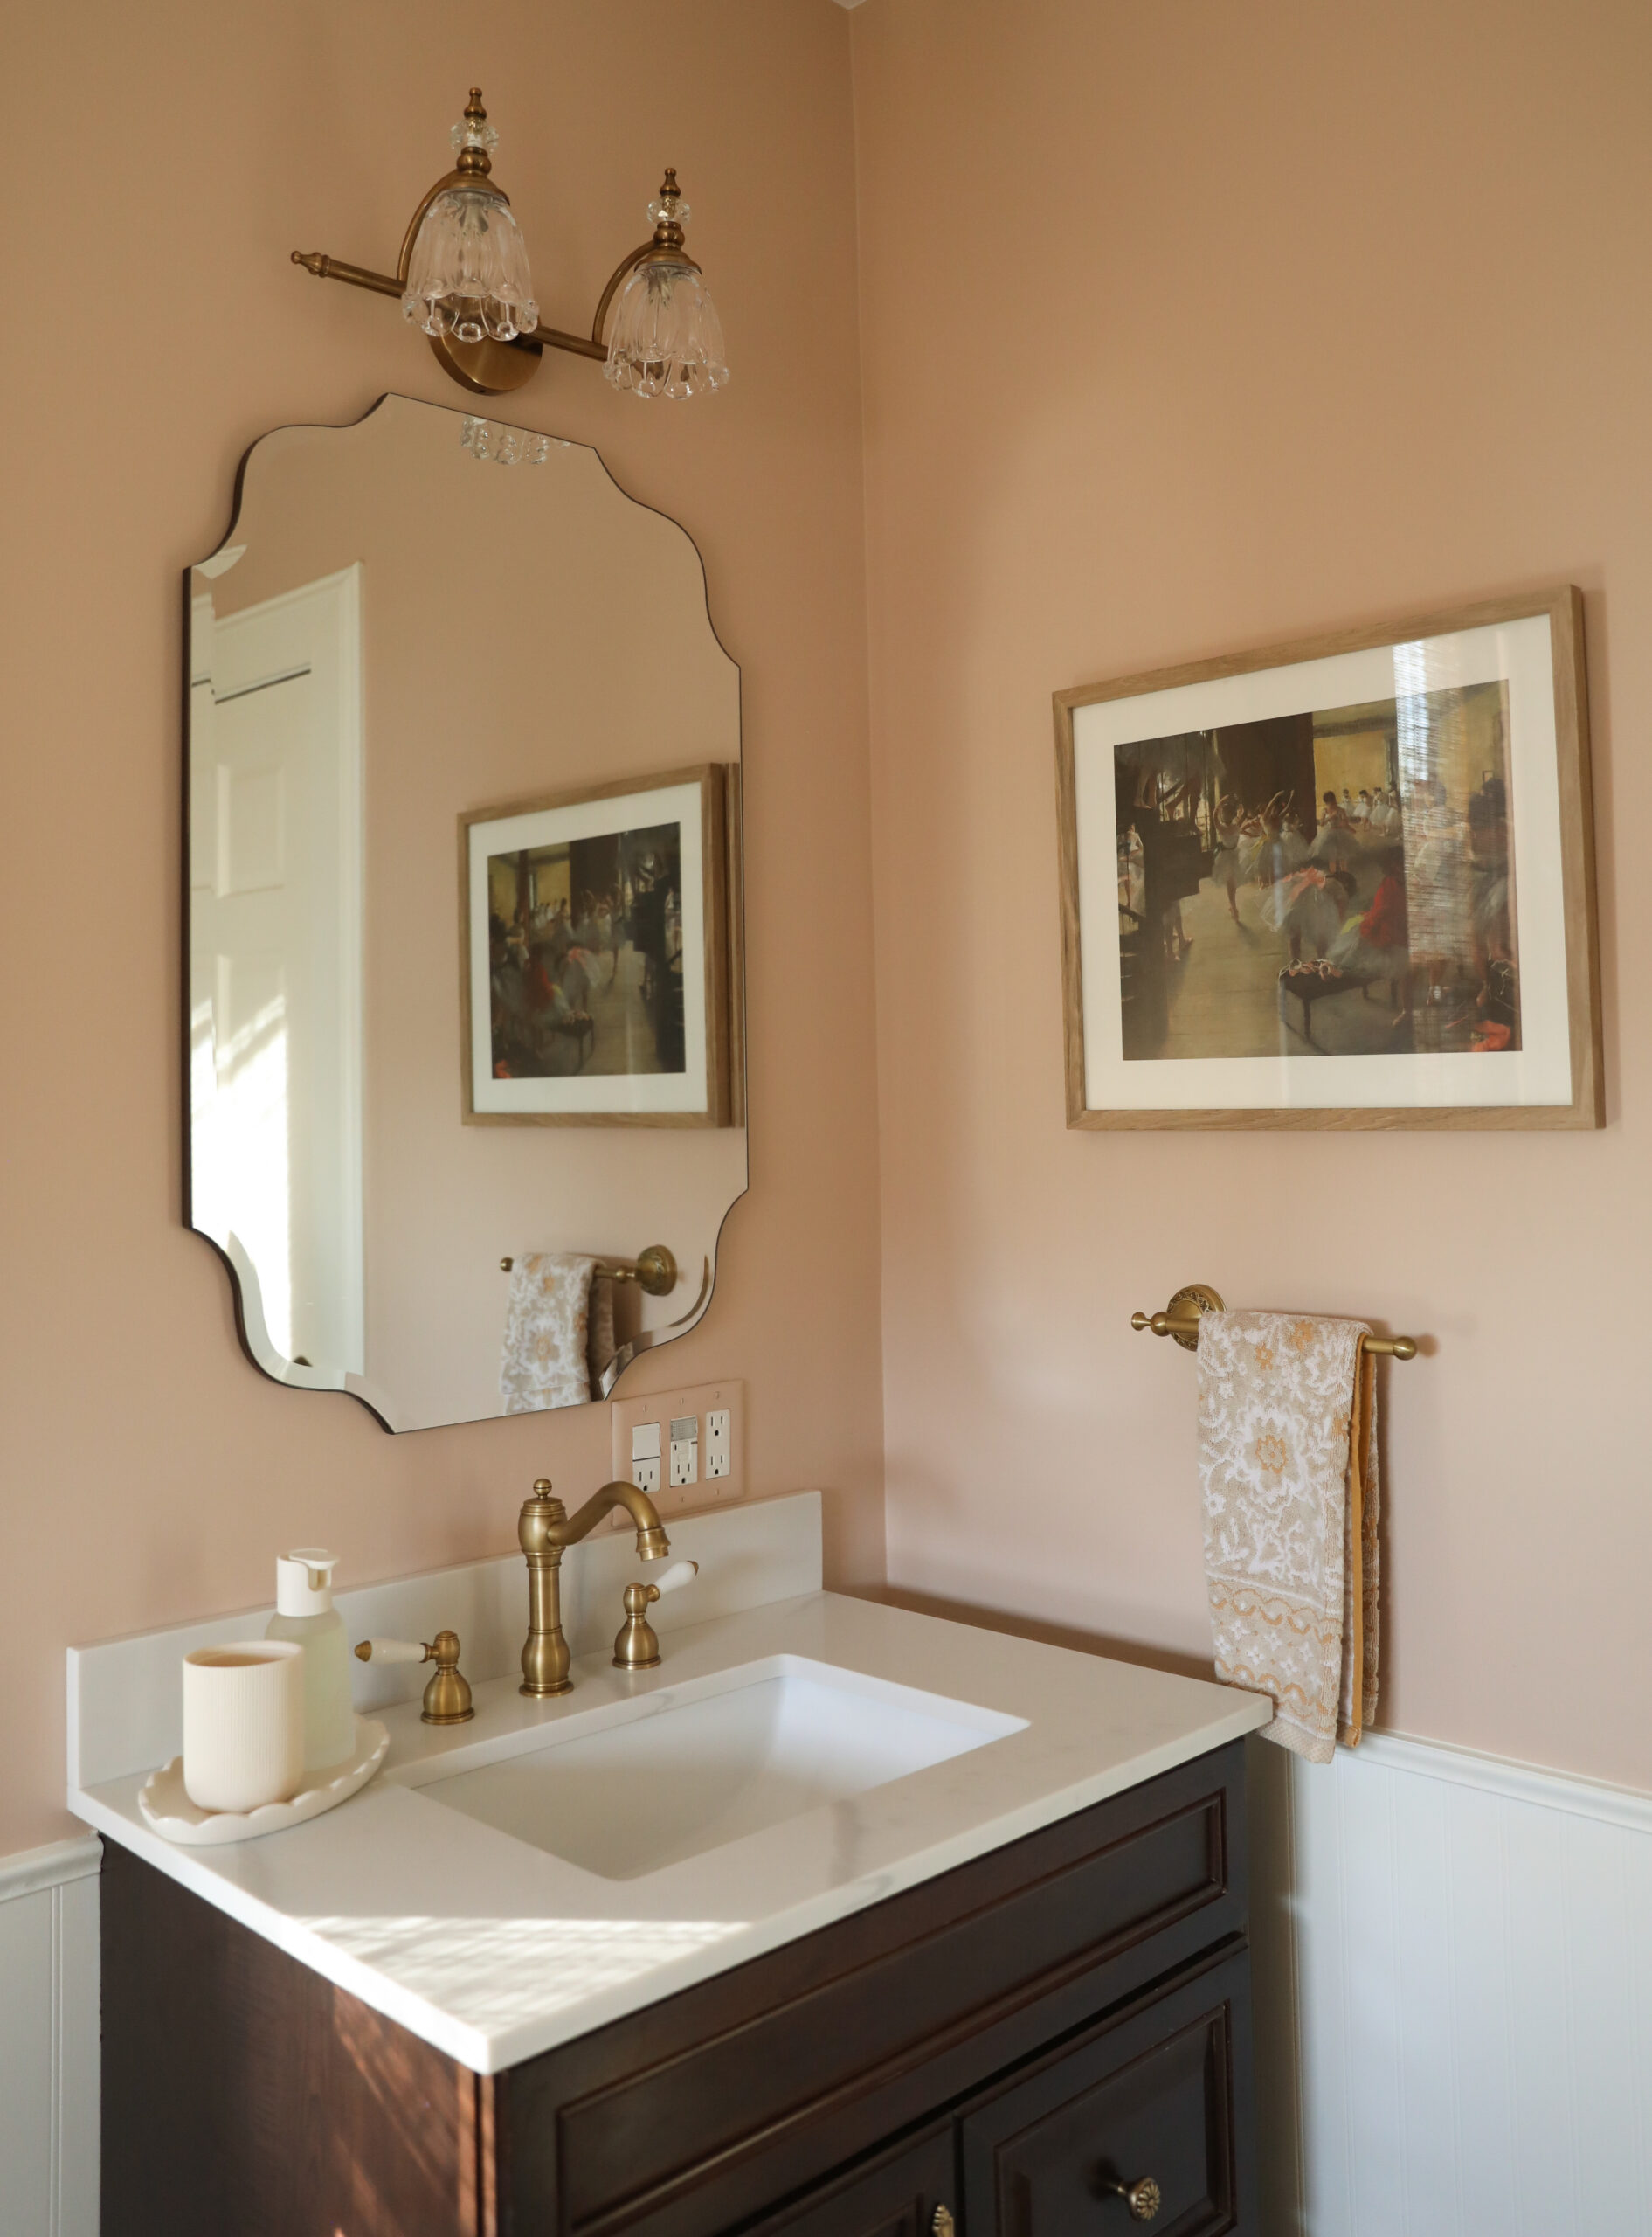
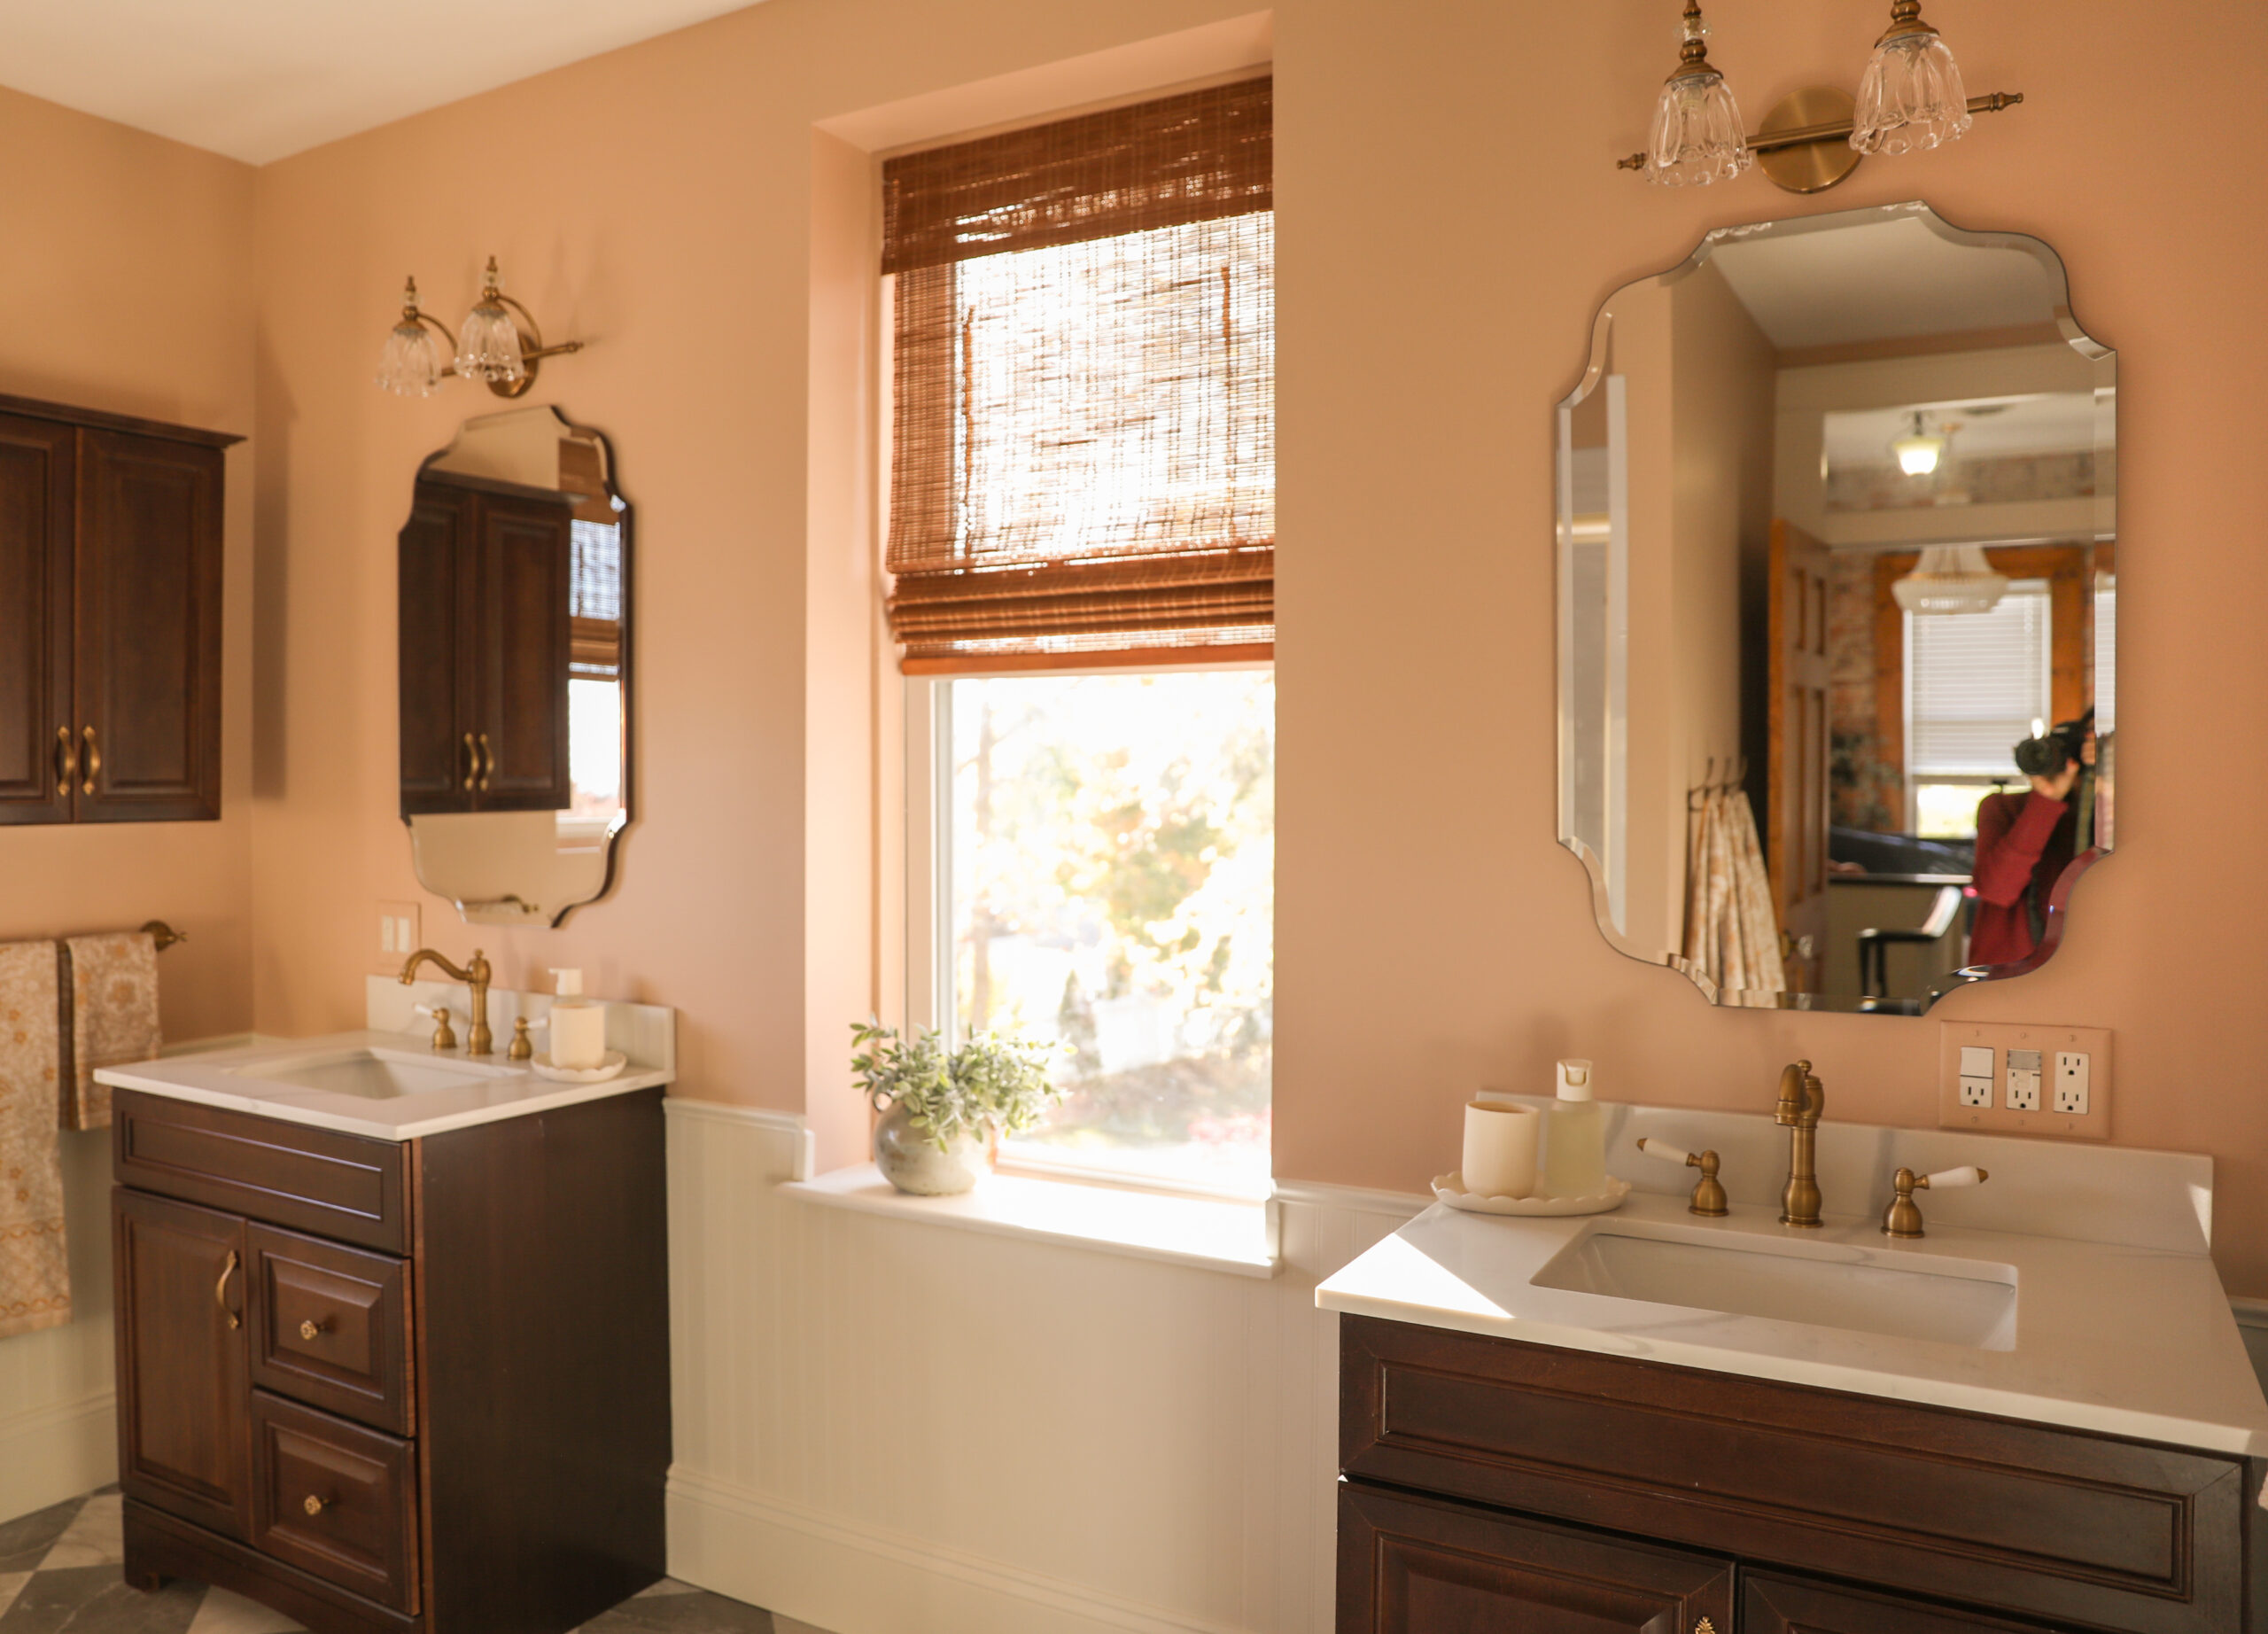
The vanities (similar vanities here) and cabinets were secured in place so we worked around them! We were able to lift the vanitites to tile underneath thankfully even though the piping prevented us from fully removing. We decided to swap the vanity tops and the faucet drains were broken so we were excited to update those as well! I found these gorgeous calacatta quartz sinks that were on sale as well as theseantiqued brass faucets. I had a hard time finding hardware that had that modern antique feel in the right finish, but eventually landed onthese pulls and knobsfrom build.
Quick Tip:We touched up these vanities with a good scrubbing and brown marker! It blended in really well over the nicks and dings as well as the edges of the drawers.
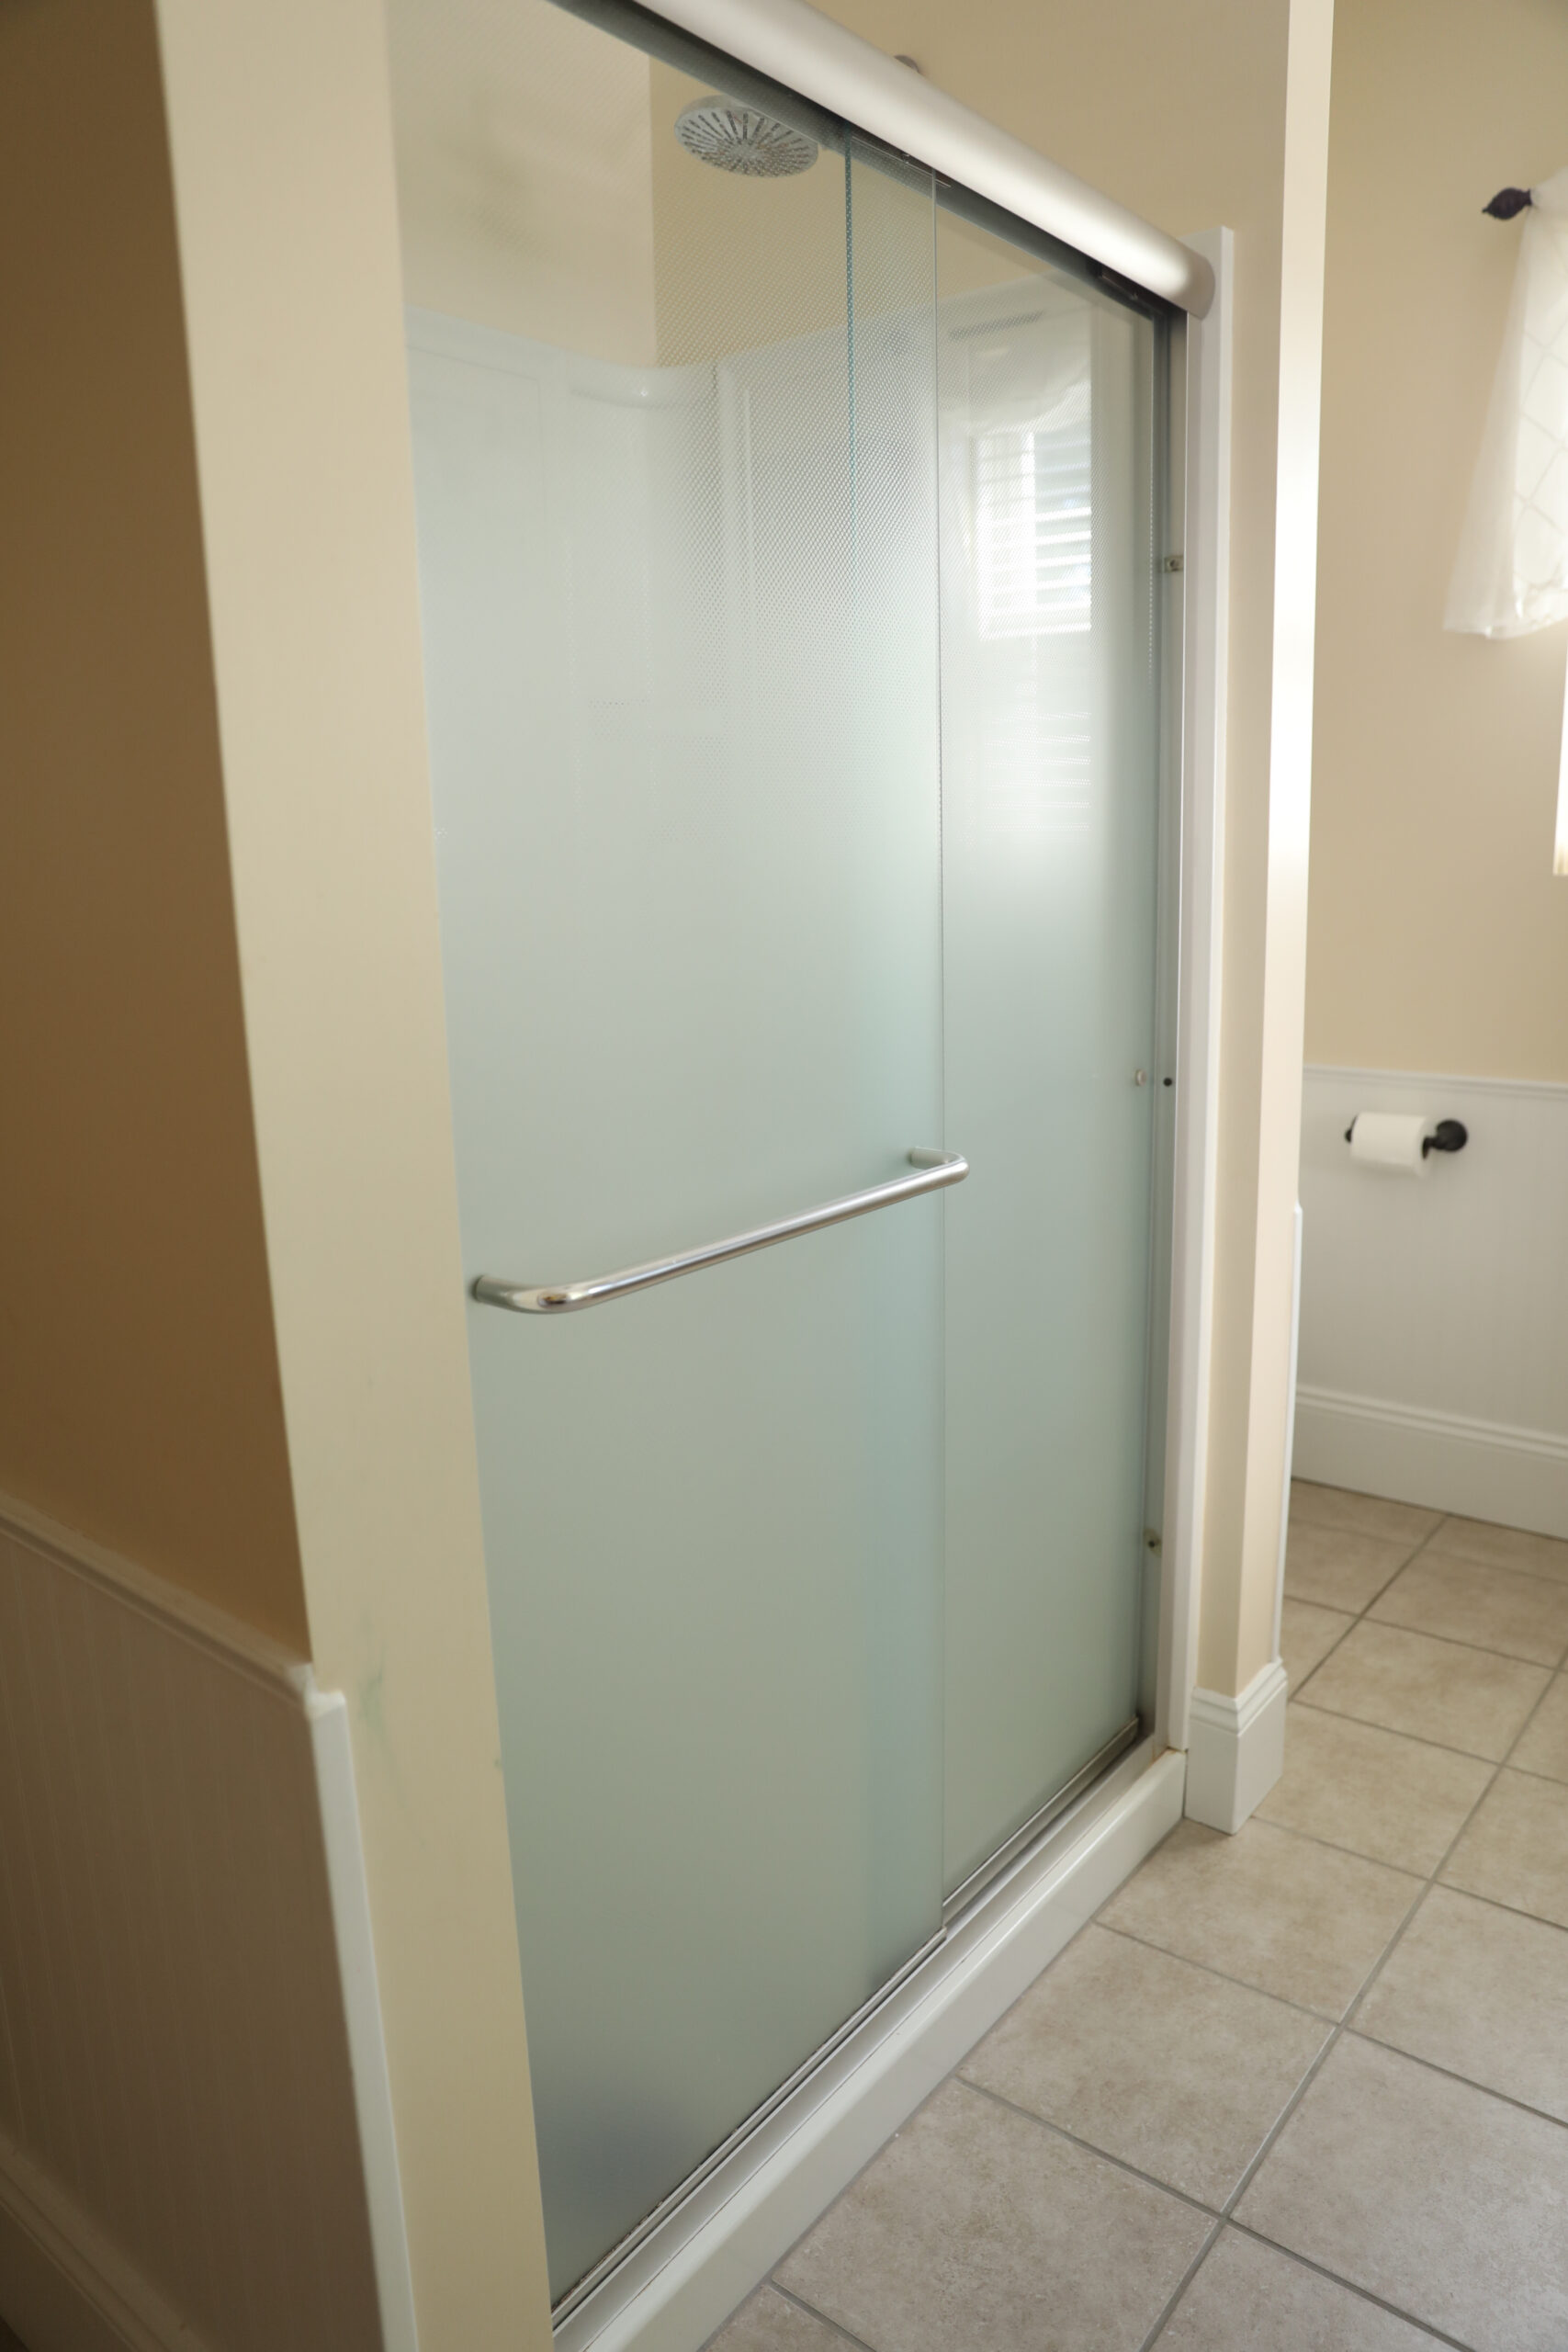
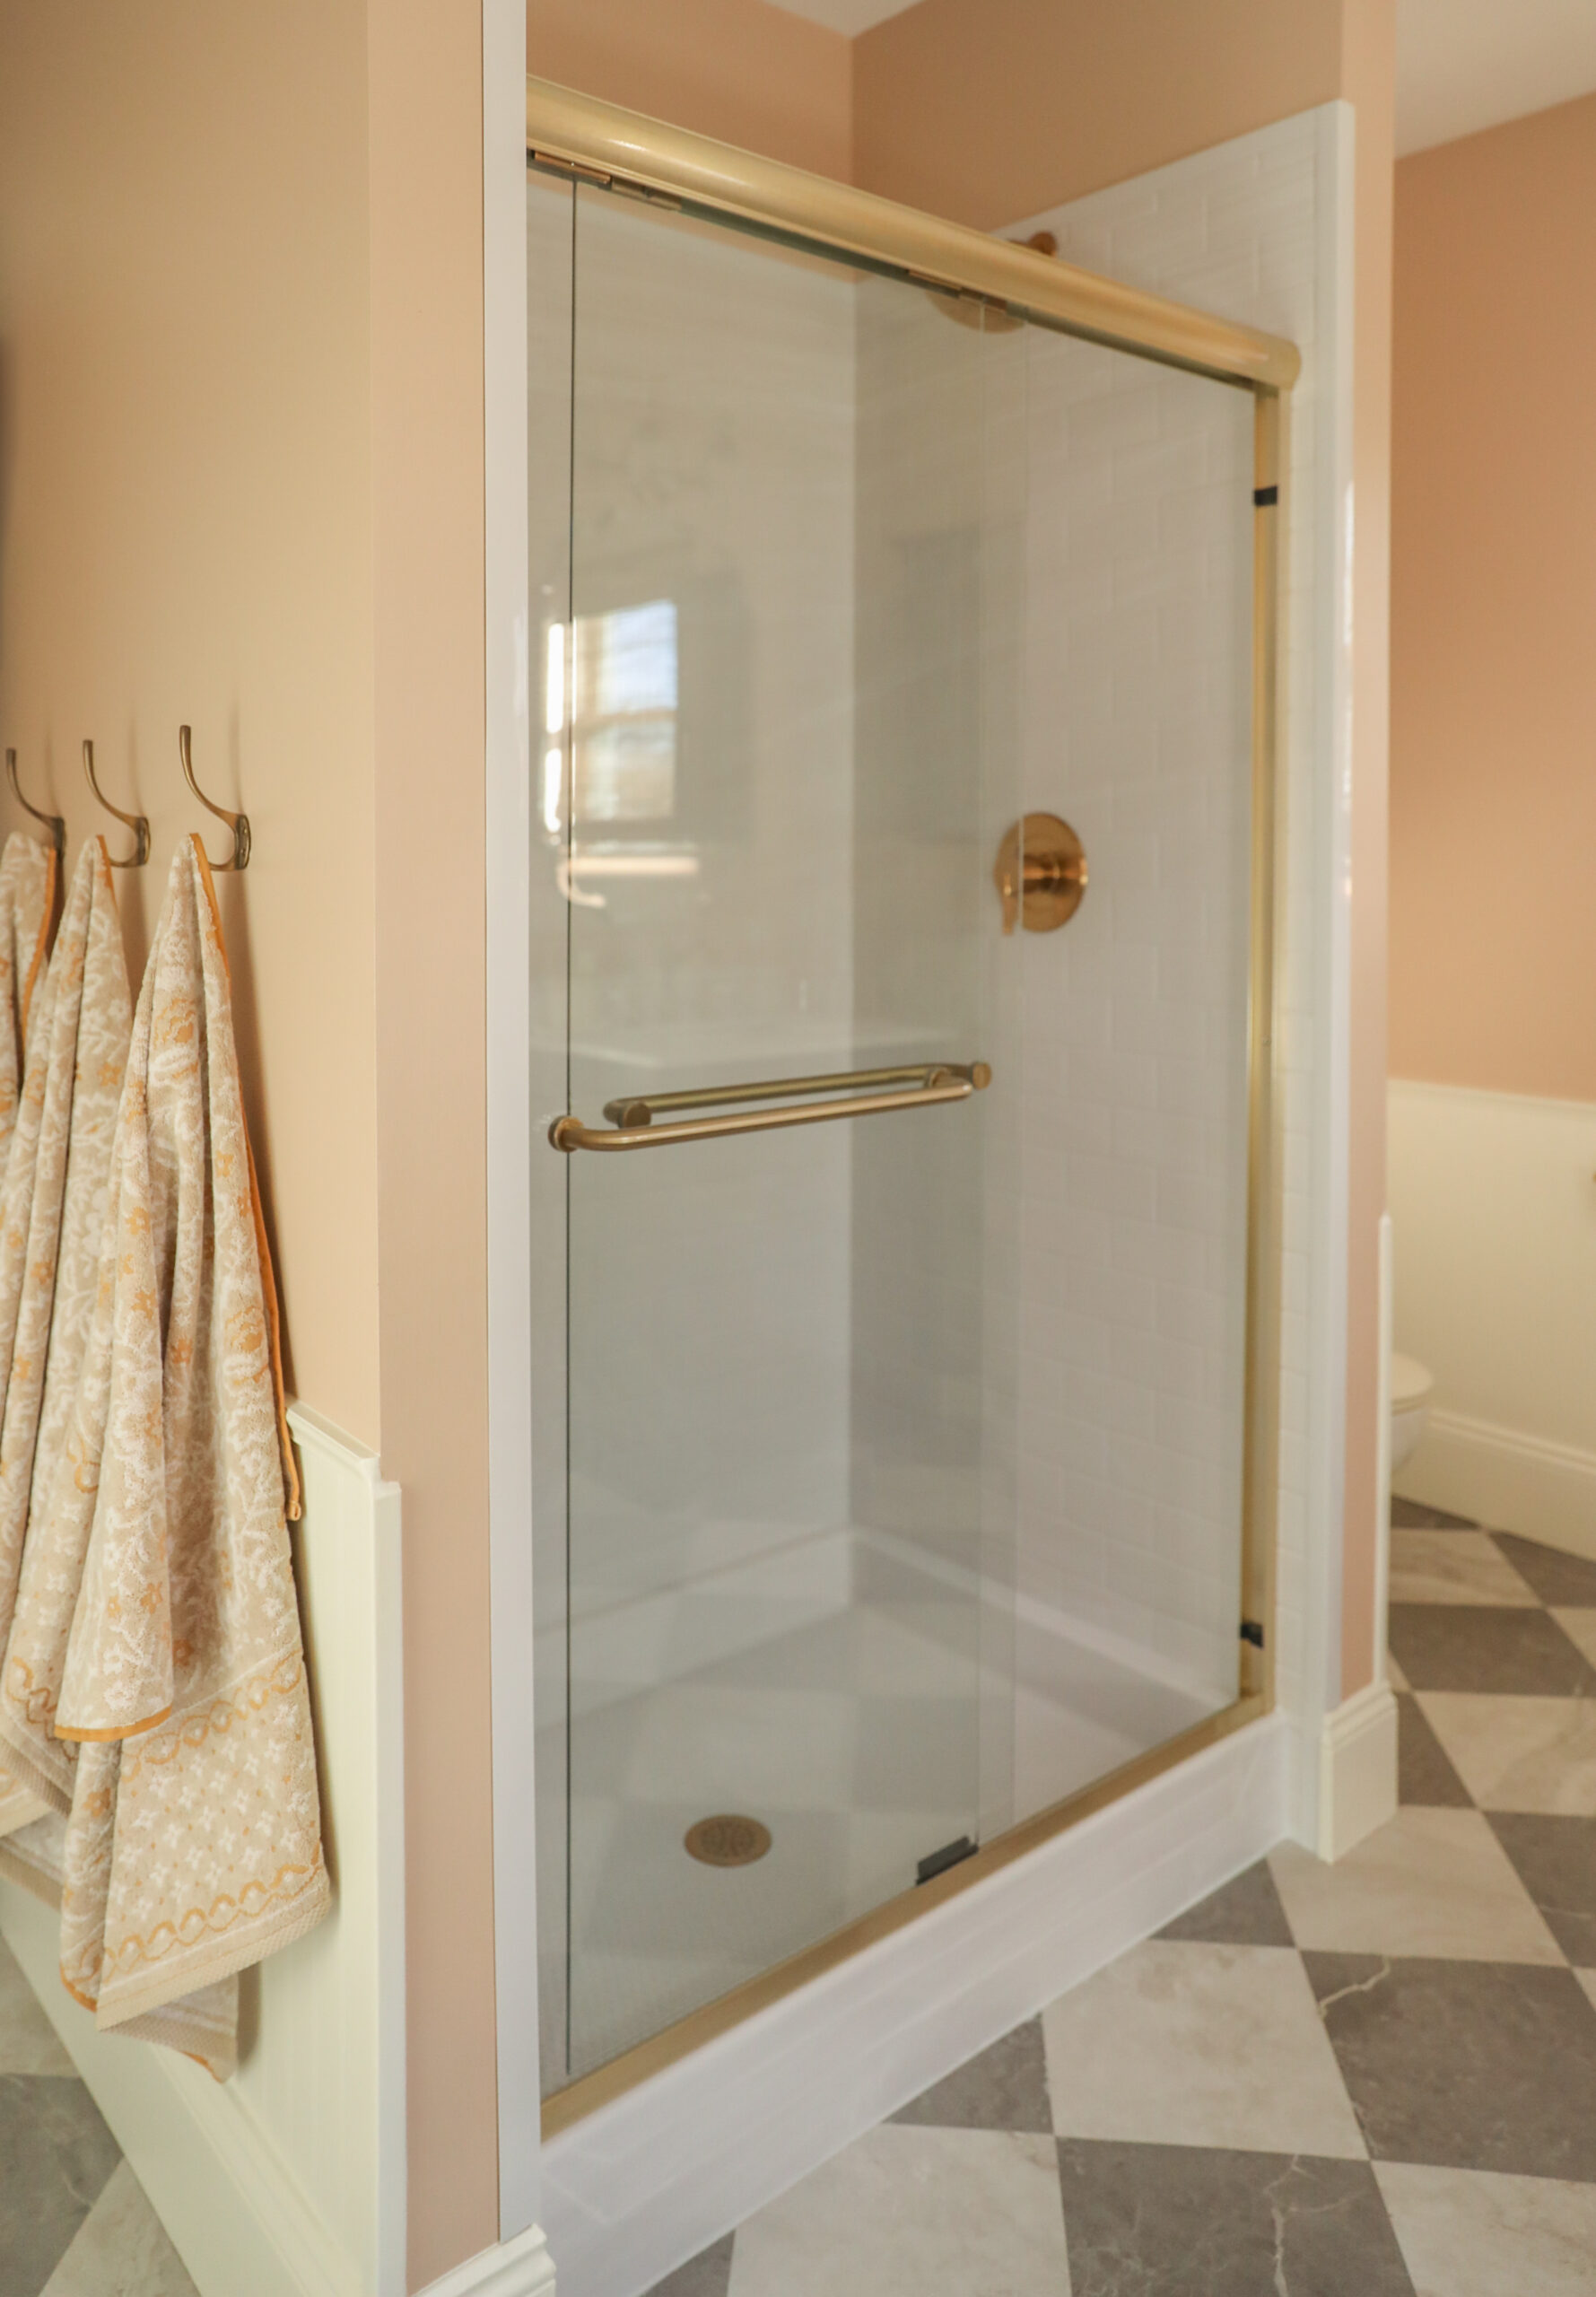
We partnered with Bath Fitter to update our shower, and we were amazed at how fast and efficient they were! We had a consultation to select the finishes and style, and scheduled the install. They removed the old shower, and installed the new shower and hardware in one day. This was such a welcome relief as we had just had a baby, and it saved us so much time and energy to try and do on our own!
We swapped the light fixtures for double sconce fixtures. I found this affordable vanity light option with the modern antique style I was looking for.
Side note: I absolutely loved these mirrors, but after a month of them being hung one fell off the backing and shattered all over the bathroom. Cannot recommend unfortunately! Found some similar ones that I ordered and are on the way!
There are a few more details I have yet to add in here like cafe curtains and the ceiling pendant! I wish we would have painted the ceiling – just might have to do that this year. I find that your most used rooms are worth investing time into even if it isn’t your long term vision. Paint, swapping light fixtures, and peel and stick tile are a few things that made this bathroom feel less like the listing photos and more like our own. It was really fun to show the girls the reveal – they have had many “spa nights” in here already:)
We send out helpful tips and resources, and inside news just for our email fam.
I love it! We moved into a home that really needs some love shown to the kids bathroom, but the budget is lacking. I will look into the peel and stick floor!
I wish we would have painted the ceiling – just might have to do that this year. I find that your most used rooms are worth investing time into even if it isn’t your long term vision. Play game block blast free.


Laurie Parks
says:I love it! We moved into a home that really needs some love shown to the kids bathroom, but the budget is lacking. I will look into the peel and stick floor!
tommysanchez
says:I wish we would have painted the ceiling – just might have to do that this year. I find that your most used rooms are worth investing time into even if it isn’t your long term vision. Play game block blast free.