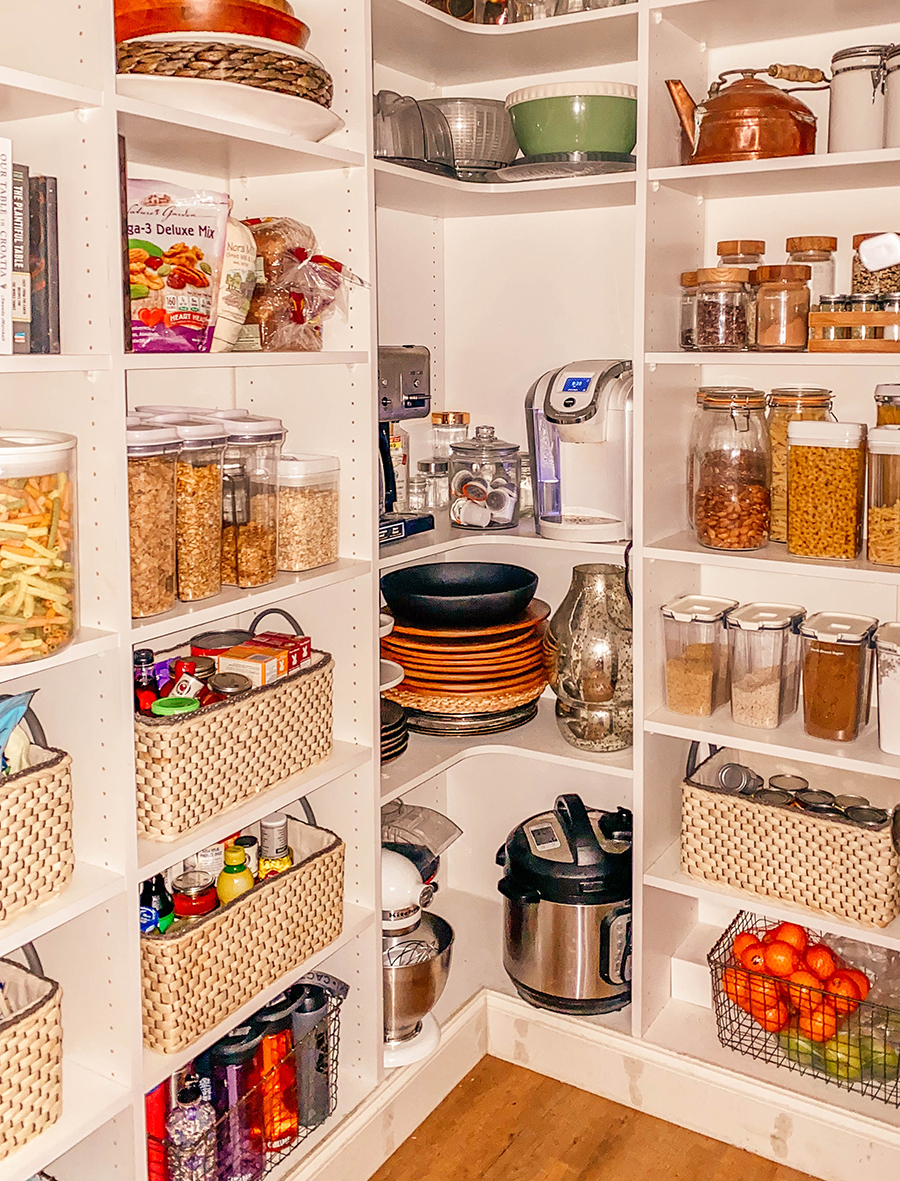
Currently, our pantry is our most pinned post on pinterest. I think it might have to do with everyone being stuck indoors? The real question is, have you organized your sock drawer yet?! I realized we never got the chance to share how we built out our pantry design conversion video and process. Today, Gabe […]
Pantry design project from start to finish + total cost. (VIDEO)
Currently, our pantry is our most pinned post on pinterest. I think it might have to do with everyone being stuck indoors? The real question is, have you organized your sock drawer yet?!
I realized we never got the chance to share how we built out our pantry design conversion video and process. Today, Gabe is going to share the materials we used for our pantry design, the instructions, total cost, and the all of the sources for the storage containers.
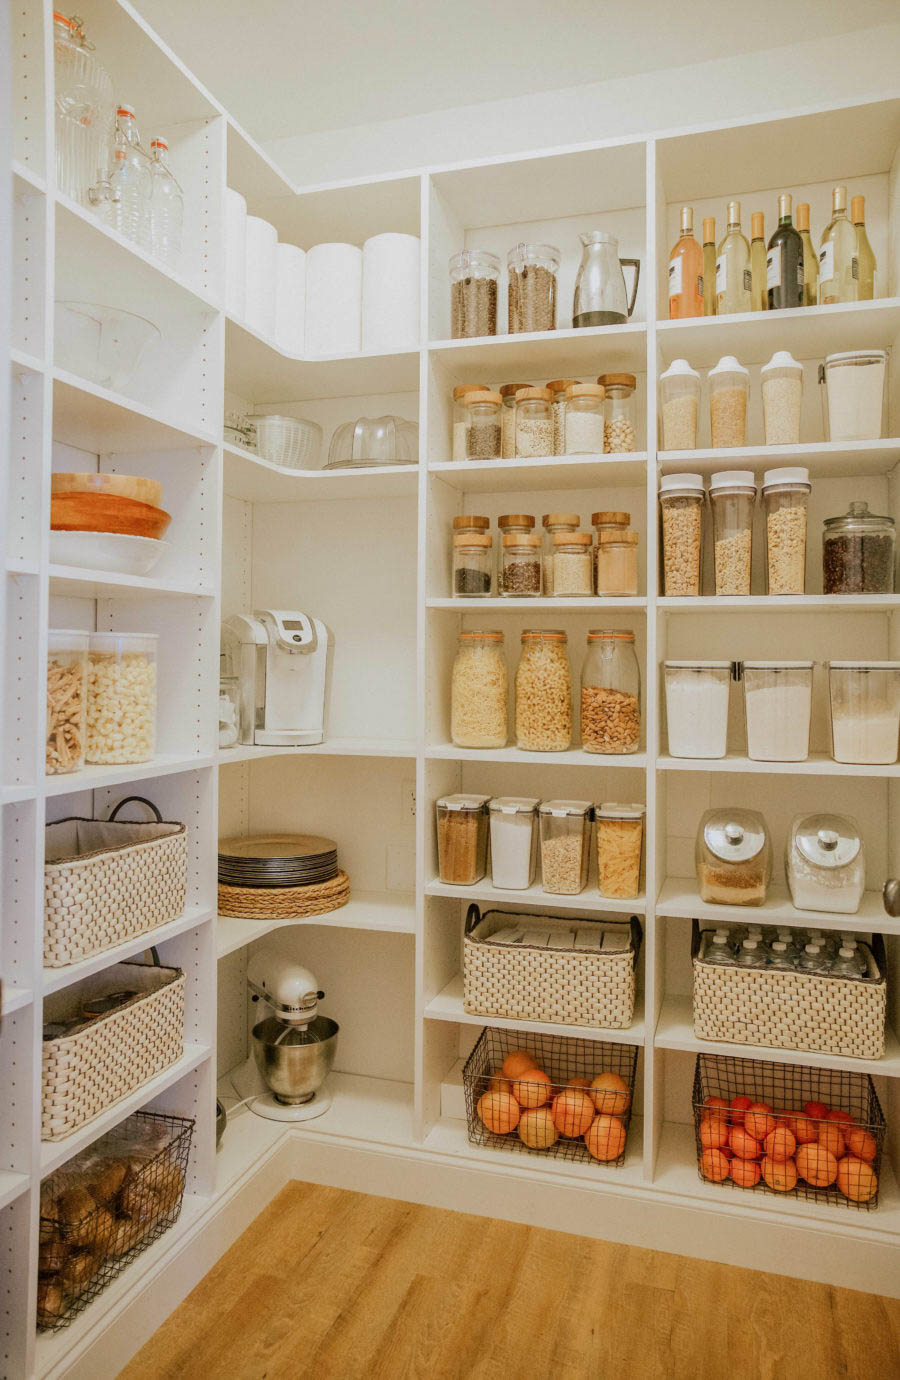
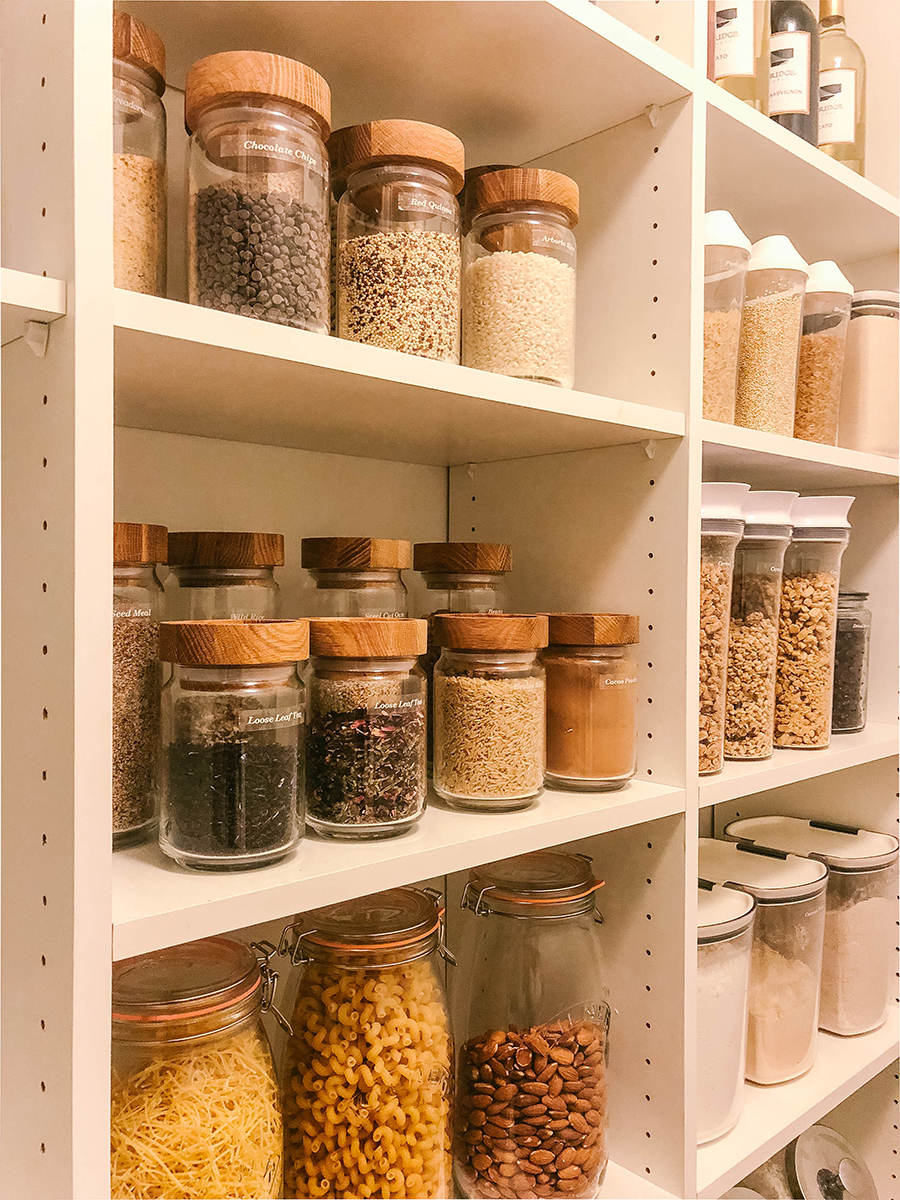
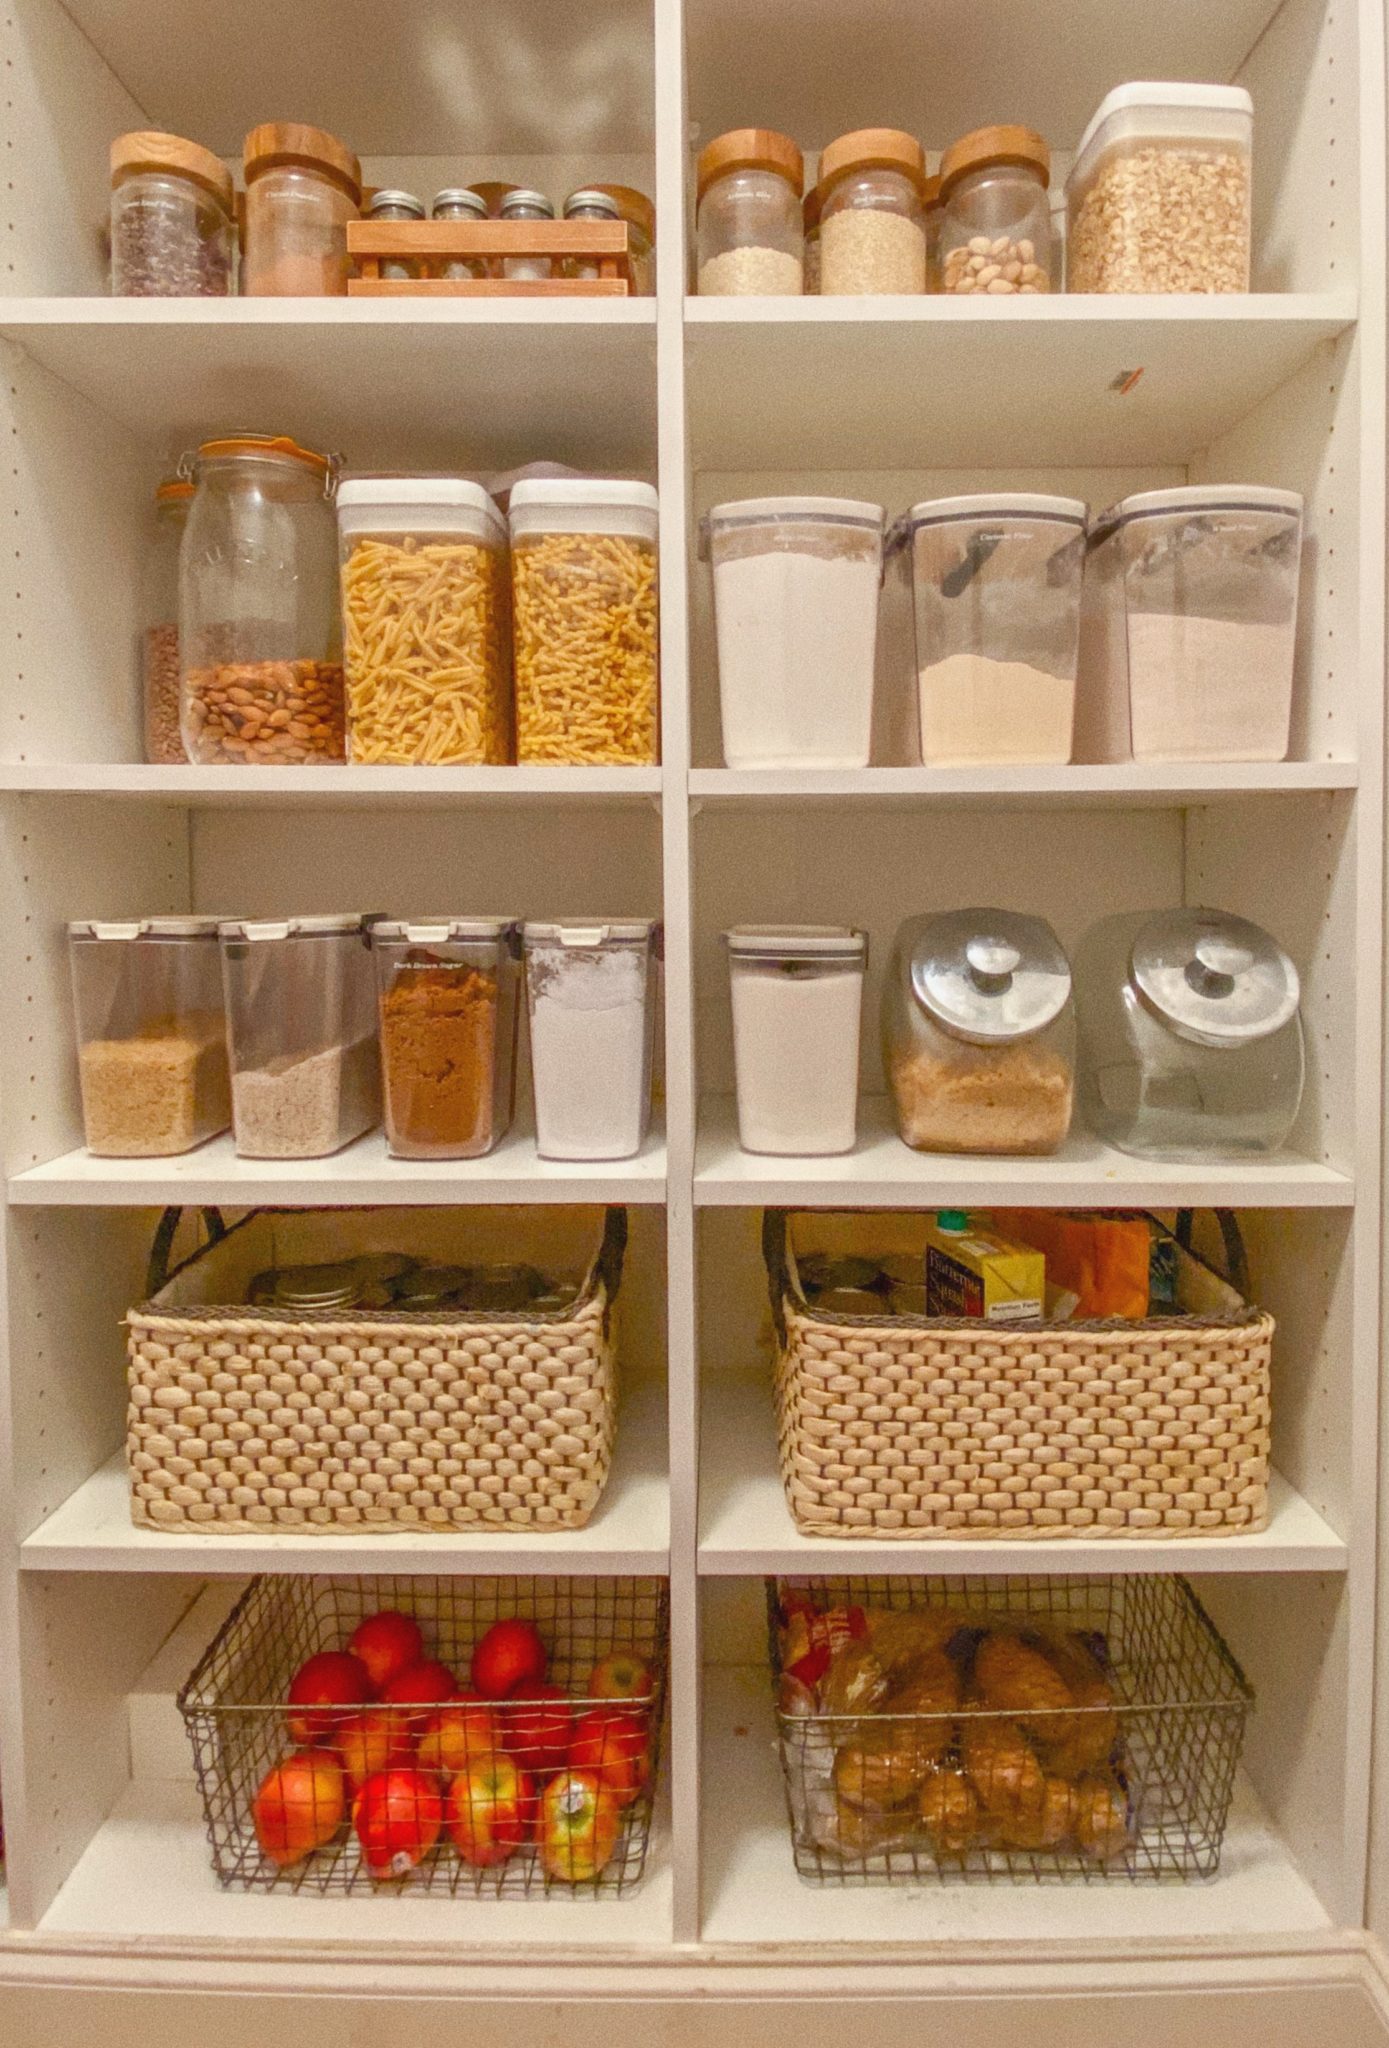
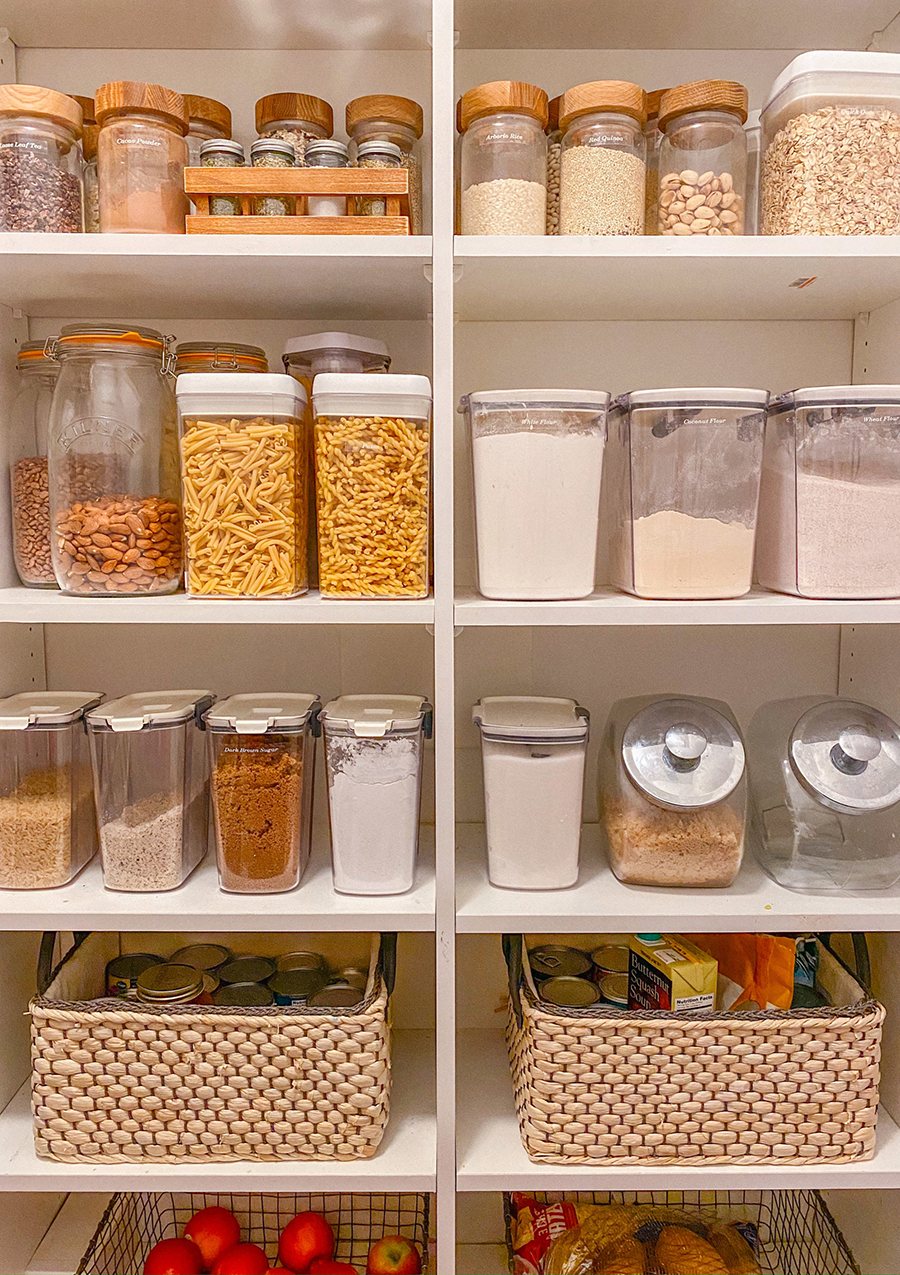
A very styled, clean version of our pantry;)
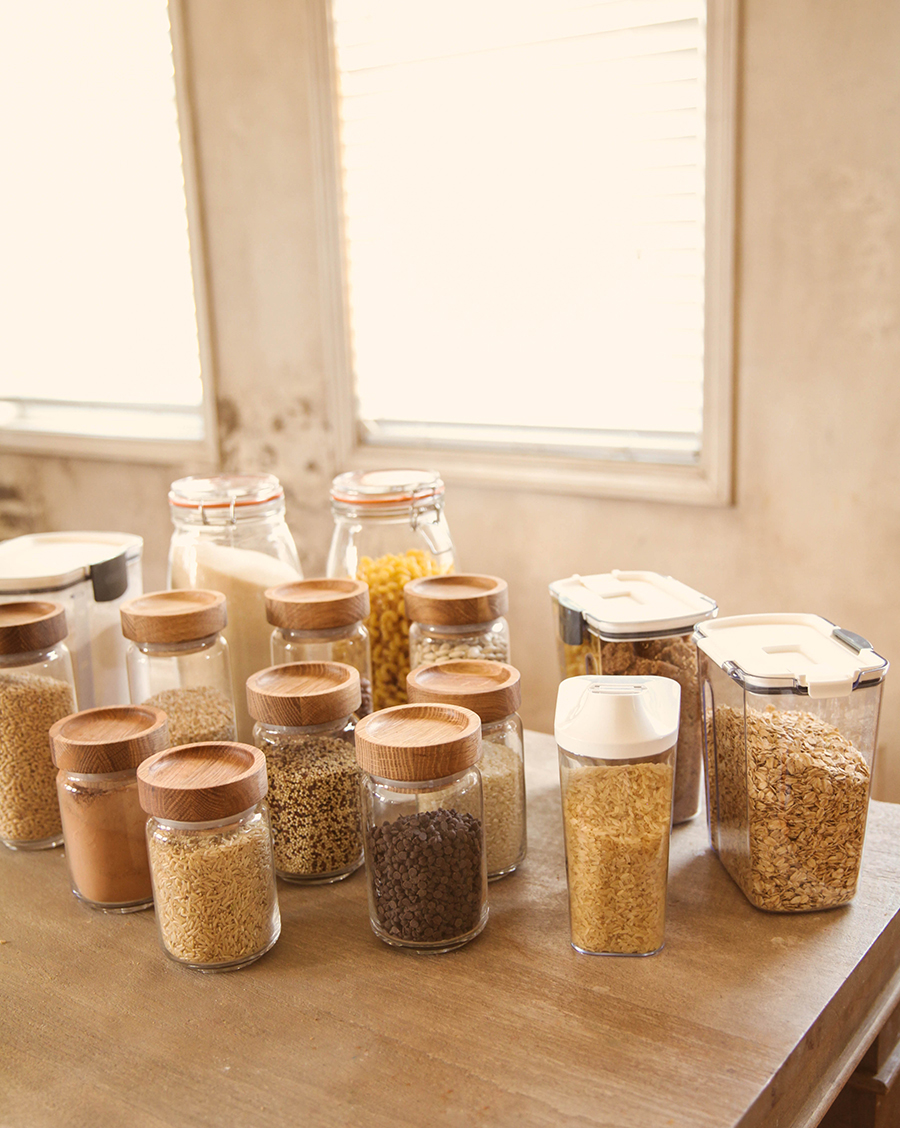
Before we get to instructions, a quick list of the food storage items we use and love for this pantry:
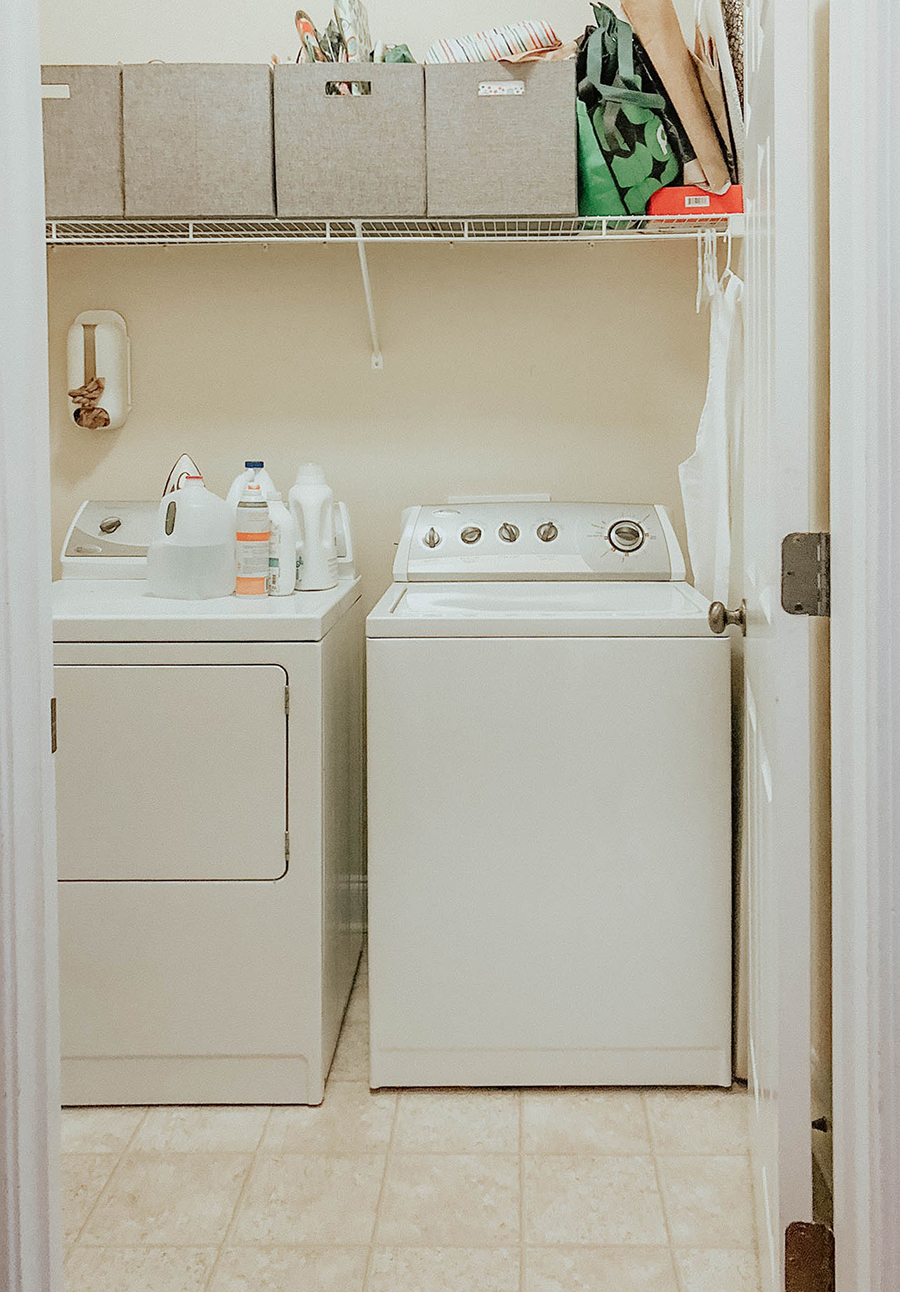
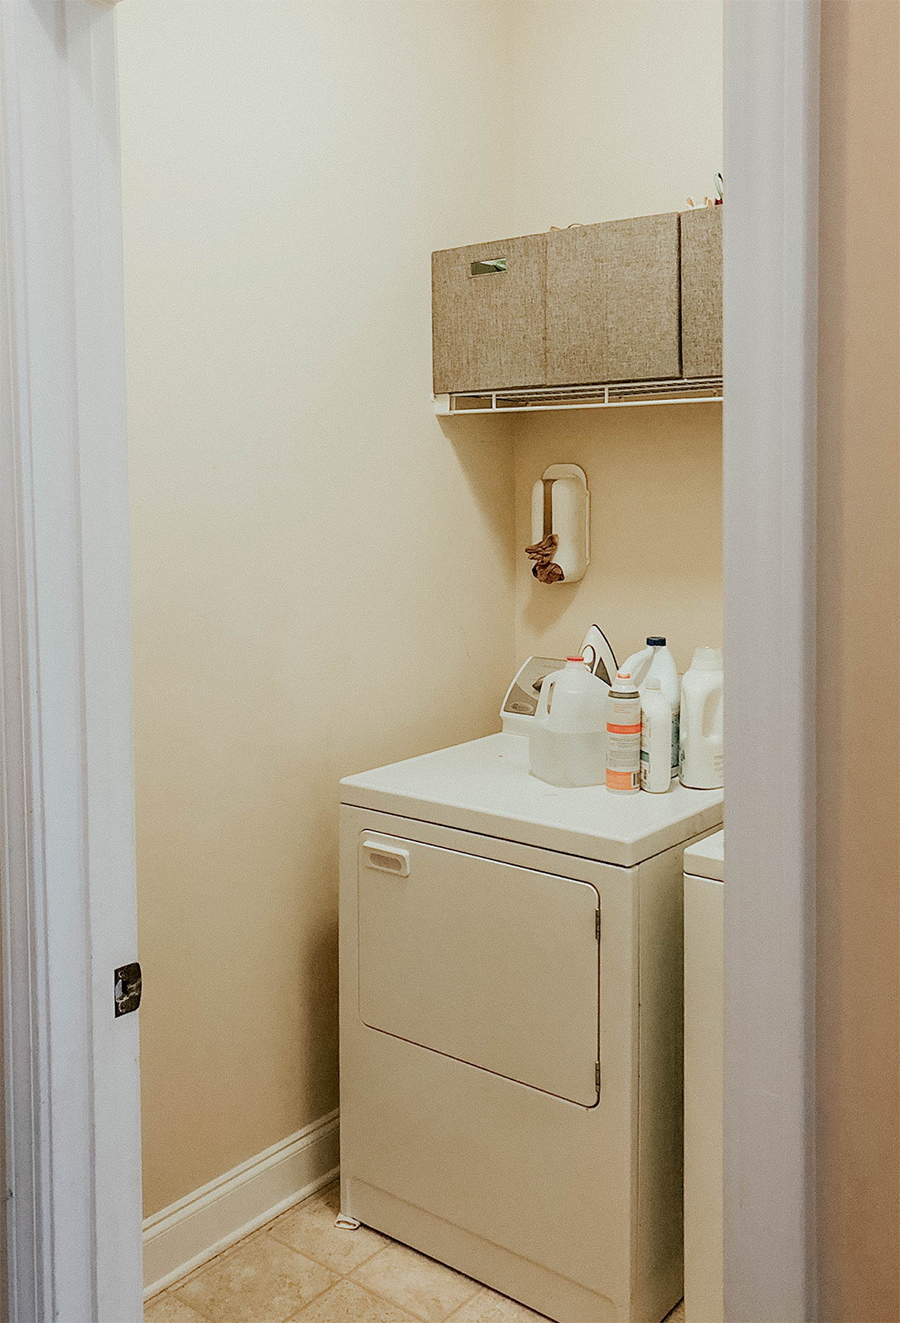
When we moved in, the laundry room was right off the kitchen.
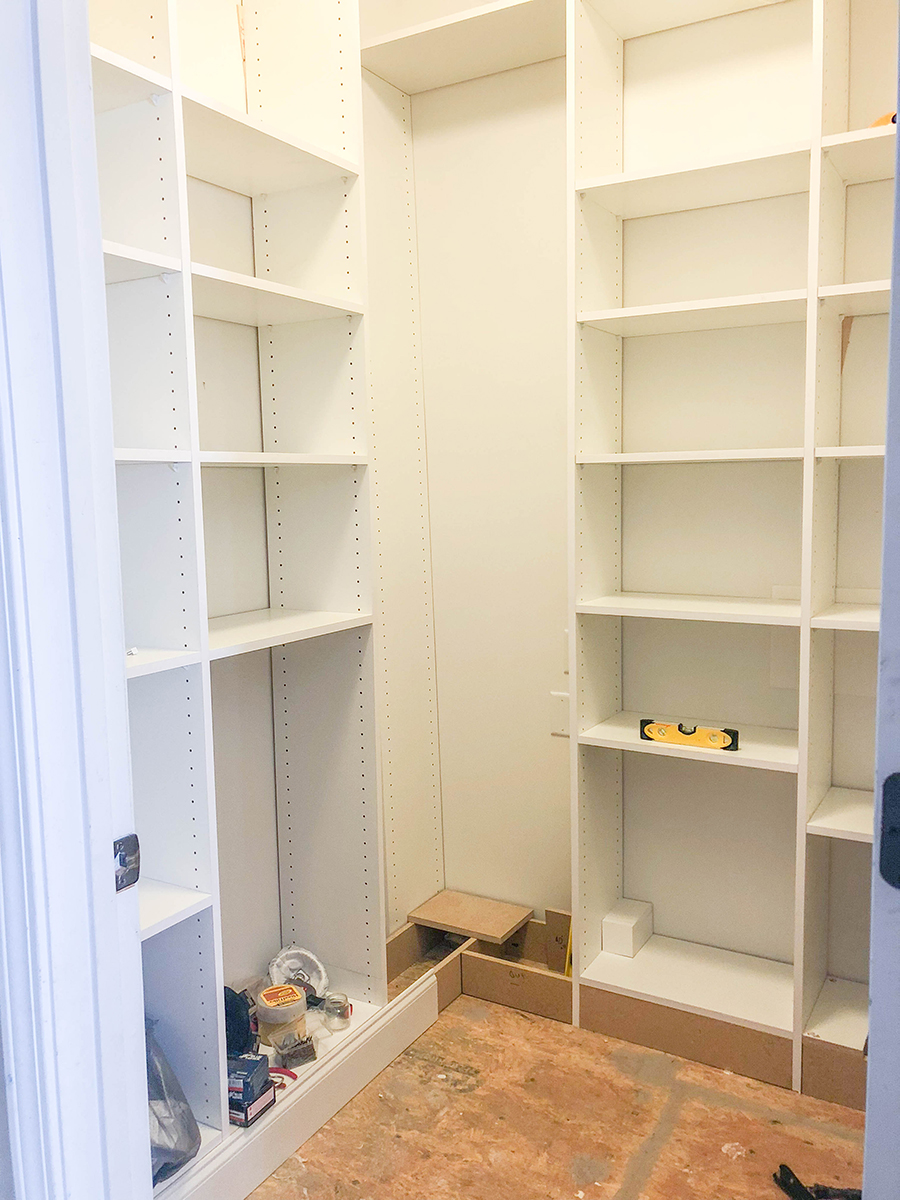
If you plan on doing built-ins yourself, we highly recommend adjustable shelves so that you can create the height between shelves you need. This did require a good deal of extra time since I drilled through all of the pre-drilled holes to make sure we could insert shelving tabs on both sides. (They only come half way drilled through.) It was worth the extra time however, since we have so much more flexibility with the structure now.
SPECS AND MATERIALS: The dimensions of this walk in pantry are about 5ft 6in. square. The shelving unit’s hight is 8ft and depth is 11 3/4in.
Melamine boards – ¾ in thick and 11¾ in. deep (The vertical lengths are 8 ft. pre-drilled boards, while the shelves and top are un-drilled boards cut to length.)
Corner shelves – All shelves except for the corner shelves are 20 in. in length. The corner is constructed from 30 in. corner shelves trimmed to size.
A few corner brackets (These screws and brackets secured boards)
Once the unit was fully built, we finished the floor with heritage plank flooring + 5¼ in baseboards. _________________________________________
Total Cost: $550 (Not including the flooring costs which we had extra supply of from our basement design.)
Instructions from Gabe: The vertical boards extend all the way to the floor so we did not secure them directly to the floor. I used some scrap mdf to about 3.5 in wide and the length of the shelves, and secured them to the vertical boards using L brackets to create a makeshift base. This also gives a nice stable platform for your bottom most shelf. You could easily secure the vertical boards to the floor using more L brackets as well if desired.
I started in the left hand corner and built the two left hand shelf lengths working my way to the center corner. Use the cam and dowel fasteners to permanently affix a shelves to the vertical boards 15in from the top and roughly 3 feet up from the floor. (Originally I used coarse pocket screws to attach the permanent shelves, but I now use the cam and dowels as it is much more efficient once the process is learned.) Then I moved on to the far right hand corner and built two shelf lengths moving toward the center corner. Last, I added the corner shelves, again use the cam and dowel fasteners for the permanent shelves, and the top boards using coarse screws drilled from the top. Add the adjustable shelves where desired.
Because the unit sits on the floor, and because it is in a corner unit extending from wall to wall, it only needs to be secured to the wall in order to prevent the unit from falling over. (In my case this was not really needed because of how tight it fit into the corner, but it doesn’t hurt to be extra careful.) Once I secured the top boards to the unit, I secured the whole unit to the wall by adding L brackets to the top board and then screwing the bracket into the wall studs.
This is a doable home project, but there is a bit of a learning curve. It took a total of about 3 weeks to complete. We did a lot of problem solving as we went, but it would have saved us a lot of time and headache if he used cam and dowel fasteners from the start instead of using pocket screws. Definitely the most used project to date though in our home! It really has helped with less wasted food, more resourceful cooking, and lots of saved time hunting for variations of flours and rice;) We do however have to keep a lock on the door to prevent certain 3 and 4 yr olds from chowing down when they please.
To prevent chipping while drilling 1. Be sure you are using a high quality carbide tip braid point drill bit to cleanly drill through the melamine board when creating peg holes. Use slow consistent pressure. 2. Place a board below the melamine and clamp the two together good and tight. Having the pressure on the back side helped to prevent the chips. Do not clamp the whole board together, but only in the immediate area where you are drilling. (I used two clamps with about 6 hole spaces between. Drill those 6 holes and move the clamps down accordingly/gradually to ensure tight backside pressure.) The sacrificial board underneath needs to have a nice smooth surface like cheap MDF. Some chipping still occurred, but it was kept to a minimum.
To prevent chipping while trimming melamine 1.Using a quality fine toothed saw blade is the biggest factory in reducing chipping while cutting. Use a straight piece of wood clamped to the top of your board to ensure you trim the melamine in a straight line. 2. Add some painters tape to the top and bottom of the melamine where you make your cut. 3. A tube of white Seam-Fill can help to cover up any remaining chips.
Please let us know if you have any questions, we are happy to answer what we can!
We send out helpful tips and resources, and inside news just for our email fam.
Hi there! We are about to do this reno this weekend and I have a question. Since the peg boards you have linked only have holes on 1 side, did you take that attachment you have linked above and drill completely through every hole on the boards that needed to have 2 holes on each side with the Carbide Tip Braid Point Bit?
Please confirm! Also


I love how your pantry turned out! I hope we can have a big enough space some day to do something like this!
Paige
http://thehappyflammily.com
Tara
says:Where did you purchase the shelves and materials for your pantry? I love it btw!
Bill Porter
says:Love the pantry. It’s exactly how we want to do ours. Did you cut the corner shelves from larger material and paint?
Kathie
says:What a great set up! Thank you for sharing! I moved my washer & dryer & this is exactly what I want! Thanks again!!!
Katelyn
says:Hi there! We are about to do this reno this weekend and I have a question. Since the peg boards you have linked only have holes on 1 side, did you take that attachment you have linked above and drill completely through every hole on the boards that needed to have 2 holes on each side with the Carbide Tip Braid Point Bit?
Please confirm! Also