

Outdoor Projects ›
Bedrooms ›
Kitchen ›
Living Room ›
Browse by Room
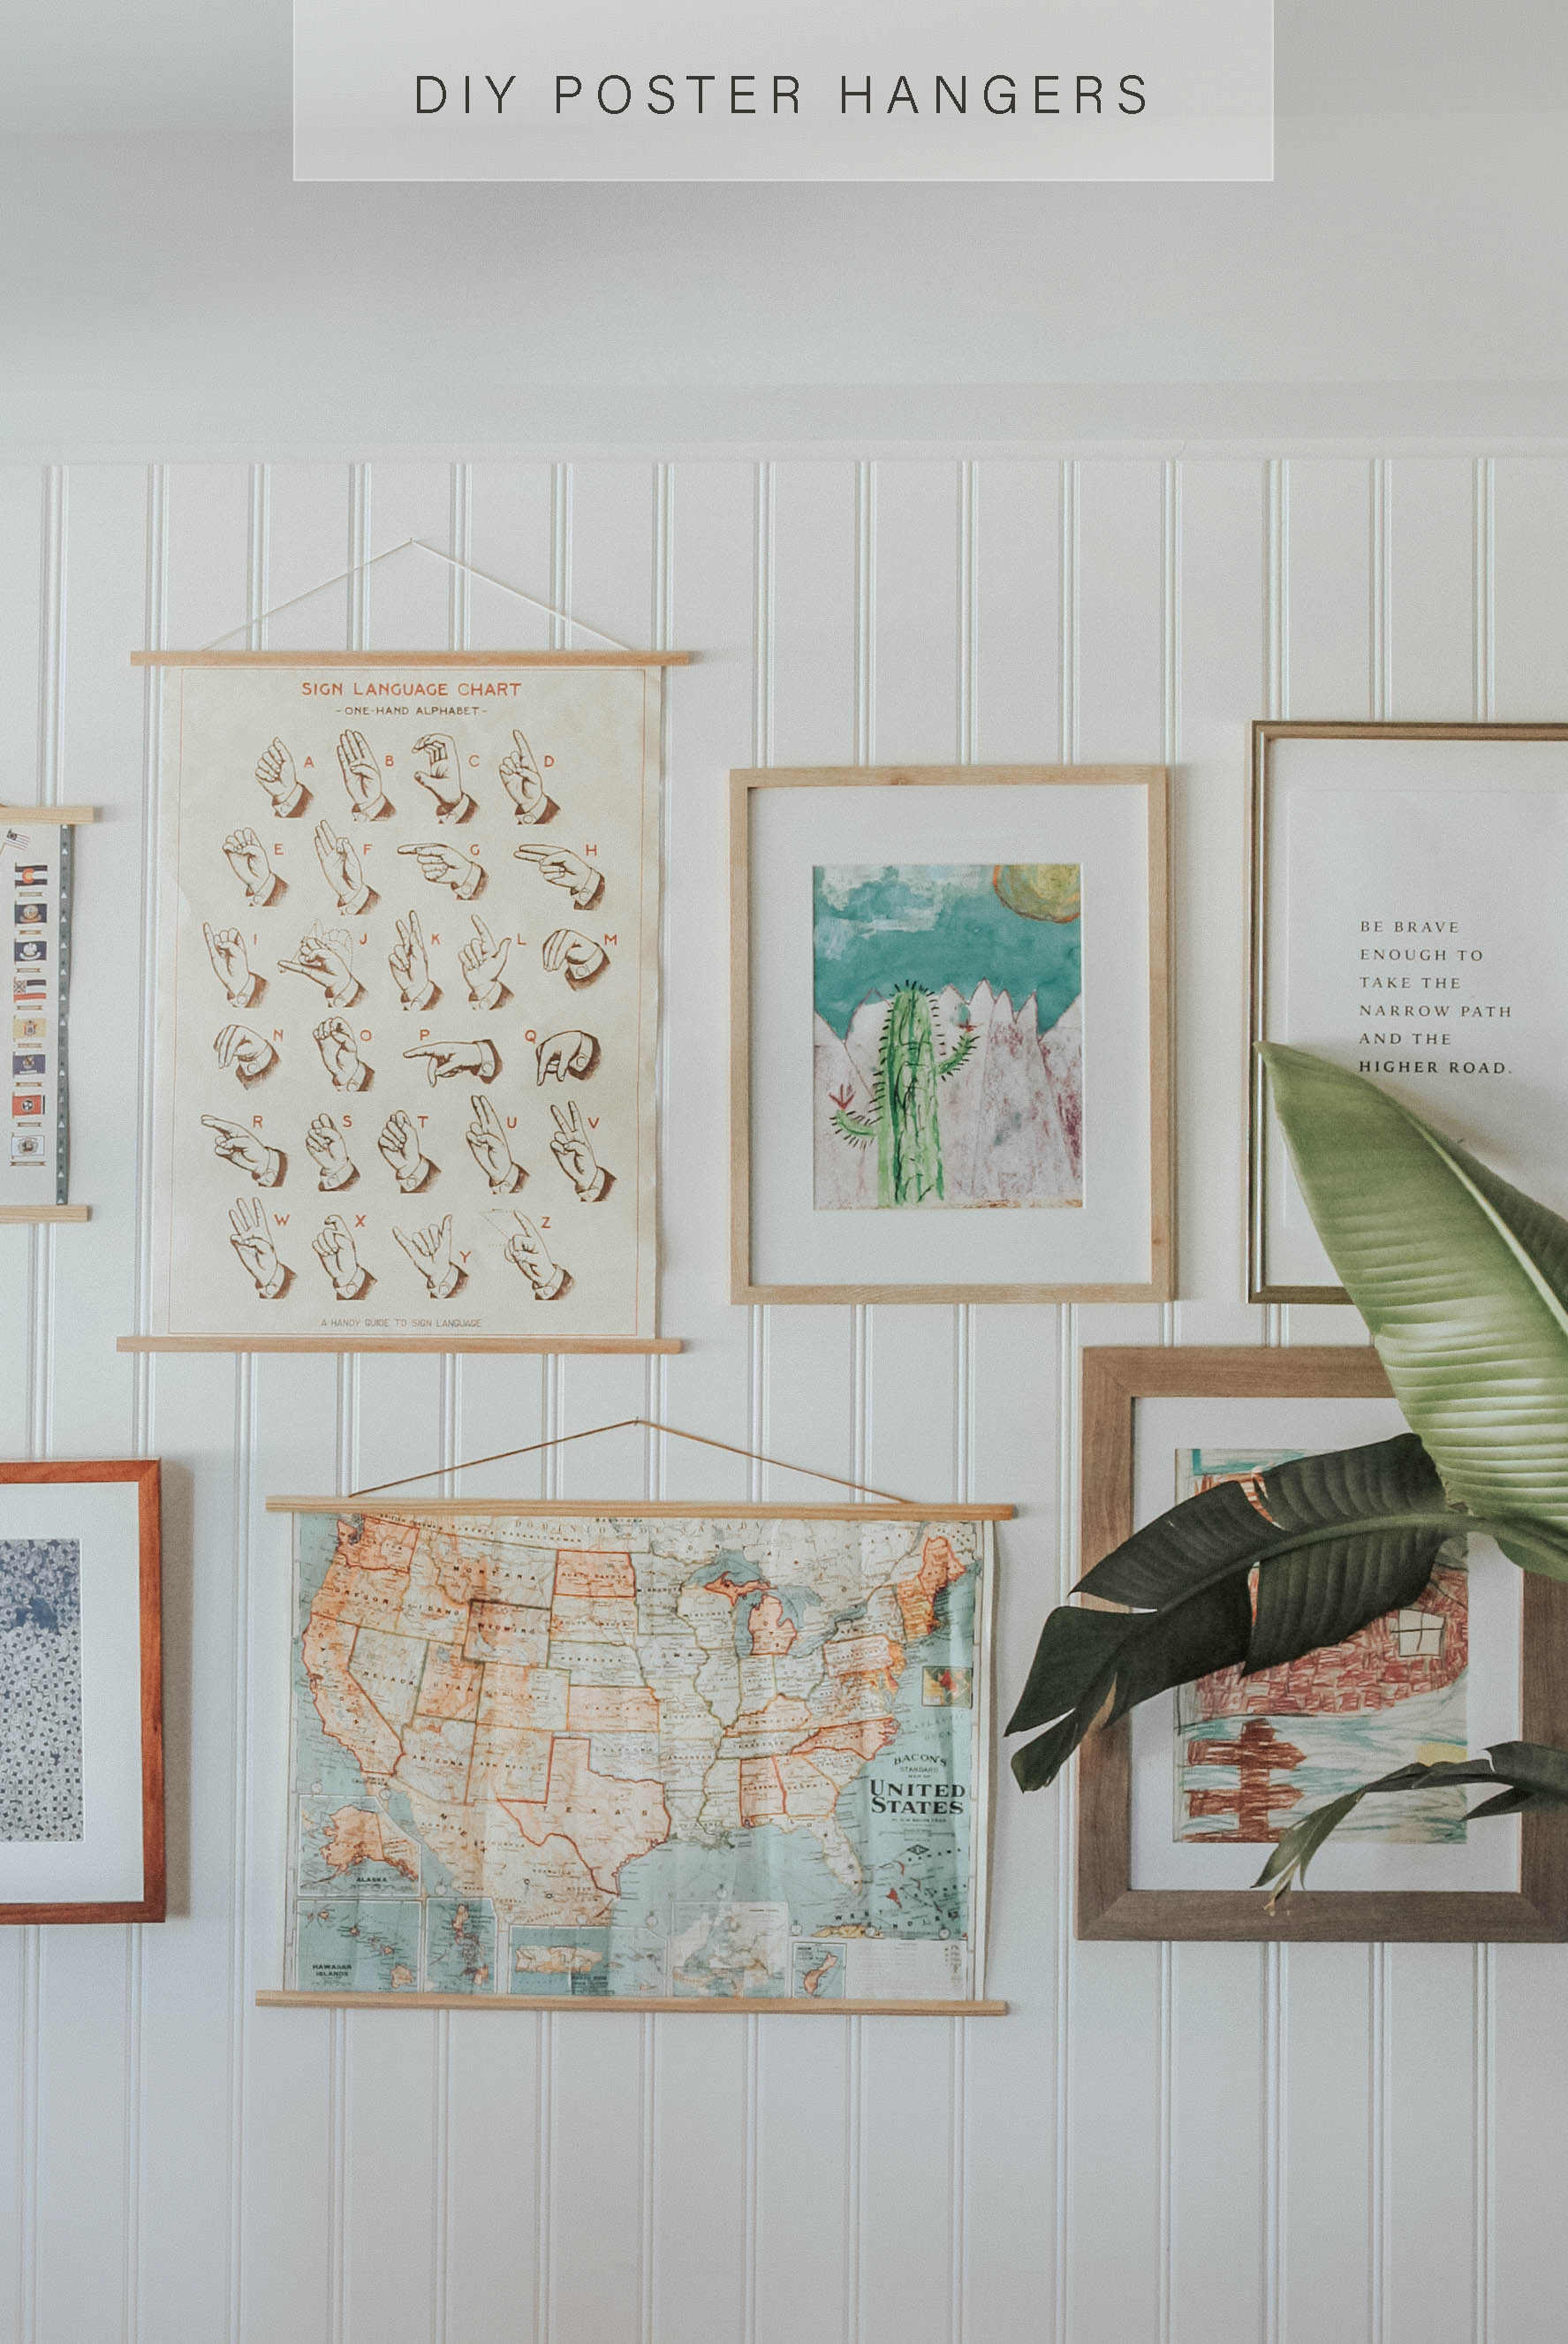
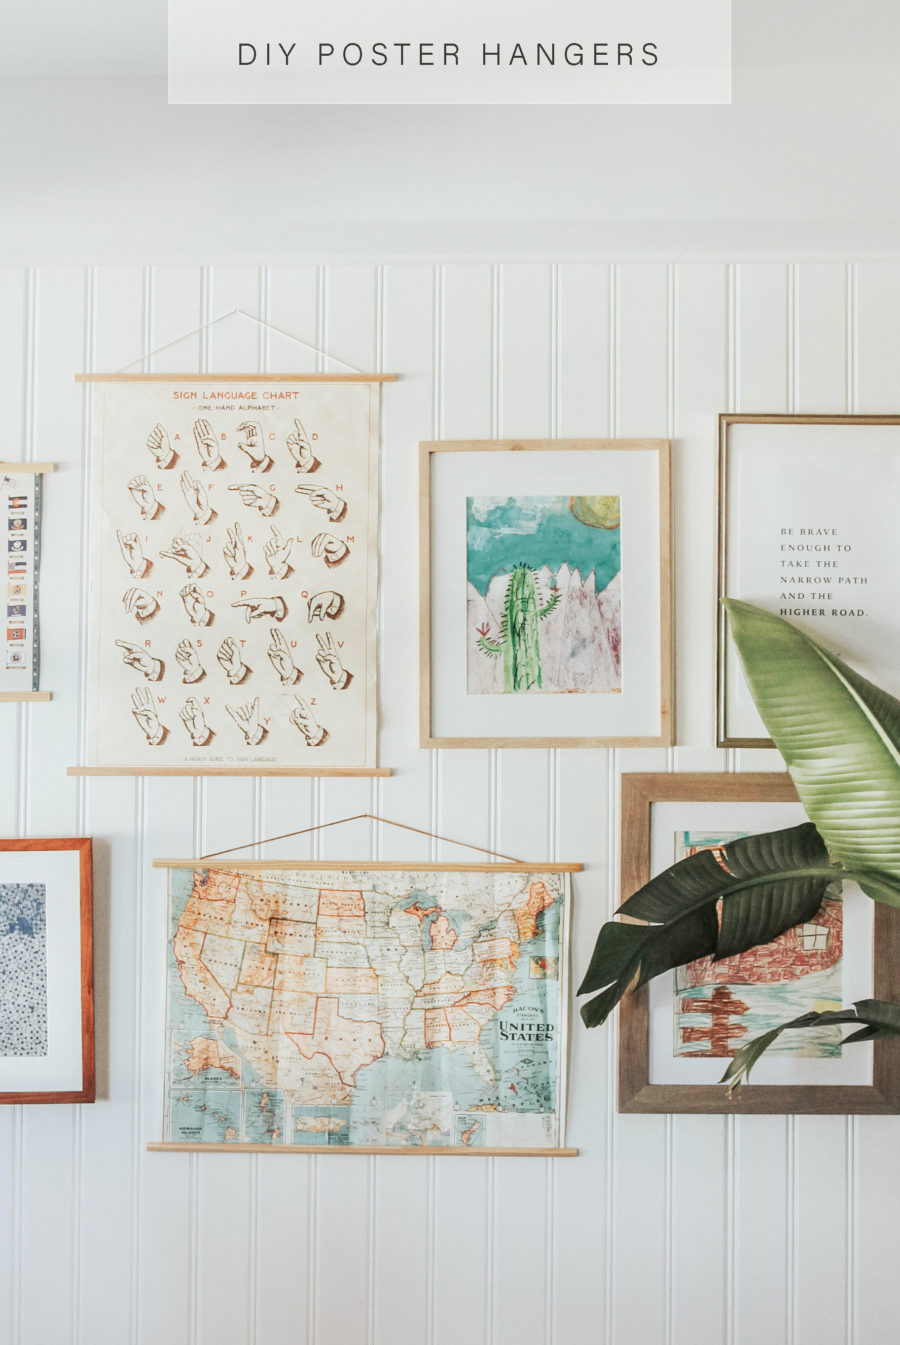
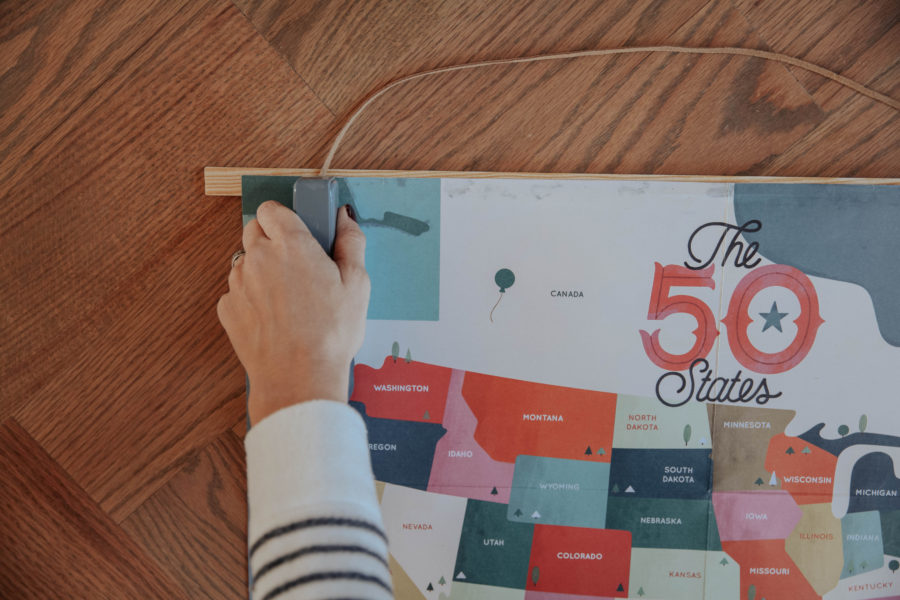
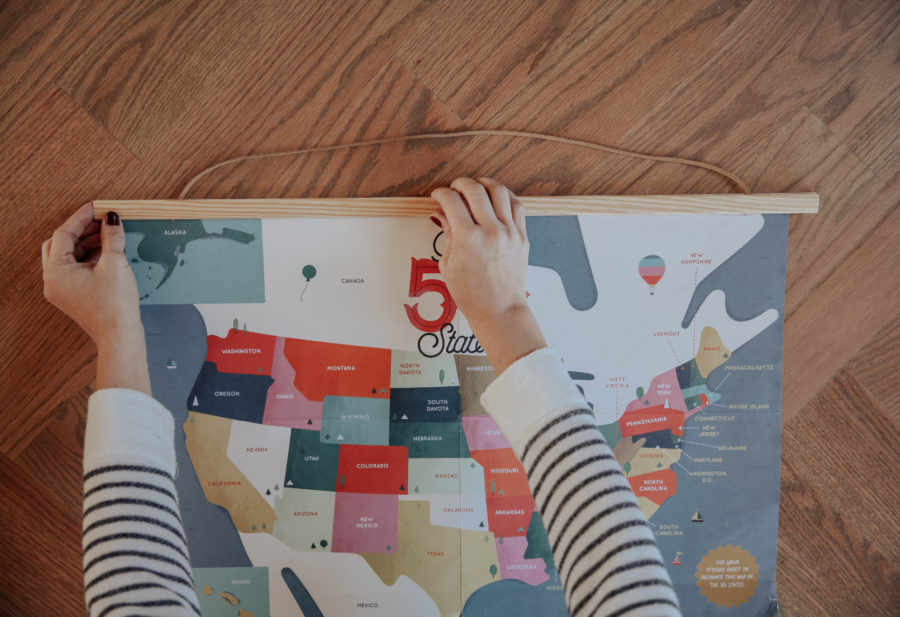
I was hunting for poster hangers for our boys room, and ordered a few options that were in the $12-$15 range. I thought it wasn’t bad compared to frames, but then Gabe comes in and says “you paid how much for these? I could make those for a couple bucks!” So I let him prove […]
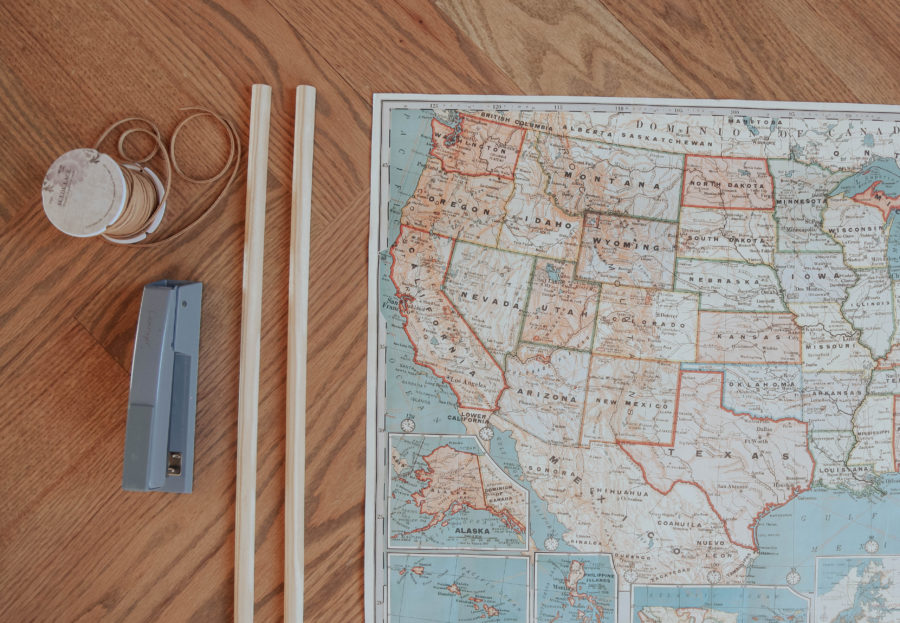
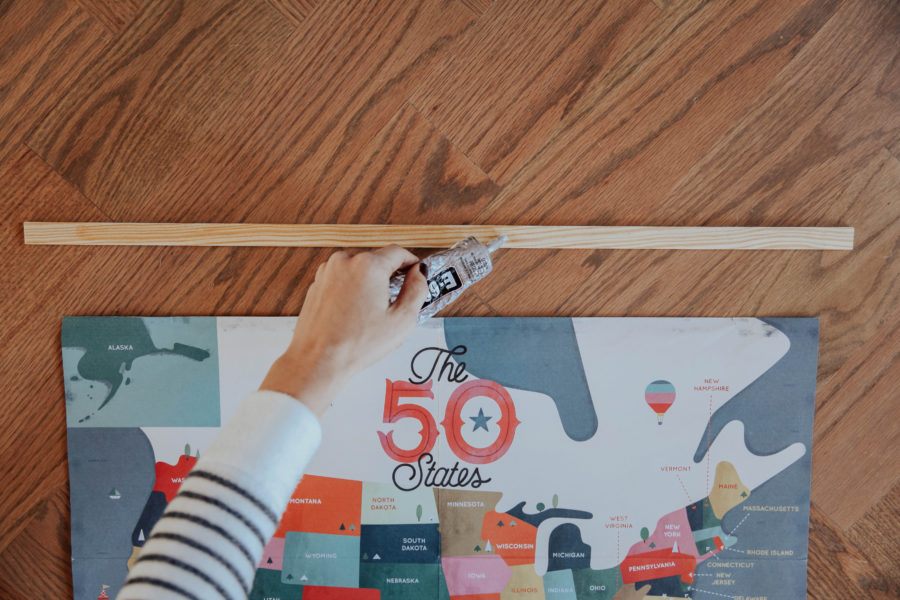
DIY Poster Hangers in 3 steps.
Current Projects ›
Other Updates ›
DIY Ideas ›
Renovation Updates
About Us
Shop
Design Guides
Family
Home diys
Renovations
Latest Projects ›
Popular Projects ›
How-tos ›
Home DIYs

DIY Poster Hangers in 3 steps.
About Us
Shop
Design Guides
Family
Home diys
Renovations
Outdoor Projects ›
Bedrooms ›
Kitchen ›
Living Room ›
Browse by Room

DIY Poster Hangers in 3 steps.

Organizational ideas ›
Activities & games ›
Family favorites ›
Family Updates ›
Family Resources


DIY Poster Hangers in 3 steps.
DIY Poster Hangers in 3 steps.
About Us
Shop
Design Guides
Family
Home diys
Renovations
Snacks & Desserts ›
Family Dinners ›
Hearty Lunches ›
Breakfast & Brunch ›
Recipes

LAtest guides ›
moodboards ›
resources ›
Design Resources
All Design topics ›

DIY Poster Hangers in 3 steps.
DIY Poster Hangers in 3 steps.
About Us
Shop
Design Guides
Family
Home diys
Renovations

Our Home Shop ›
favorite Buys ›
Gift Guides ›
Shop with IHOD
Trending Now ›


DIY Poster Hangers in 3 steps.
DIY Poster Hangers in 3 steps.
About Us
Shop
Design Guides
Family
Home diys
Renovations


Aww, I love the classic and minimal look of the hangers! Very comfortable on the eyes and goes well with green plants! 🙂
I love how simple it is to make posters into really chic decor! Thanks for this idea. I can’t wait to use it in my own place. 🙂
My husband and I tried making these over the summer, but it was for two pieces to go side by side that were the exact same size, and they were just a hair off and it looked awful and we wound up throwing it all away… it was so sad haha! I’ll have to try again with pieces that aren’t the same where it can be a little more forgiving!
What a great idea! I didn’t even think of this! Can’t wait to make some for our little one’s nursery!
Alli
says:Cool! Where do you like to get the posters?
Macie
says:Yay!! I was literally looking for a tutorial like this today, and you posted it in your Instagram story. I’ll be making ton of these soon!
Such a neat idea and so versatile. I guess the moulding strips can be painted to fit in with any decor, plus they’re lightweight so won’t risk pulling chunks out of the plaster. Thanks for sharing this!
Sarah
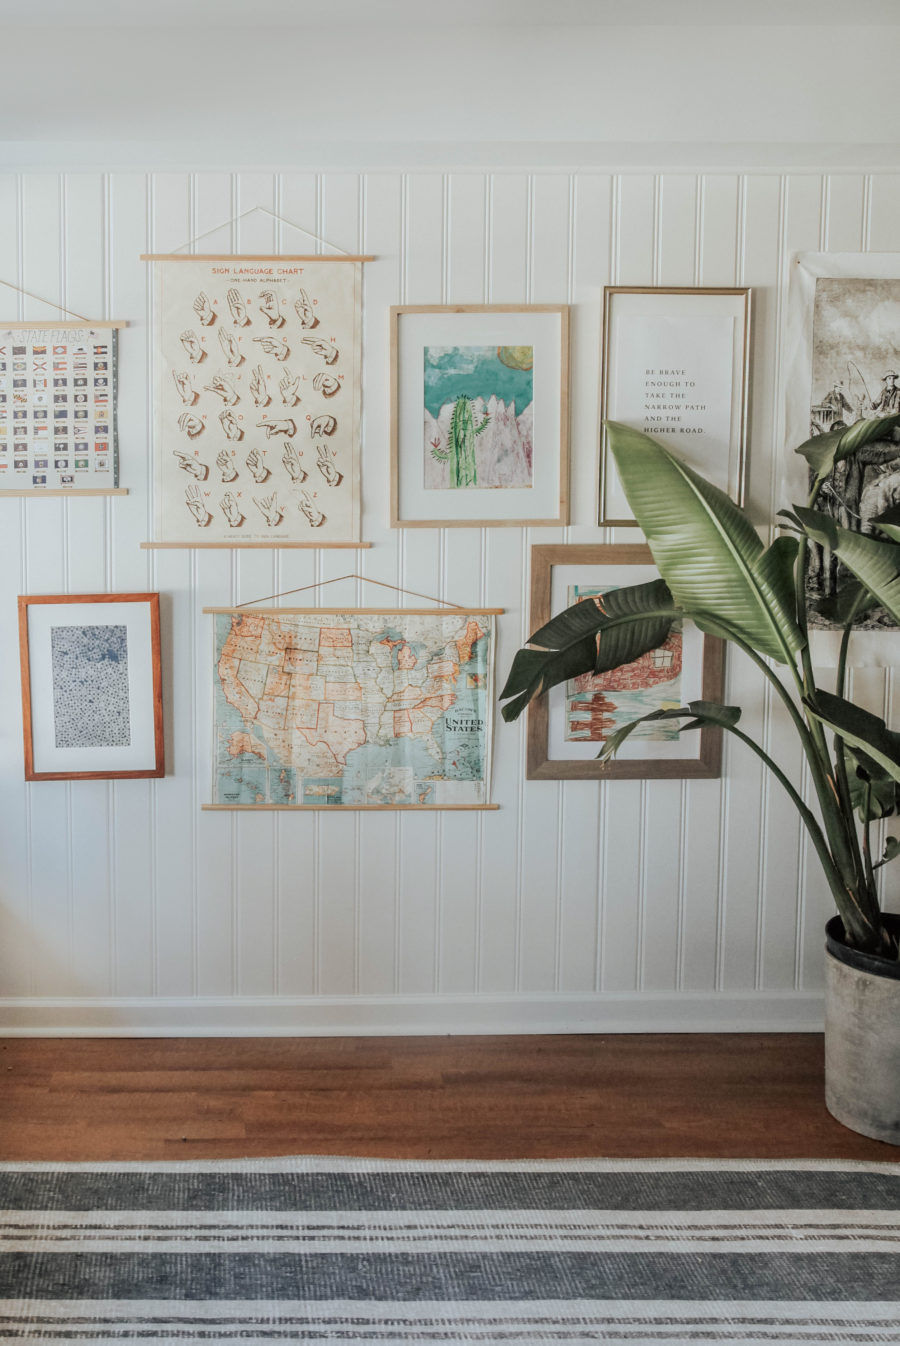
says:Where can I find that fantastic sign language chart?
Madeline Bazzle
says:I literally had the exact same experience when I bought one of these and my husband found out how much I paid, oops!