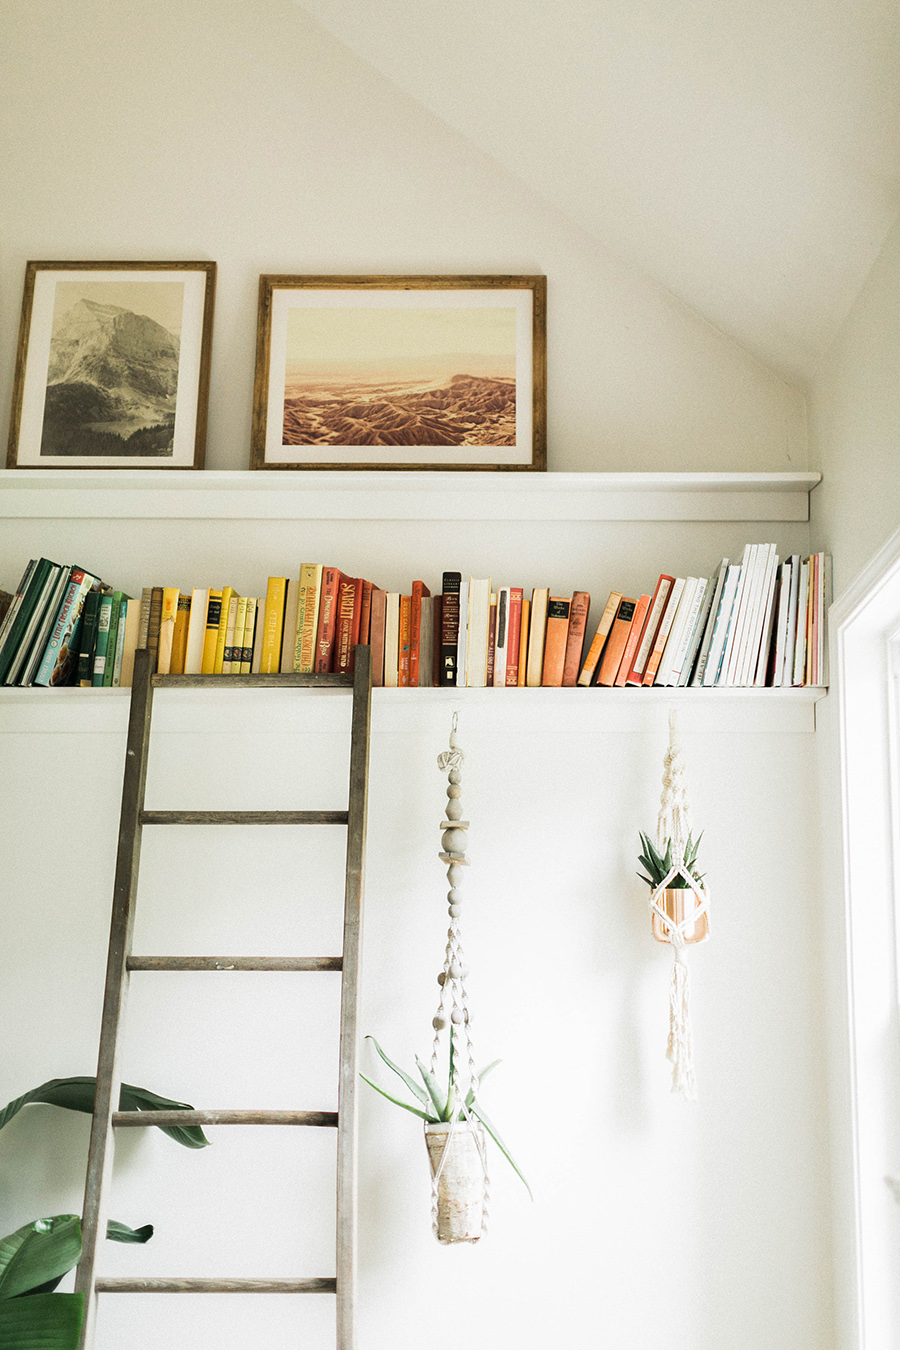
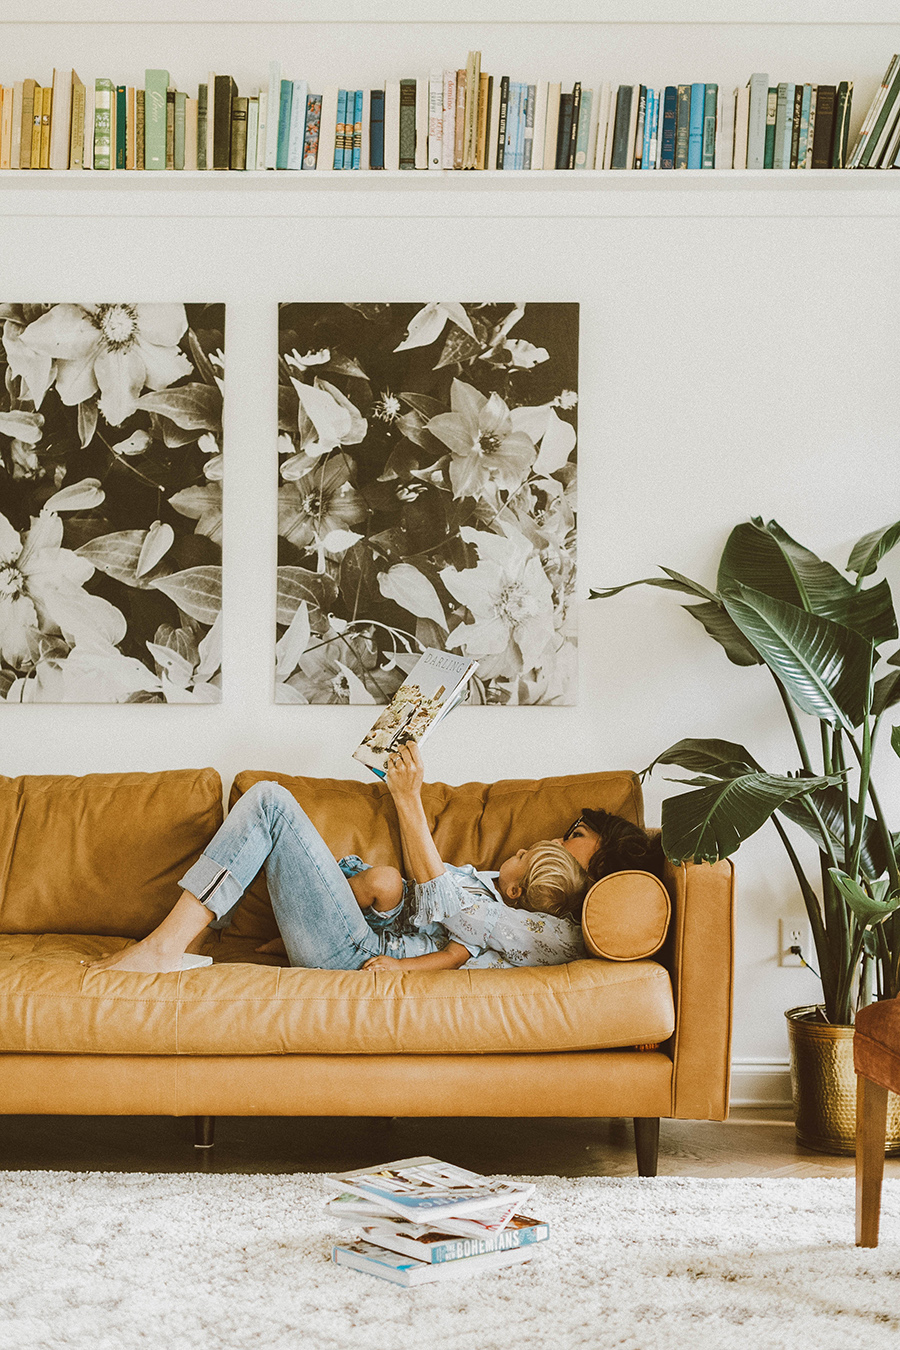
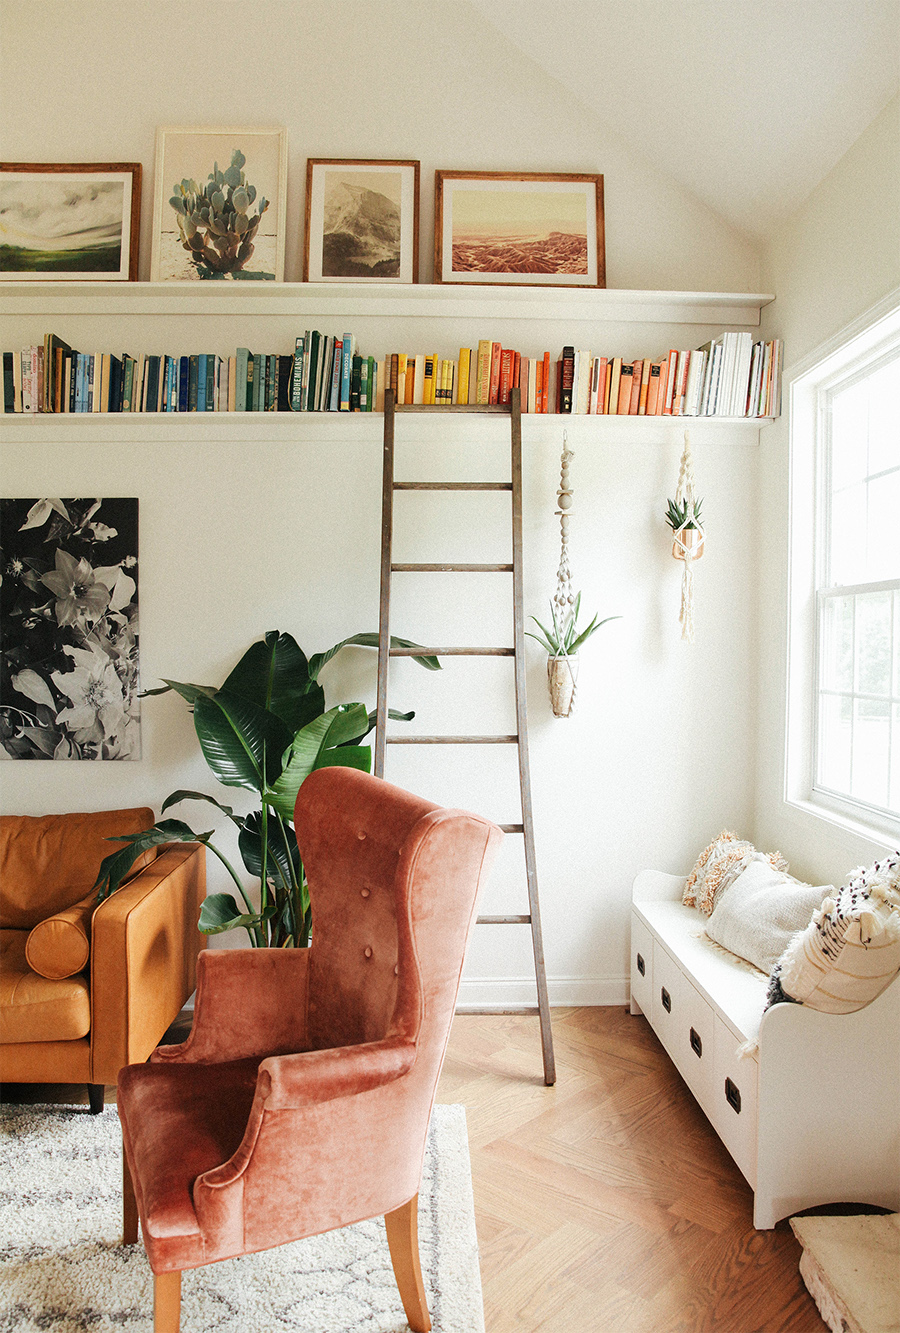
We’ve been meaning to share with you all how we created these large DIY picture ledge and DIY bookshelves, so Gabe is here today to explain his process for you to try on your own. Easier than you think! Don’t worry! I’m breaking this down in to simple steps so that even the most […]
We’ve been meaning to share with you all how we created these large DIY picture ledge and DIY bookshelves, so Gabe is here today to explain his process for you to try on your own. Easier than you think!
Don’t worry! I’m breaking this down in to simple steps so that even the most hesitant of you homeowners and renters can feel confidant in trying this out. If you have any questions we will answer them in the comments below!
MATERIALS Wood Glue (I love Titebond III)
1.25in or 1.5in wood screws or drywall screws
1×8 board
1×3 board Note on selecting your wood: When purchasing dimensional lumber always check the lumber for warping. Selecting the straightest possible boards makes for an easier build.
INSTRUCTIONS This is an easy build and a good introduction to basic wood craft. In a nutshell, all you are looking to do is securely mount the 1×3 to the underside of your 1×8 pieces of wood.
1. Start by cutting your boards to the desired shelf length. (Both the 1×8 and 1×3 boards should be cut to the same length.)
2. Lay your 1×8 down on a raised work surface (such as work bench or saw horses) and run a line of wood glue 1/2in from the edge nearest to you.
3. Place your 1×3 along the glue line and line up the edges of the two boards. Next Clamp the two boards together. To help ensure the two boards are at a 90 degree angle, you can clamp wood blocks in the inside joint of your two boards, or simply use a corner clamp at each end of the shelf.
4. To prevent the wood from splitting, pre drill the screw holes using a 1/16in, 5/32in, or 1/8in drill bit.
5. Now that the shelf has been glued and clamped, flip the shelf over so that the 1×3 is on the underside of your 1×8. Use your wood or drywall screws to further secure the boards together by driving them through the 1×8 into the 1×3. I like to space the screws roughly 15 to 18 inches apart.
6. Once the screws have been inserted, remove the clamps and wipe up any glue that was squeezed out of the joint. I like to sand down all corners to give the shelf a cleaner/softer look.
At this point your shelf is ready to paint or stain, just be sure the glue has dried.
HANGING THE SHELVES We hung our shelves using two different methods.
1.The first shelf we hung by using French cleats secured directly into your wall studs. This method is beneficial if you are placing light weight objects on your shelf, and you do not want to have your shelf permanently hung.
2. The second shelf we hung by securing the shelf directly to the wall studs by drilling through the lower board of the shelf. This requires you to fill in the screw holes with a filler then paint over the holes if you do not want them visible. This method allows you to place much more weight on the shelves, but is more of a permanent mount on the wall.
If you give this a try, be sure to show us your work! We love seeing these projects in your homes. Go get ’em tiger!
We send out helpful tips and resources, and inside news just for our email fam.
I love the idea of high open shelving. I always have problems in storing books. But our landlord won’t let us drill the wall at the moment, so we put off the idea. I love how you arrange your books.
love this, and planning something similar in our great room. did you create a groove on the shelving to keep your leaning frames from slipping? thanks!
HI Anna! Thanks for the detailed instructions! We are moving to a new place here in Munich in January and i definitely want to replace out current picture wall with a picture ledge. Pinning this article to save the tips! 🙂
AHHHH! I’ve been wanting to something just like this! Thank you for the detailed instructions — my husband isn’t handy so I might be trying this myself 🙂 Do your kids try to climb the ladder or do you move it when you aren’t using it?
Curious how long your boards ended up being(?) Our wall is 19′ and we’ve only been able to find 16′ boards so far. Considering doing two sections–any tips for breaking up the length?
I have long wanted exactly this. Only, I want my shelves just above eye level all around my studio apartment. I want my books accessible. Looking for a handyman to do this for me.
These shelves are so beautiful! Can I ask what the spacing is between the bottom shelf and your sofa, and between the two shelves (height wise)? And where did you get your hanging plants? It all looks so lovely!
Hello,
We love this idea and would like to replicate it in our apartment. Curious to if you made the ladder or bought it? We were thinking about buying ikea shelving and re-creating this look!
My partner and I plan to recreate these shelves in a few weeks 😍 we might even do 3! So excited to see this come to life, thank you so much for posting how to do this!
Love this! I’m curious how strong this ended up being – it’s been a few years, are they still up? I desperately need some book storage, so I can get my books out of boxes in the basement, and I think this would be perfect across the short wall of our living room.


I love the idea of high open shelving. I always have problems in storing books. But our landlord won’t let us drill the wall at the moment, so we put off the idea. I love how you arrange your books.
This ledge is beautiful! And I love how you styled it!
Paige
http://thehappyflammily.com
What a gorgeous DIY! I love this!
love this, and planning something similar in our great room. did you create a groove on the shelving to keep your leaning frames from slipping? thanks!
HI Anna! Thanks for the detailed instructions! We are moving to a new place here in Munich in January and i definitely want to replace out current picture wall with a picture ledge. Pinning this article to save the tips! 🙂
Great tipps. It looks wonderful. Thank you!
AHHHH! I’ve been wanting to something just like this! Thank you for the detailed instructions — my husband isn’t handy so I might be trying this myself 🙂 Do your kids try to climb the ladder or do you move it when you aren’t using it?
Guinevere
says:Curious how long your boards ended up being(?) Our wall is 19′ and we’ve only been able to find 16′ boards so far. Considering doing two sections–any tips for breaking up the length?
Sarah
says:I have long wanted exactly this. Only, I want my shelves just above eye level all around my studio apartment. I want my books accessible. Looking for a handyman to do this for me.
Laura
says:These shelves are so beautiful! Can I ask what the spacing is between the bottom shelf and your sofa, and between the two shelves (height wise)? And where did you get your hanging plants? It all looks so lovely!
Margaret Schmitt
says:This is beautiful! Absolutely love how you styled it. What type of wood did you use, and was it treated or finished at all?
Lauren
says:Hello,
We love this idea and would like to replicate it in our apartment. Curious to if you made the ladder or bought it? We were thinking about buying ikea shelving and re-creating this look!
Emily
says:My partner and I plan to recreate these shelves in a few weeks 😍 we might even do 3! So excited to see this come to life, thank you so much for posting how to do this!
Lindsay
says:Love this! I’m curious how strong this ended up being – it’s been a few years, are they still up? I desperately need some book storage, so I can get my books out of boxes in the basement, and I think this would be perfect across the short wall of our living room.
Claire
says:It looks amazing! I am going to try it. Where did you get your wooden picture frames?