I’ve mentioned before how one of the main reasons we bought this home was because of the big backyard. There is a two-tiered patio that overlooks the yard, and while we loved the setup, the boards were starting to warp and snap in some places from age. We knew we needed to replace them, […]
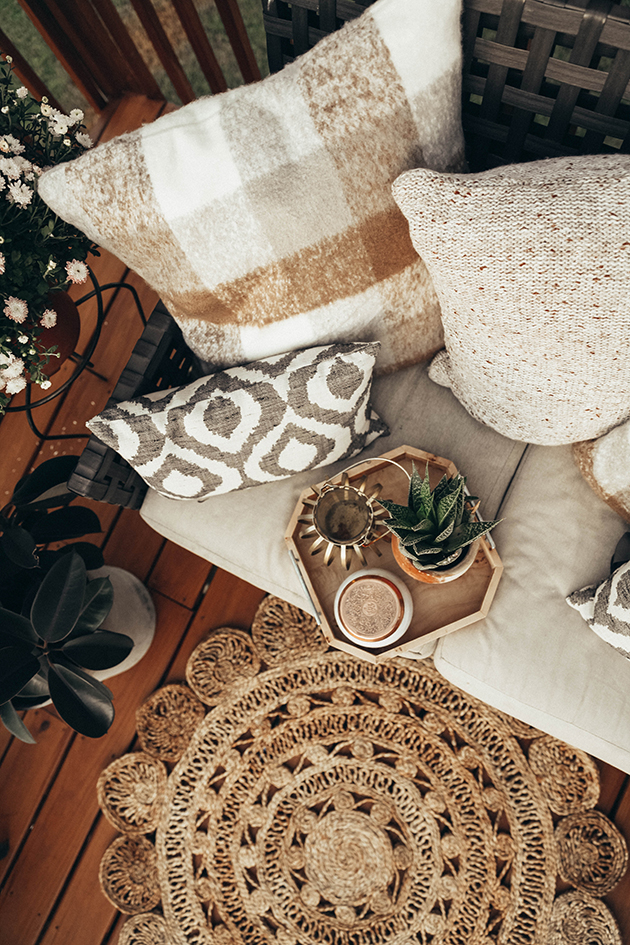
I’ve mentioned before how one of the main reasons we bought this home was because of the big backyard. There is a two-tiered patio that overlooks the yard, and while we loved the setup, the boards were starting to warp and snap in some places from age. We knew we needed to replace them, so this became one of Gabe’s first big projects to tackle this summer. So today we are sharing the before and after deck remodel from replacing boards all the way to the styled seating finish.
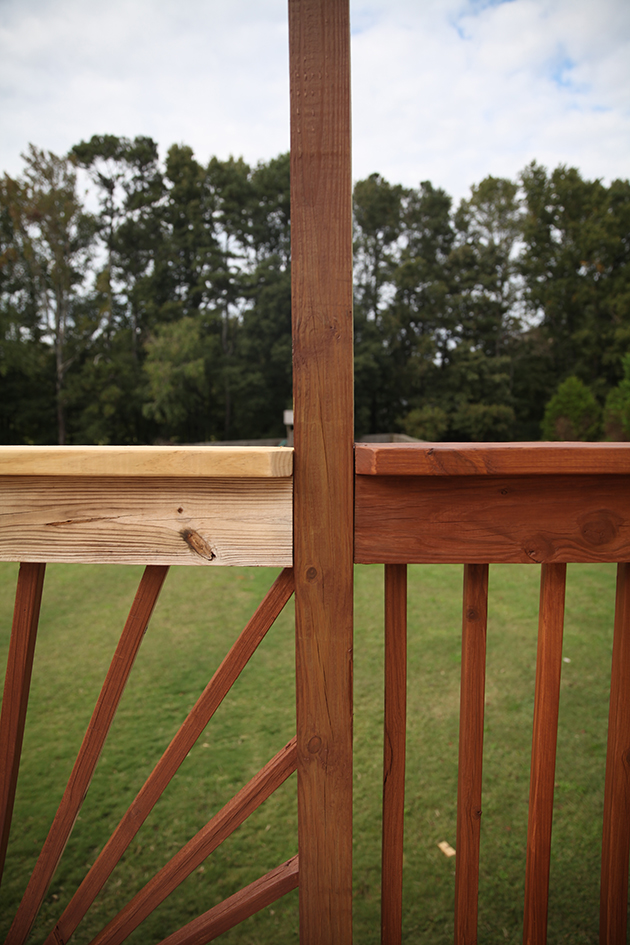
Rebuild Process We started by removing all of the top boards of the railings, and washing the wood we would keep with Thompson’s WaterSeal 3 in 1 Wood Cleaner. This did a fantastic job of cleaning and restoring the wood to its original color, providing the perfect clean base for us to apply wood stain later on.
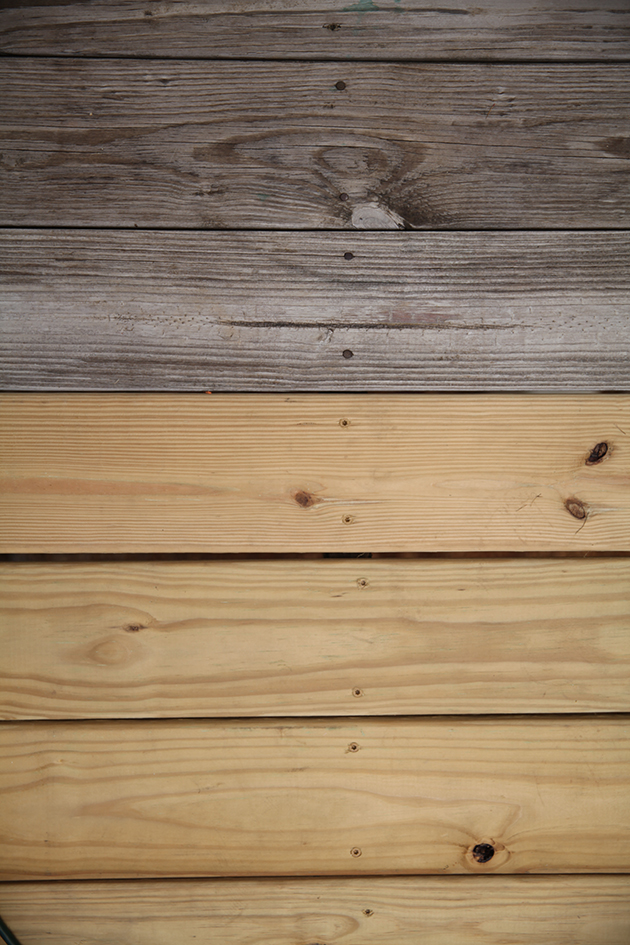
The floorboards have never been treated, so after 15 years of rain and the Georgia summer sun, they were in rough shape. We worried about sagging boards and splinters in little feet, so we opted to replace nearly all of the floorboards. This time, we plan on protecting our deck with an all-in-one stain & sealer that provides long-lasting protection from water and sun damage so that with a little maintenance, we won’t have to replace the deck boards again!
Thankfully, our deck is tall enough that Gabe could walk underneath and pop the old boards up with a sledgehammer. This method was much easier than prying each board up from above. We replaced the floorboards with 1×6 pressure treated pine, and replaced the top of each step with 2×6 pressure treated pine.
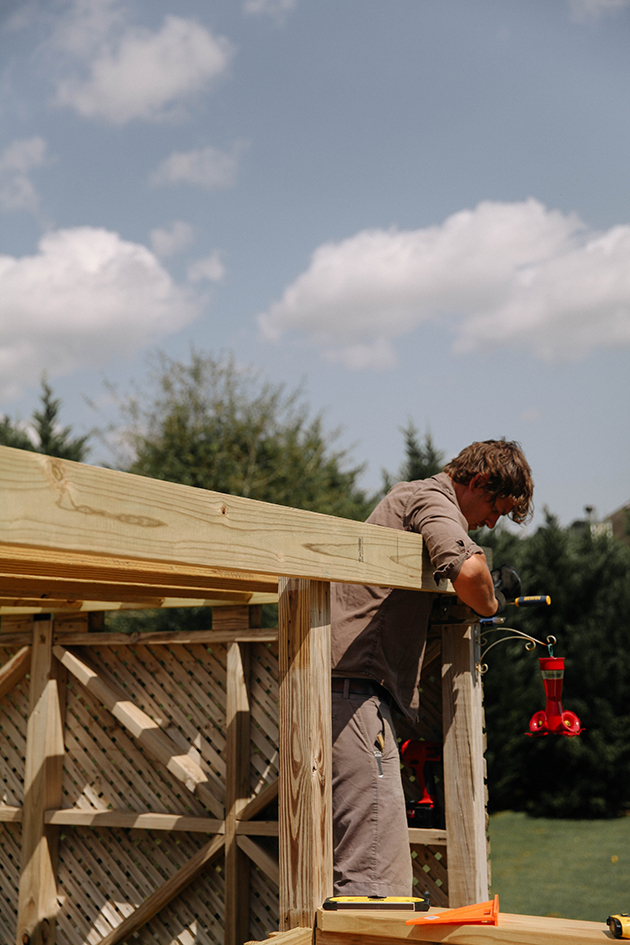
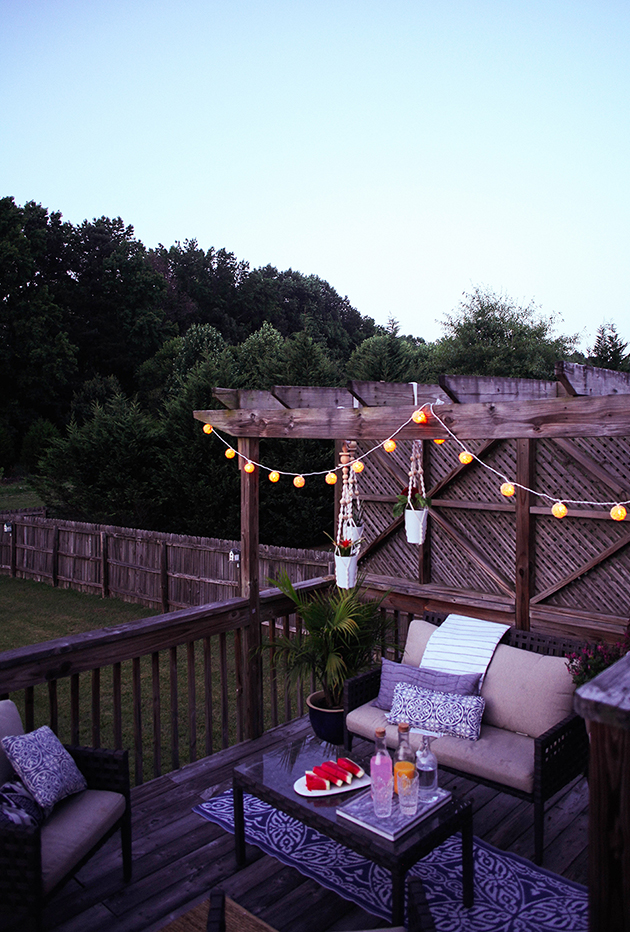
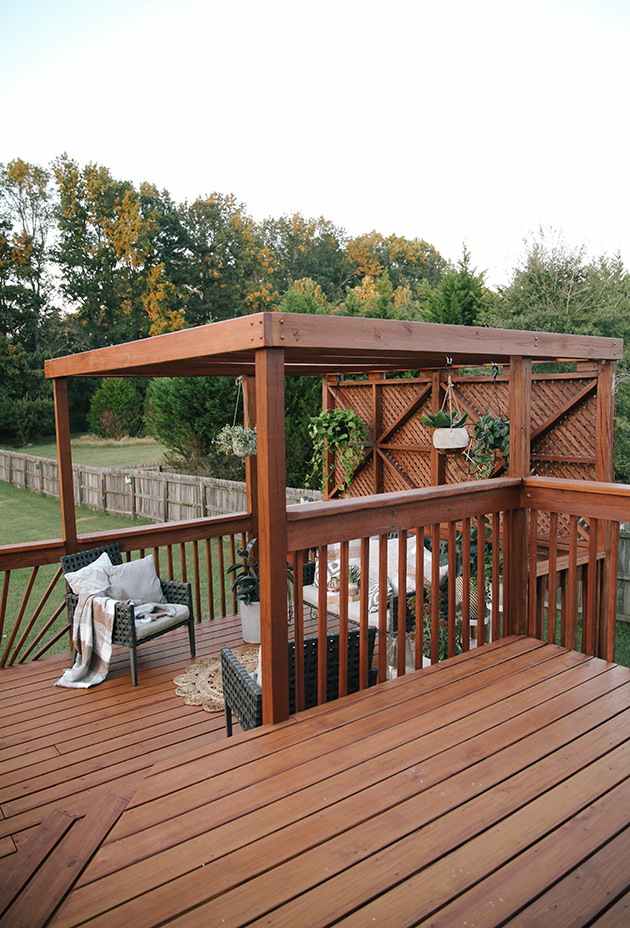
We love our pergola, so since some of those boards were splitting as well, we decided to start over from the top and build it out 7 feet longer for more shade. We built a standard frame pergola and came up with a slanted board design for the top. More on that soon!
Staining process
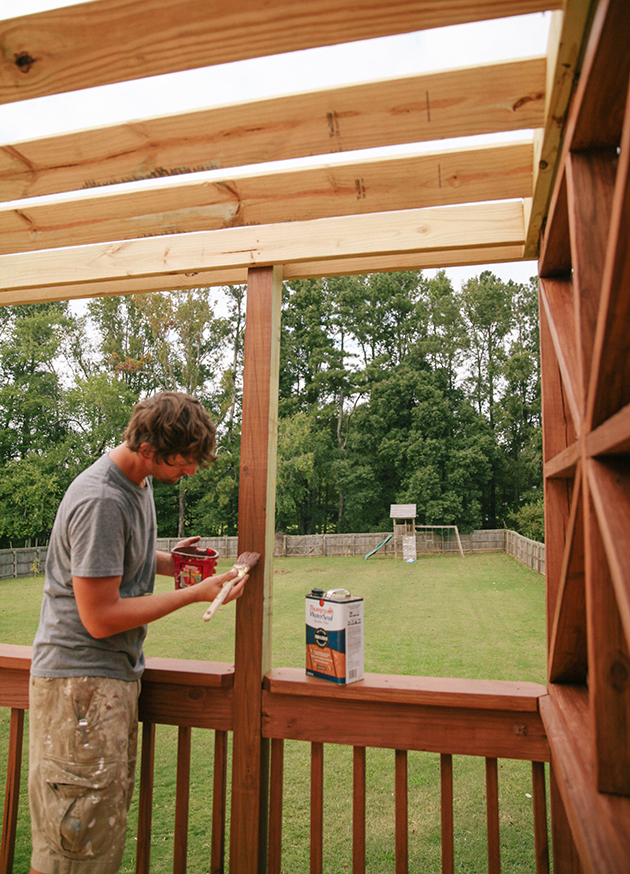
After the re-build process was finished, we stained the entire deck with Thompson’s WaterSeal Signature Series Transparent Stain & Sealer in Autumn Brown. It’s formulated to add just the right amount of beautiful color and enhance the wood grain, all while protecting the surface from water and sun damage for years to come. The product can be applied with a compression driven sprayer, paintbrush, paint pad, or roller. We chose to start by applying the stain to the spindles, railings and pergola with a brush.
Tip: When using a brush to apply the stain, move in long, smooth strokes that follow the grain of the wood, and be sure to work the stain into any cracks or crevices that may be present. Never reverse direction of the brush while the bristles are in contact with the wood as this will spray stain in all directions, and it may cause an uneven coat. Instead, always gently lift the brush as you finish your brush stroke. Remember that long, smooth brush strokes are the key to an easy, even finish.
Next, we swept the deck to remove all debris, and applied the stain to the floorboards using a deck stain pad attached to a painter’s pole. Simply fill a roller pan or paint pan with stain, dip your pad in, and run it along the length of the deck board. Some pads even have a built-in groove tool that allows you to stain between boards as you stain the top. Just like when using the brush, a long smooth motion will help ensure that the stain is applied evenly. Thompson’s WaterSeal Signature Series Transparent Stain & Sealer was so easy to work with—it only required one coat and was quick and easy to clean up. We love the rich Autumn Brown color and the way it enhanced the wood grain.
One of the best features of this stain is that it protects your deck from sun and water damage. We have noticed in the mornings when the dew covers the deck, the water beads up and doesn’t penetrate the wood, which is so cool! After putting so much work into replacing the boards, we are relieved that this stain will keep it protected for years to come!
(before)
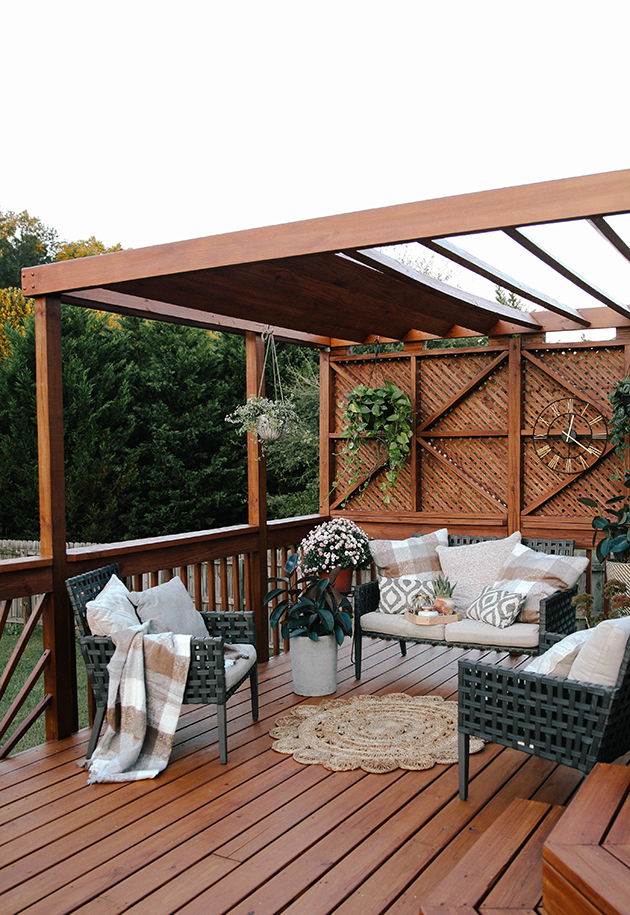
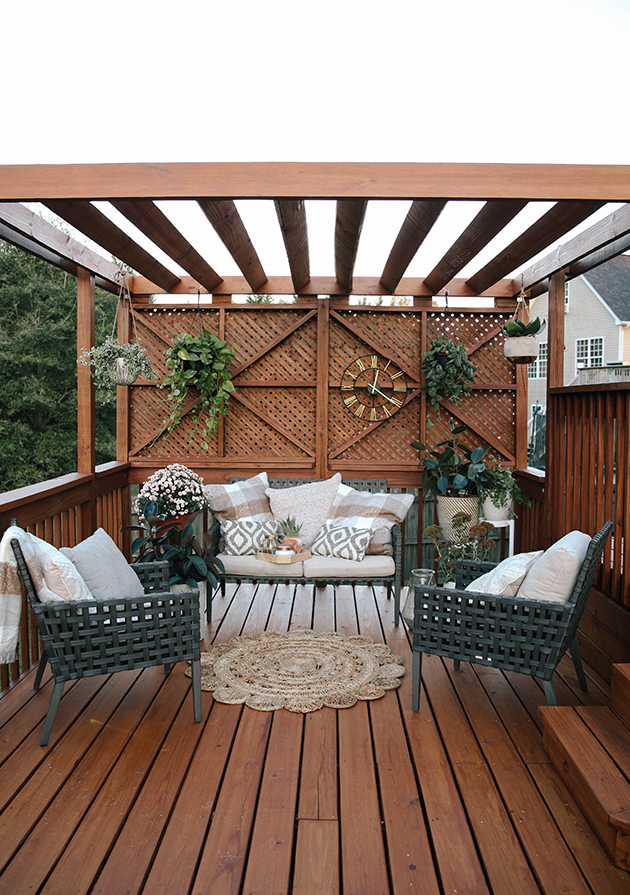
(after)
We are also hoping to slowly grow foliage over the top of the pergola, and cannot wait to see what it looks like a year from now.We are really looking forward to spending more time here this fall, which is one of Atlanta’s best weather periods of the year!
*Thank you Thompson’s WaterSeal for sponsoring this post. All opinions are our own.
We send out helpful tips and resources, and inside news just for our email fam.
Your patio makeover and the pergola look beautiful! The stain looks really good! We just moved into our house with a pergola as well and I’m excited to see what foliage you grow over yours! You have also inspired me with the part of the pergola with the wall. Next summer we plan on adding a wall to ours for more privacy. Beautiful makeover!
My husband would like to get tips from the blogs over Google on how he able to fix the back patio. He wanted to have a makeover soon. I read the whole tips from your blog. Thank you for the tips.
Can you tell me if the posts of your pergola start at the floor of the deck? Or are they from the ground up? We have a deck and want to build a pergola and yours is my inspiration!
I found this article really helpful, This is awesome blog, which gives us the wonderful ideas. I have learnt many new things from here. Looking forward to finding out more and acquire further knowledge from here!
Are there outdoor patio string lights that you recommend? I’ve seen several online with mixed reviews. Love the Edison bulb look, but ultimately want the best quality (brown cord preferred) and need to be able to connect at least 100ft.
One other question, how do you control webs and spiders on your outdoor furniture?


You two are so passionate and talented at makeovers. I love the patio. It looks so comfortable!
Charmaine Ng | Architecture & Lifestyle Blog
http://charmainenyw.com
Your patio makeover and the pergola look beautiful! The stain looks really good! We just moved into our house with a pergola as well and I’m excited to see what foliage you grow over yours! You have also inspired me with the part of the pergola with the wall. Next summer we plan on adding a wall to ours for more privacy. Beautiful makeover!
It looks soooo amazing ❤️❤️
Kate
says:it looks so great! So warm and inviting!
This is SO beautiful!!
I absolutely love the cozy little seating area you guys created! The new pergola and the stain are gorgeous. Perfect for hanging planters!
This is an amazing DIY project. I really love this patio. It’s lovely.
I loved your deck makeover! It looks warm, comfortable and the kind of place I’d like to be. Well done!
I love DIY articles! You guys did a great job and I love the privacy wall. You might as well be pro deck builders!
My husband would like to get tips from the blogs over Google on how he able to fix the back patio. He wanted to have a makeover soon. I read the whole tips from your blog. Thank you for the tips.
Catie Stockdale
says:Can you tell me if the posts of your pergola start at the floor of the deck? Or are they from the ground up? We have a deck and want to build a pergola and yours is my inspiration!
I found this article really helpful, This is awesome blog, which gives us the wonderful ideas. I have learnt many new things from here. Looking forward to finding out more and acquire further knowledge from here!
Your progress in writing such informative post is appreciative. Wonderful work!
Great! Thanks for sharing the wonderful information with us.
Great post, I appreciate you and I would like for sharing this useful information.
Christine Speedon
says:Are there outdoor patio string lights that you recommend? I’ve seen several online with mixed reviews. Love the Edison bulb look, but ultimately want the best quality (brown cord preferred) and need to be able to connect at least 100ft.
One other question, how do you control webs and spiders on your outdoor furniture?
Thanks!!
Christine
Thanks again for the article post.Really looking forward to read more. Great.
Beautiful patio transformation! The new furniture and decor create a cozy, inviting space for outdoor relaxation.