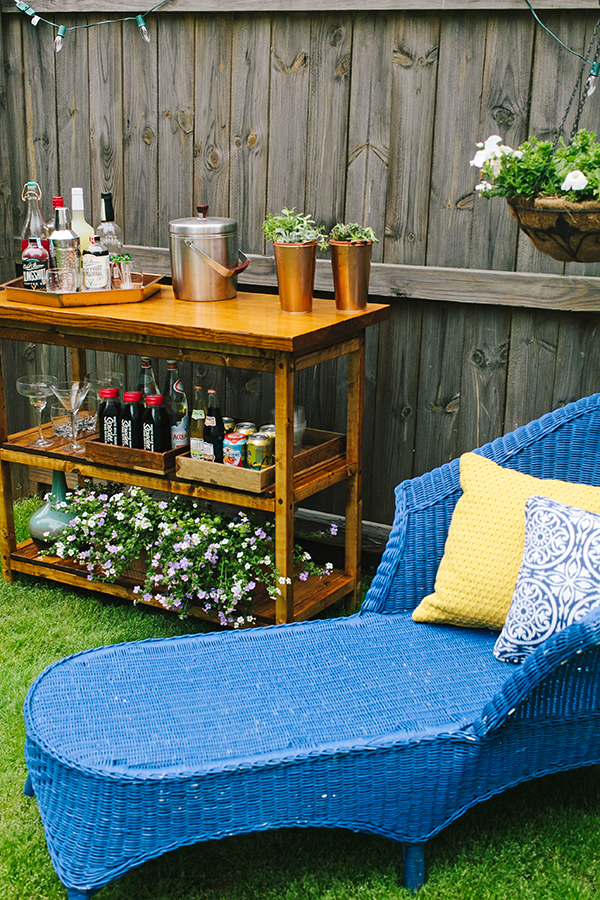
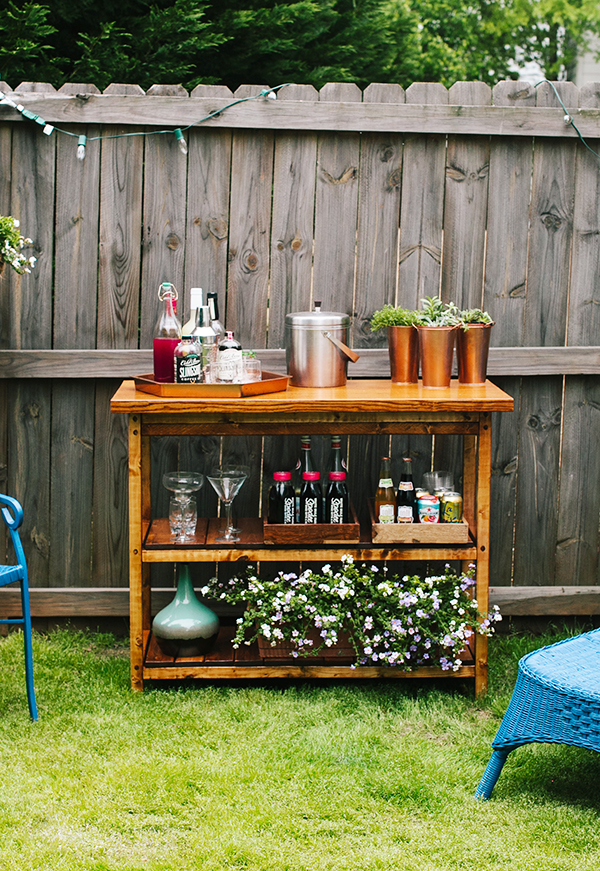
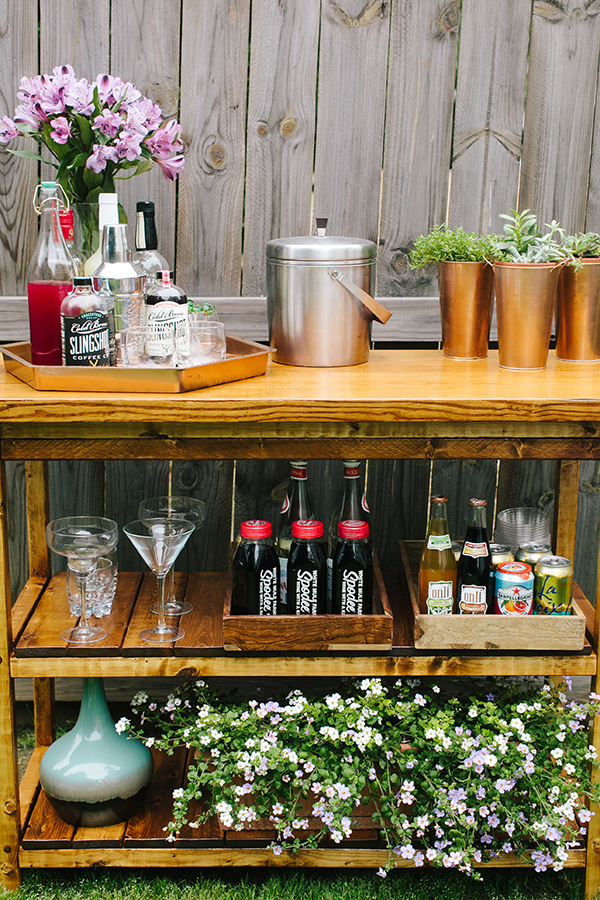
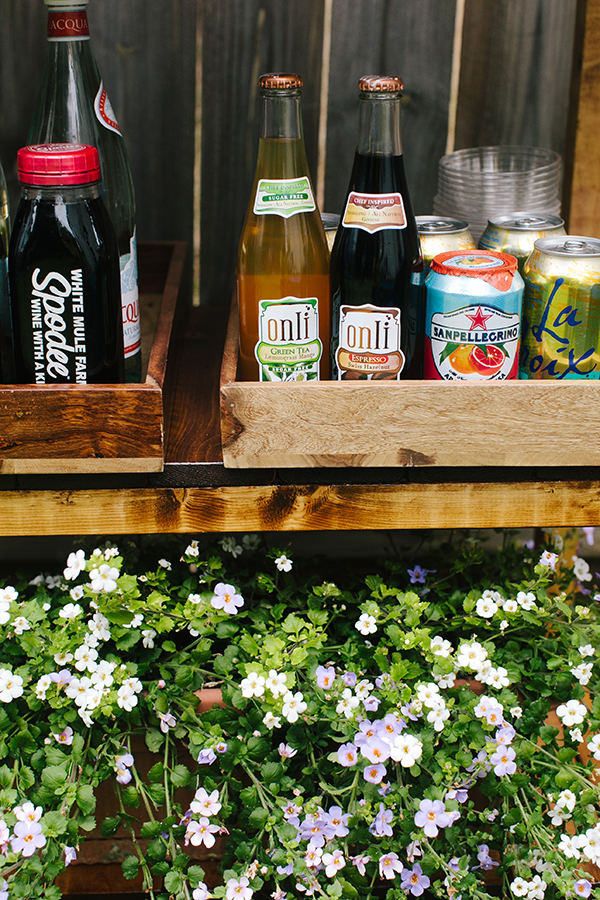
Outdoor bar table/bar cart How-to So as Anna mentioned yesterday, I am taking over for the day for a little woodworking lesson. Technically speaking this is a stationary table. What is good about the design and materials is that it can easily be turned into a cart by shortening the legs and slapping the wheels […]
So as Anna mentioned yesterday, I am taking over for the day for a little woodworking lesson. Technically speaking this is a stationary table. What is good about the design and materials is that it can easily be turned into a cart by shortening the legs and slapping the wheels of your choice on the bottom.
This may seem like a complicated process at first glance, but it is surprisingly simple and can easily be complete by a novice at woodworking. This was my first furniture project designed and built from the ground up, and I would in no way consider myself highly skilled in woodworking. As such, it is an ideal project for a first timer, especially considering the relatively low cost.
In addition you can use this same design to create your own coffee table by simply subtracting one shelf and shortening the legs.
Required Materials 1 box 1⅝in screws
1 box 1¼in screws
1 box ½in hardwood plugs
4 1x4x8 boards
6 2x2x8 boards
1 2x12x8 board
1 can of stain
1 can of varnish
Total cost: under $70 – all boards are standard “whitewood” (southern pine)
Suggested tools Power drill
Phillips screw driver bit
½in spade bit
3/32in drill bit
coarse sand paper
saw (table or miter works best but any saw will do, including a hand saw)
3 or 4 clamps (I prefer Bar or C clamps)
hammer or mallet
wood glue (not required but suggested)
1. Select wood
No pressure treated wood. It is critical to select the straightest possible boards. Also take notice of the moisture in the wood. If it is noticeably wet at the time of purchase it may warp upon drying.
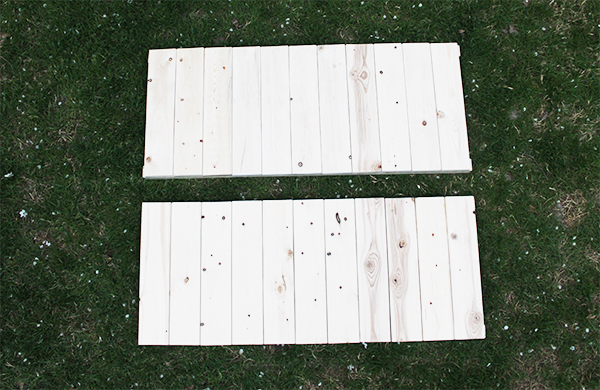
2. Cut wood
Halve the 2x12x2 at the store – remeasure once these are brought home as they may require slight trimming to make even. I like to rip about ¾ of an inch lengthwise off the joint side of these boards so they fit cleaner, but this is not necessary if you don’t have the equipment.
8 – 38in 2×2’s (sides of frame and shelves)
4 – 34½in 2×2’s (legs)
8 – 1 ¾in 2×2’s (sides of frame and shelves)
22 – 15⅝in 1×4’s (slats for the shelves)
After cutting, sand down the cut edges slightly.
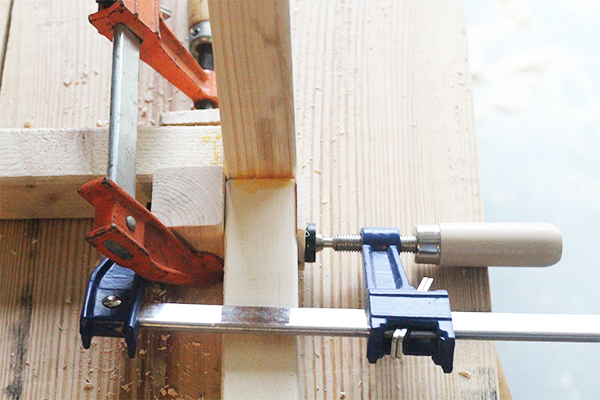
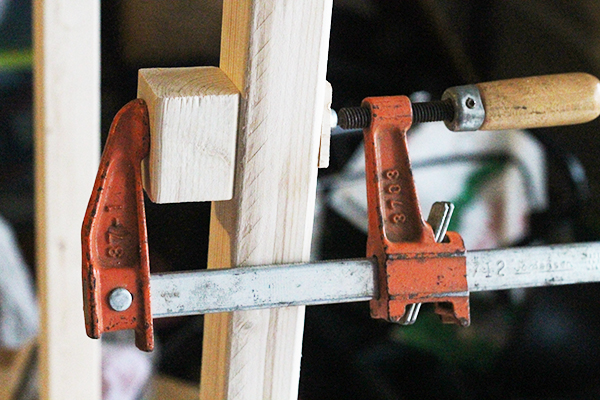
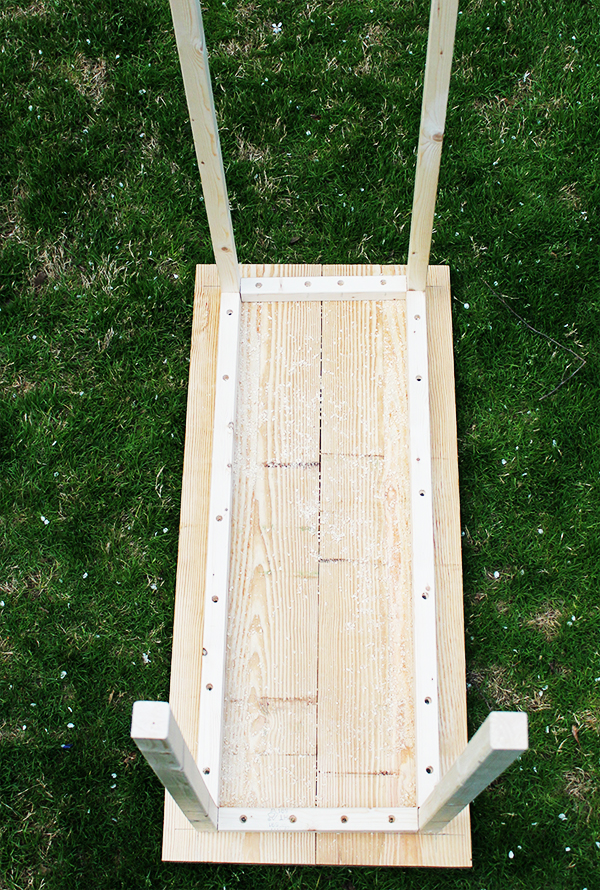
3. Assemble underframe and legs
Use scrap 2×2’s and the clamps to set the corner as seen in the picture.
Place leg in the corner and hold in place. Using the spade bit, drill into the legs between
⅜in and ½in where the screws will secure the leg to the frame. Then use the 3/32 bit to
Drill pilot holes into the spade bit holes.
Before inserting screws place small amount of wood glue at the inner joint where the leg and sides meet. Secure with 1⅝in screws and repeat process for 3 remaining corners.
4. Secure frame to the table top
Lay the 2×12’s top down and center the frame on top. Use clamps to stabilize the frame to the top.
Using the spade bit and 3/32 bit, pre drill holes in the bottom of the frame and secure with 1⅝in screws.
5. Add second layer of sides to frame
Place second layer of 2×2’s on underside of the frame. Pre drill holes using the drill bits previously mentioned. Be sure to offset these holes with the screws used to secure the
Frame to the top. Finish with 1⅝in screws.
Secure the sides of the second layer to the legs with the same system of pre drilling and glue described in step 3.
6. Assemble shelves
With the table still top down, align the slats across the frame. Slide 38in 2×2’s between the legs and align with the edges of the slats. Drill pilot holes as described previously and secure with 1¼in screws.
7. Attach shelves
Using a clamp, secure a scrap 2×2 to the desired height of the shelf to each leg. Take your finished shelf and rest it on top of the clamped 2×2 scraps. Double check the height of each corner and secure shelf to the legs using the procedure described in step 3. Repeat for the second shelf. Then add the remaining 12¾in 2×2’s to the legs next to each shelf.
8. Fill holes
Turn table right side up for the first time.
Insert the ½in hardwood plugs into the visible drill holes. Be sure that they are inserted straight.
Hold a scrap 2×2 on top of the plug and tap with a hammer or mallet until plug is flush with the surface of the table. Then lightly sand over the top of the inserted plug to smooth the area.
Repeat for each visible hole.
9. Stain and varnish Follow directions on the can.
I used spar varnish because my wife wants to primarily use it outside and a spar varnish will provide better moisture and UV protection. If it will primarily be used inside a polyurethane varnish will work fine. Slap on at least two coats.
I hope this is clear enough and gives you the confidence to give it a try. Feel free to email us with any questions and I would be happy to help!
– Gabe
Hi Gabe! I love the bar cart and have forwarded to my hubby with directions to get on it;) I love the functionality of it! Will send you and Anna pics when it’s done!
On another note I have to know where Anna got the blue wicker lounger?!? I love it!
Hi Gabe!! So excited for my hubby to build this cart!
I sent him directions and told him to get on it;)
I love the look and the functionality of it!
On another note, I would love to know where Anna got the blue wicker lounger?!? I love it! Your backyard looks amazing!
Love this idea – I also saw and idea similar to this on Pinterest, but it was an old cupboard fixed up and attached to an outdoor porch wall and stocked with bar stuff and outdoor entertaining accessories, which I loved.
[…] (Add a good coat of semi-gloss spar varnish to prevent UV and water damage.) Take a look at the full bar table tutorial on my blog, In Honor of […]
[…] (Add a good coat of semi-gloss spar varnish to prevent UV and water damage.) Take a look at the full bar table tutorial on my blog, In Honor of […]
Love this & plan on making one this week. To clarify, under the cutting section, the third item states “8 – 1 3/4 in 2x2s”… should this be 12 3/4 in? Thanks.
Have you ever thought about adding a little bit more than just your articles?
I mean, what you say is fundamental and everything.
Nevertheless imagine if you added some great graphics or video
clips to give your posts more, “pop”! Your content is excellent but with images and videos, this
blog could certainly be one of the very best in its field.
Terrific blog!
[…] Thanks to its compact size and straightforward design, a DIY bar cart can be a terrific project for an aspiring woodworker who’s looking for a beginner-level project. To give this one a shot, you’ll need only some inexpensive materials, a couple of basic tools, and the full project tutorial provided by In Honor of Design. […]
[…] (Add a good coat of semi-gloss spar varnish to prevent UV and water damage.) Take a look at the full bar table tutorial on my blog, In Honor of […]
Hello! This is my first visit to your blog! We are a team of volunteers and starting
a new initiative in a community in the same niche. Your blog
provided us valuable information to work on. You have done a wonderful job!
[…] how to build a bed, transform basic Ikea into masterpieces like this bookshelf, build and style an outdoor bar cart, improve your business skills, make blue mason jars, how to travel lightly, and DIY french vanilla […]
[…] (Add a good coat of semi-gloss spar varnish to prevent UV and water damage.) Take a look at the full bar table tutorial on my blog, In Honor of […]
[…] by building a patio table how to build your own if you can’t find those wood nuts at your. How to make your own outdoor bar table design travel. How to make your own bar table for indoor or outdoor use. Easy diy patio furniture projects you […]
I have checked your blog and i’ve found some duplicate content, that’s why you don’t rank high in google, but there is a
tool that can help you to create 100% unique content, search for; boorfe’s tips unlimited content
I know this post is from several years ago, but I’m wanting to try this project and have a question about the measurements. Under the section where the cut parts are listed, is there a typo? The third item in the list is 8 – 1 3/4″ 2x2s. I’m thinking this needs to be a larger measurement–perhaps something like 8 – 11 3/4″ 2x2s? If you could clarify, I’d really appreciate it! I’m hoping to build this for my kiddo’s upcoming graduation party in our backyard.


Seriously, you backyard is becoming the best place in your house, isn’t it? I’m totally in love with it! This outdoor bar table is genius!
Michele
says:Hi Gabe! I love the bar cart and have forwarded to my hubby with directions to get on it;) I love the functionality of it! Will send you and Anna pics when it’s done!
On another note I have to know where Anna got the blue wicker lounger?!? I love it!
Props to you for a great job!
Michele Moczarski
Hi Gabe!! So excited for my hubby to build this cart!
I sent him directions and told him to get on it;)
I love the look and the functionality of it!
On another note, I would love to know where Anna got the blue wicker lounger?!? I love it! Your backyard looks amazing!
Props to you for a job well done!
Michele Moczarski
Love this– making one for my backyard!
jillian
says:LOVE the final product!! xo jillian – cornflake dreams
What an awesome DIY! I’m going to get Dave on this as soon as we have a house! 🙂
Great tutorial Gabe, and even better for your first go at this. I know it’s your first time but you make it look easy, with a bit of hard work hey!
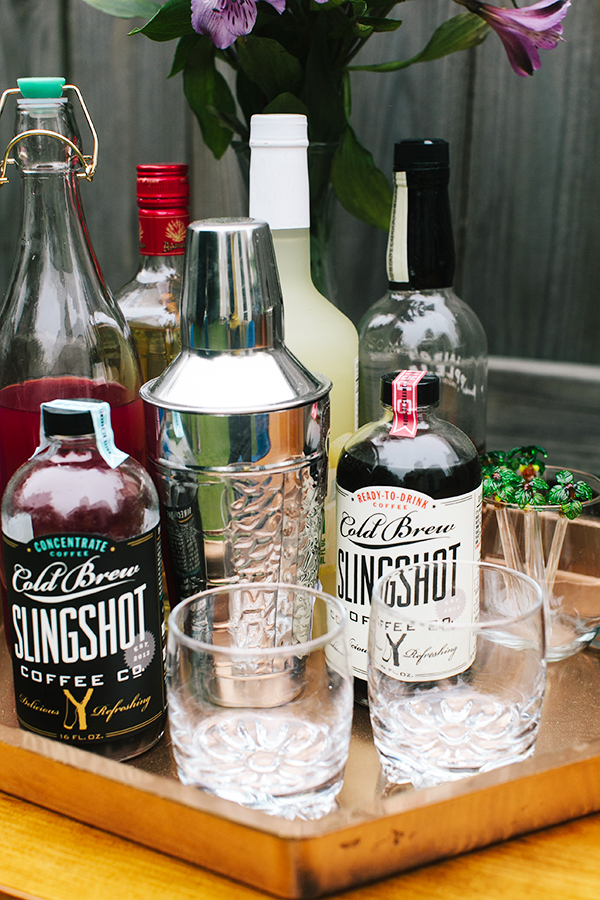
Will save this for a later date, great post. Hopefully we see some more of your tutorials in the future. What’s slingshot coffee like btw?
Buckets & Spades
Oh my gosh I love this Anna! It’s absolutely darling! Perhaps I can convince papa bear to build me one this summer :). xo
Love this idea – I also saw and idea similar to this on Pinterest, but it was an old cupboard fixed up and attached to an outdoor porch wall and stocked with bar stuff and outdoor entertaining accessories, which I loved.
Great DIY project. The stain and the decor make this really classy. I can see myself making a Bee’s Knees Martini on that …mmmm
[…] (Add a good coat of semi-gloss spar varnish to prevent UV and water damage.) Take a look at the full bar table tutorial on my blog, In Honor of […]
[…] to hold all of their essential items in their renter-friendly backyard design. Anna shared the DIY bar table tutorial on her blog, In Honor of […]
[…] to hold all of their essential items in their renter-friendly backyard design. Anna shared the DIY bar table tutorial on her blog, In Honor of […]
[…] to hold all of their essential items in their renter-friendly backyard design. Anna shared the DIY bar table tutorial on her blog, In Honor of […]
[…] to hold all of their essential items in their renter-friendly backyard design. Anna shared the DIY bar table tutorial on her blog, In Honor of […]
[…] (Add a good coat of semi-gloss spar varnish to prevent UV and water damage.) Take a look at the full bar table tutorial on my blog, In Honor of […]
Doug
says:Love this & plan on making one this week. To clarify, under the cutting section, the third item states “8 – 1 3/4 in 2x2s”… should this be 12 3/4 in? Thanks.
Doug
says:Never mind. Step #7 states 12 3/4″.
Jess
says:Wish I saw your comment earlier and saw the typo, Doug!
Have you ever thought about adding a little bit more than just your articles?
I mean, what you say is fundamental and everything.
Nevertheless imagine if you added some great graphics or video
clips to give your posts more, “pop”! Your content is excellent but with images and videos, this
blog could certainly be one of the very best in its field.
Terrific blog!
[…] Thanks to its compact size and straightforward design, a DIY bar cart can be a terrific project for an aspiring woodworker who’s looking for a beginner-level project. To give this one a shot, you’ll need only some inexpensive materials, a couple of basic tools, and the full project tutorial provided by In Honor of Design. […]
[…] (Add a good coat of semi-gloss spar varnish to prevent UV and water damage.) Take a look at the full bar table tutorial on my blog, In Honor of […]
Hello! This is my first visit to your blog! We are a team of volunteers and starting
a new initiative in a community in the same niche. Your blog
provided us valuable information to work on. You have done a wonderful job!
[…] though, I found this on In Honor Of Design (she and her husband built this!) and think I could totally pull this one off. What do you […]
[…] to hold all of their essential items in their renter-friendly backyard design. Anna shared the DIY bar table tutorial on her blog, In Honor of […]
[…] how to build a bed, transform basic Ikea into masterpieces like this bookshelf, build and style an outdoor bar cart, improve your business skills, make blue mason jars, how to travel lightly, and DIY french vanilla […]
[…] How to make your own outdoor bar table […]
[…] How to make your own outdoor bar table […]
[…] How to make your own outdoor bar table […]
[…] How to Make Bar Cart Outdoor Table […]
[…] (Add a good coat of semi-gloss spar varnish to prevent UV and water damage.) Take a look at the full bar table tutorial on my blog, In Honor of […]
[…] Great project for an aspiring woodworker who’s looking for a beginner-level project. Tutorial at In Honor of Design […]
[…] by building a patio table how to build your own if you can’t find those wood nuts at your. How to make your own outdoor bar table design travel. How to make your own bar table for indoor or outdoor use. Easy diy patio furniture projects you […]
[…] Ideal project for the novice at woodworking. Tutorial at In Honor Of Design […]
[…] Source: In Honor of Design […]
I have checked your blog and i’ve found some duplicate content, that’s why you don’t rank high in google, but there is a
tool that can help you to create 100% unique content, search for; boorfe’s tips unlimited content
simeemma30
says:Hi fellows. I think you need to take some time and take a fast tour on woodprix website to learn how to make it.
[…] Tolles Projekt für einen aufstrebenden Holzarbeiter, der ein Anfängerprojekt sucht. Tutorial bei Zu Ehren des Designs […]
[…] image source […]
Julie
says:I know this post is from several years ago, but I’m wanting to try this project and have a question about the measurements. Under the section where the cut parts are listed, is there a typo? The third item in the list is 8 – 1 3/4″ 2x2s. I’m thinking this needs to be a larger measurement–perhaps something like 8 – 11 3/4″ 2x2s? If you could clarify, I’d really appreciate it! I’m hoping to build this for my kiddo’s upcoming graduation party in our backyard.